06
Settings
Configure system settings.
Changing the Theme and Language
Change the screen theme and the display language in the profile area at the bottom of the left menu.
- Look at the profile area at the bottom of the left menu
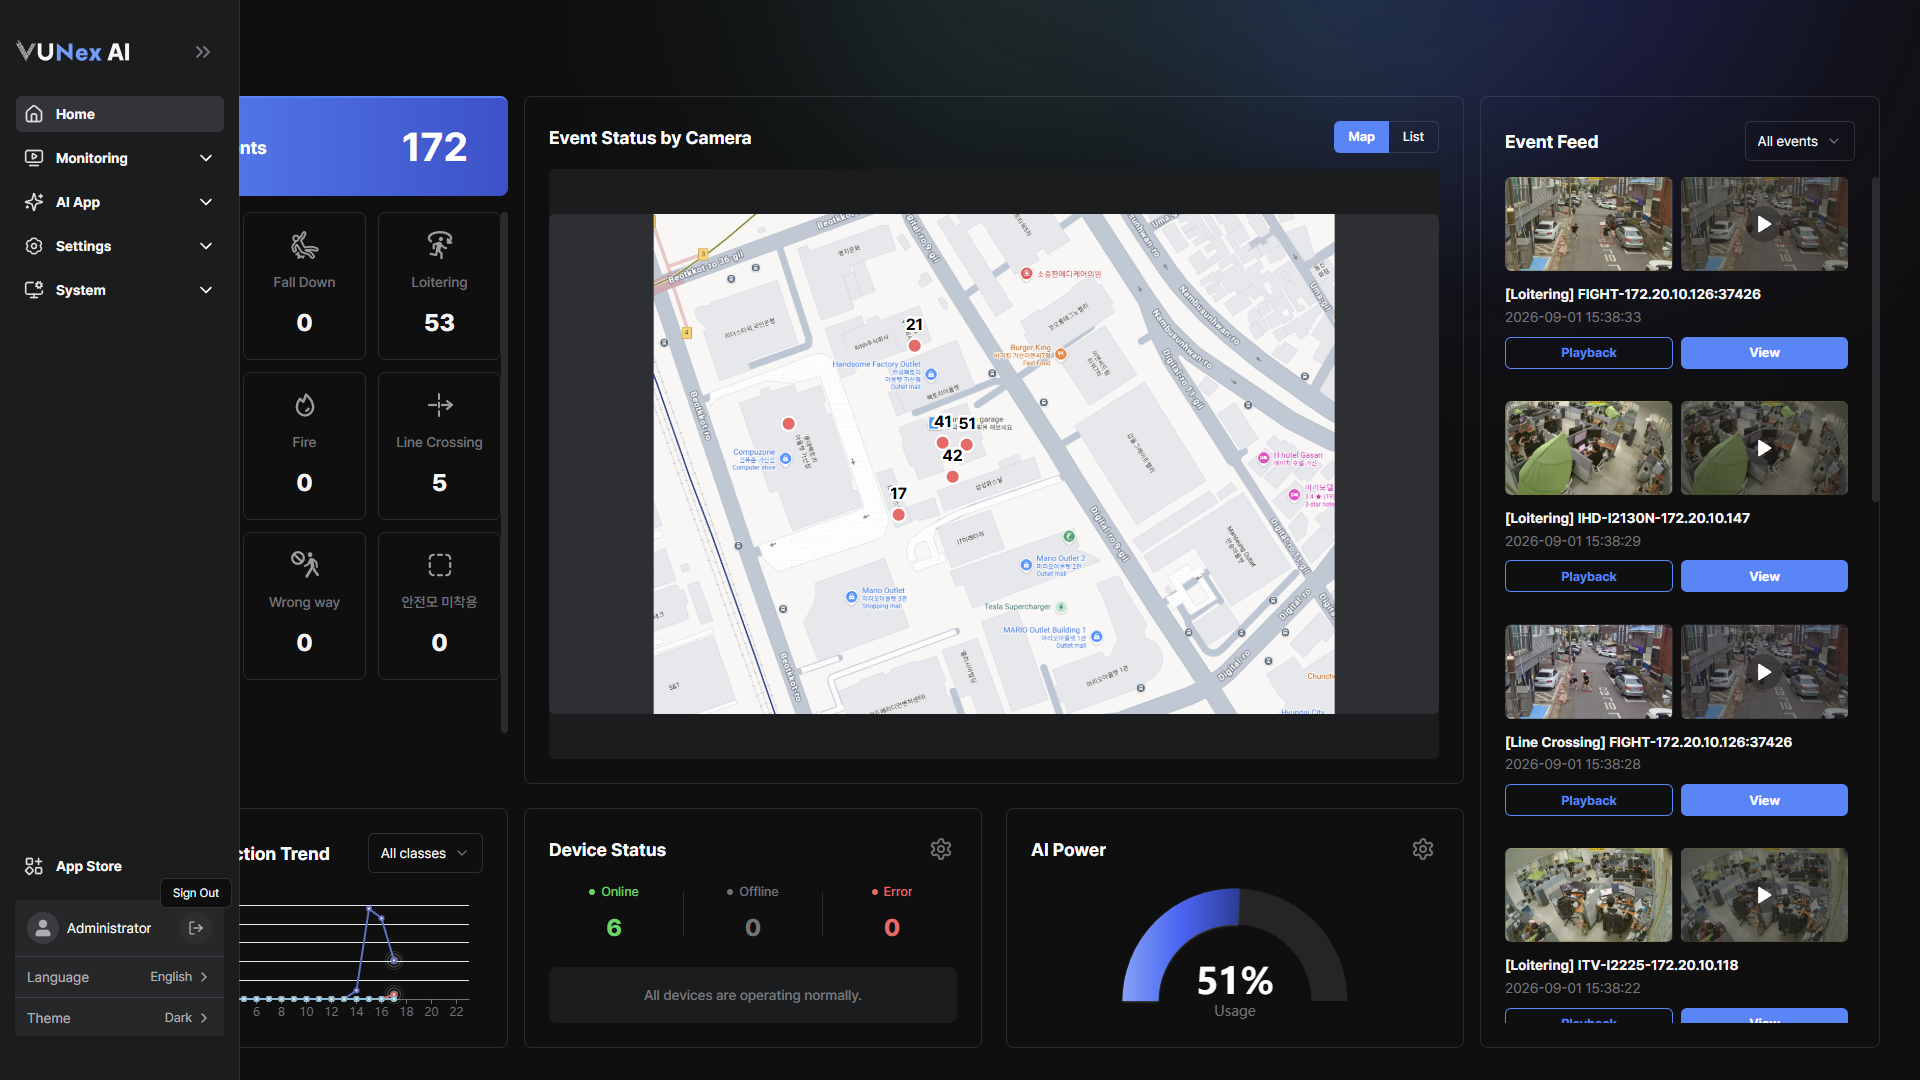 Figure 6-14. Profile Area
 - Click [Language] and select the language to useKorean, English, Japanese and Spanish are supported.
- Click [Theme] and select [Dark] or [Light]
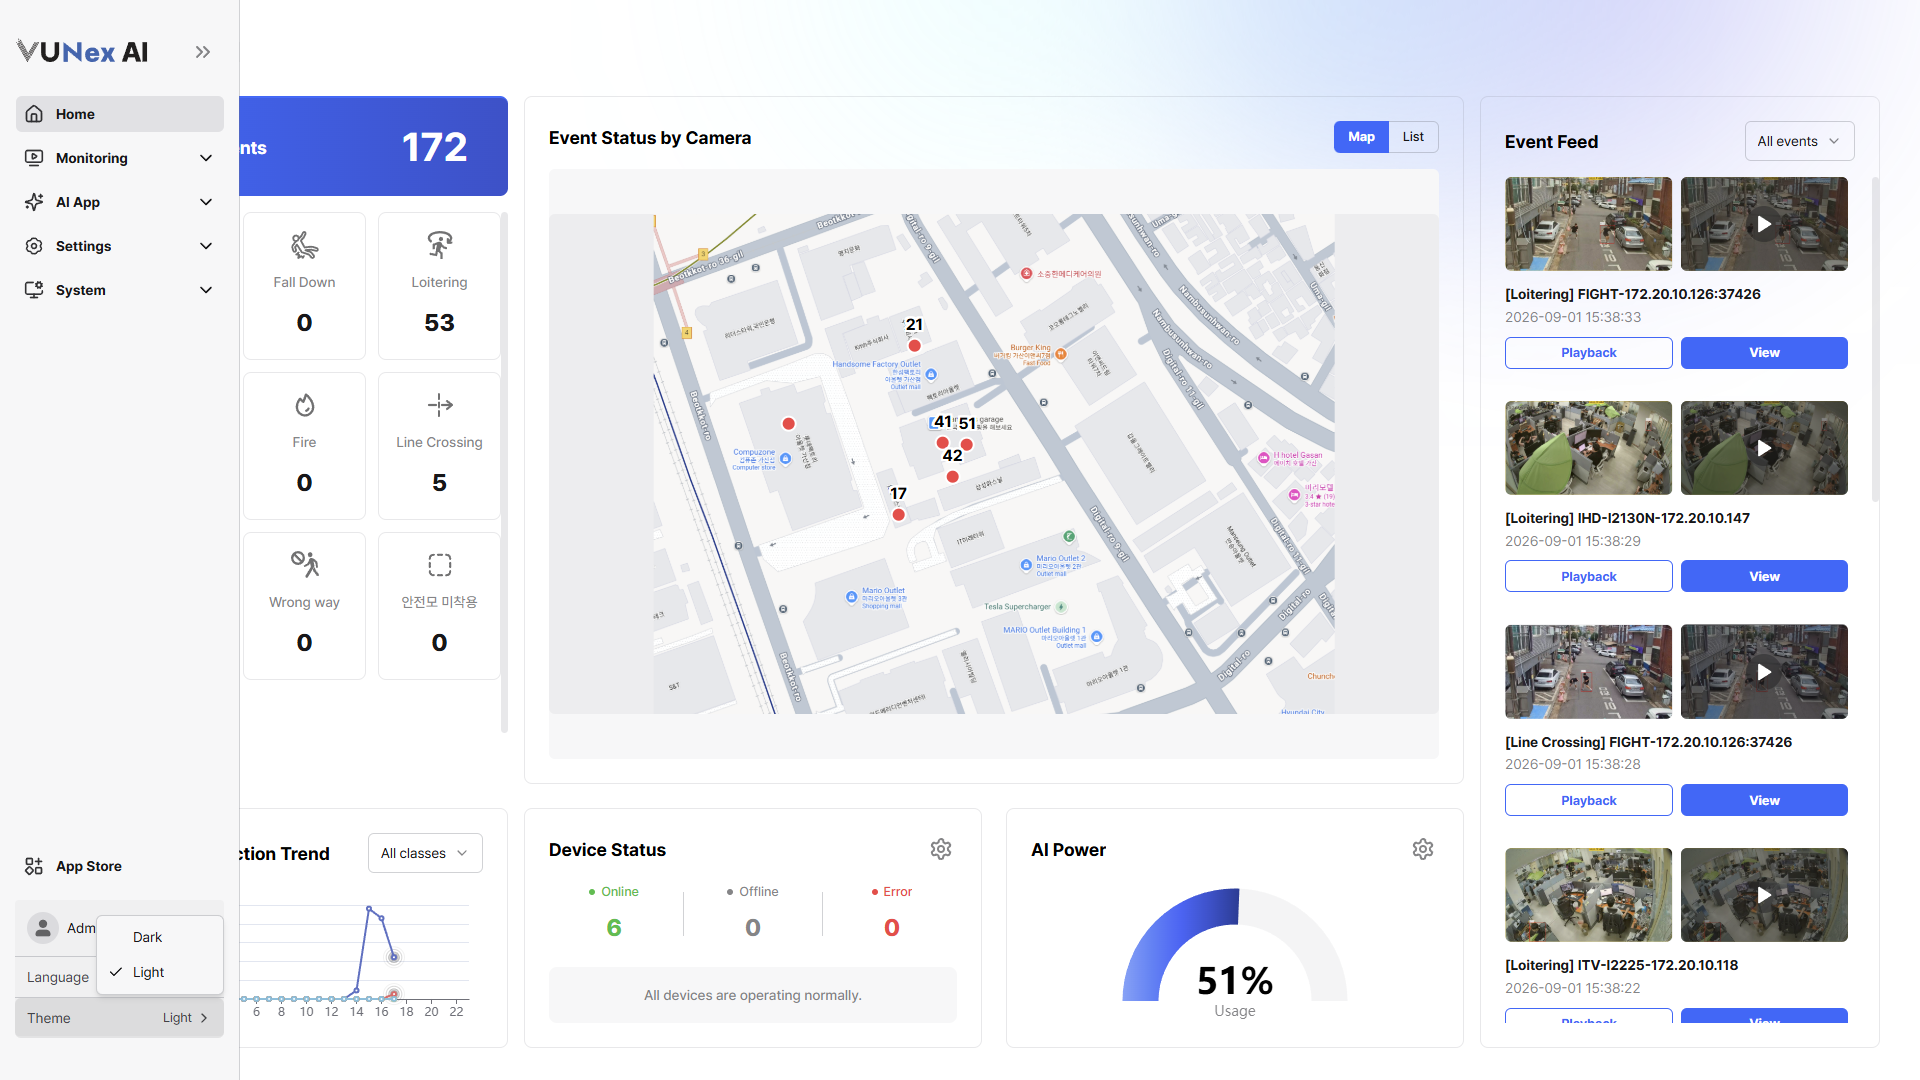 Figure 6-15. Theme Selection
Note
The selected theme and language apply immediately and are kept the next time you connect.
The language can also be changed on the login screen.
Use the logout button in the profile area to leave the system.
Adding a Device
Add a device.
- In the main menu, click [] > [Device]The Device settings screen appears.
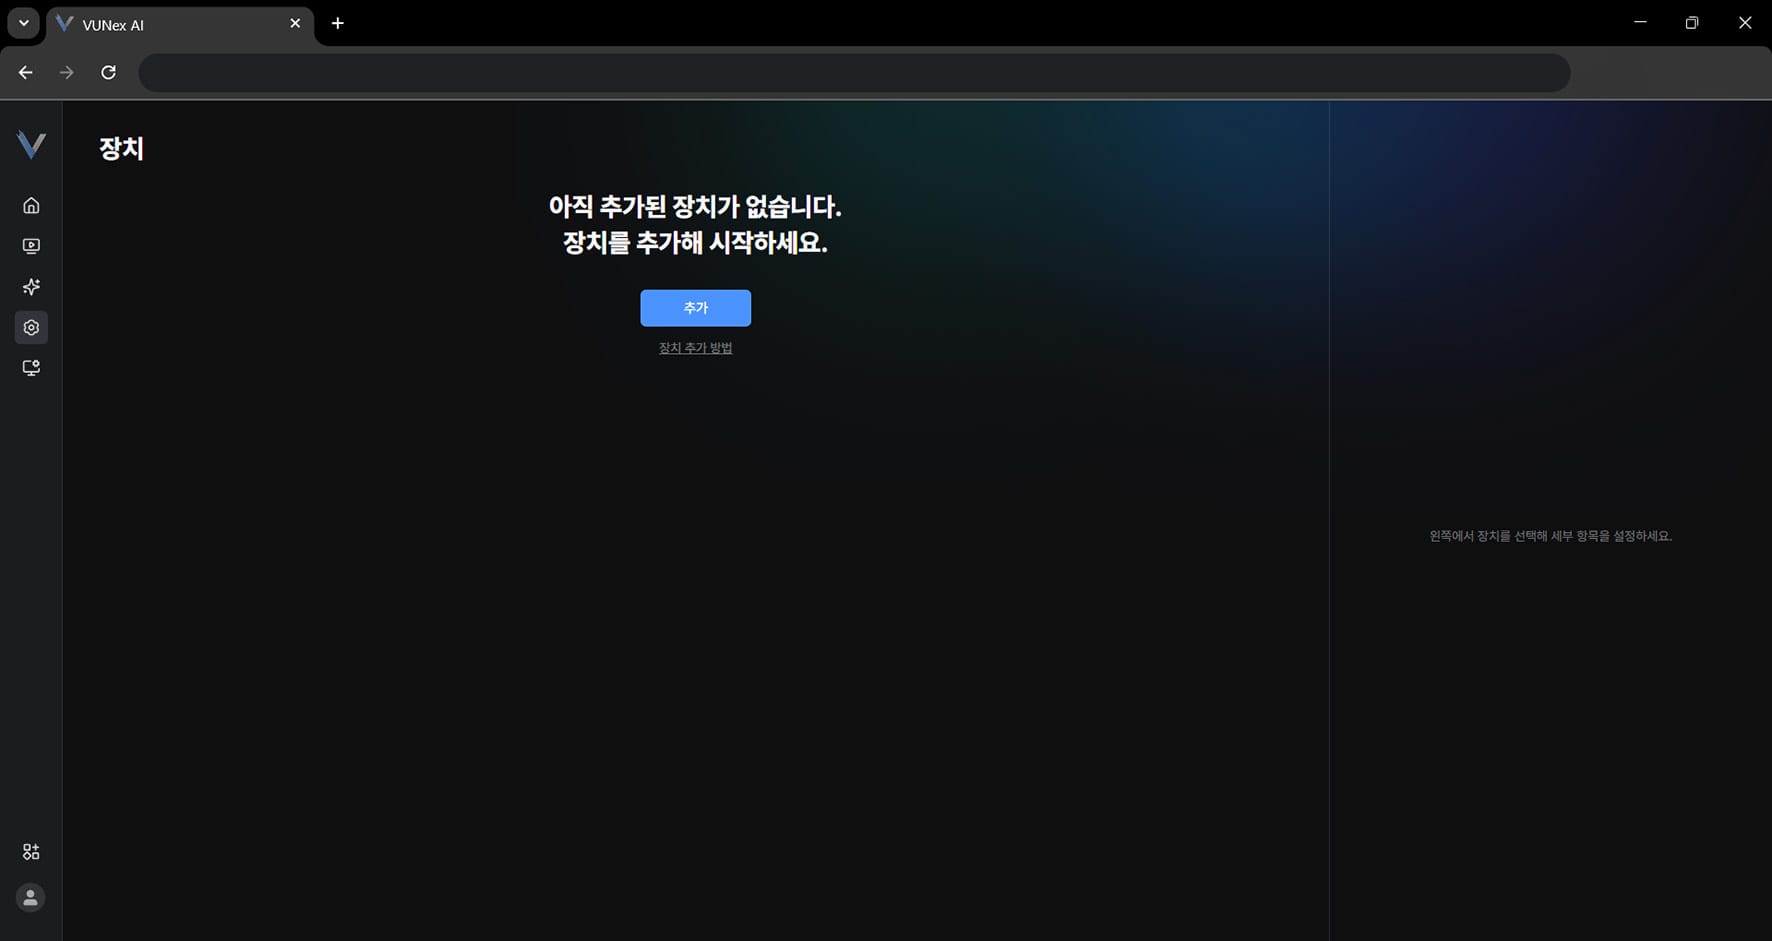 Figure 6-3. Device Settings Screen
 - Click [Add]
- Select the item you want[Auto scan]: automatically finds ONVIF and mDNS devices on the same subnet. [Manual scan]: finds ONVIF devices by entering an IP range and credentials. [Manual add]: adds a device manually by entering an RTSP address and connection details. [File upload]: adds devices by uploading a file.
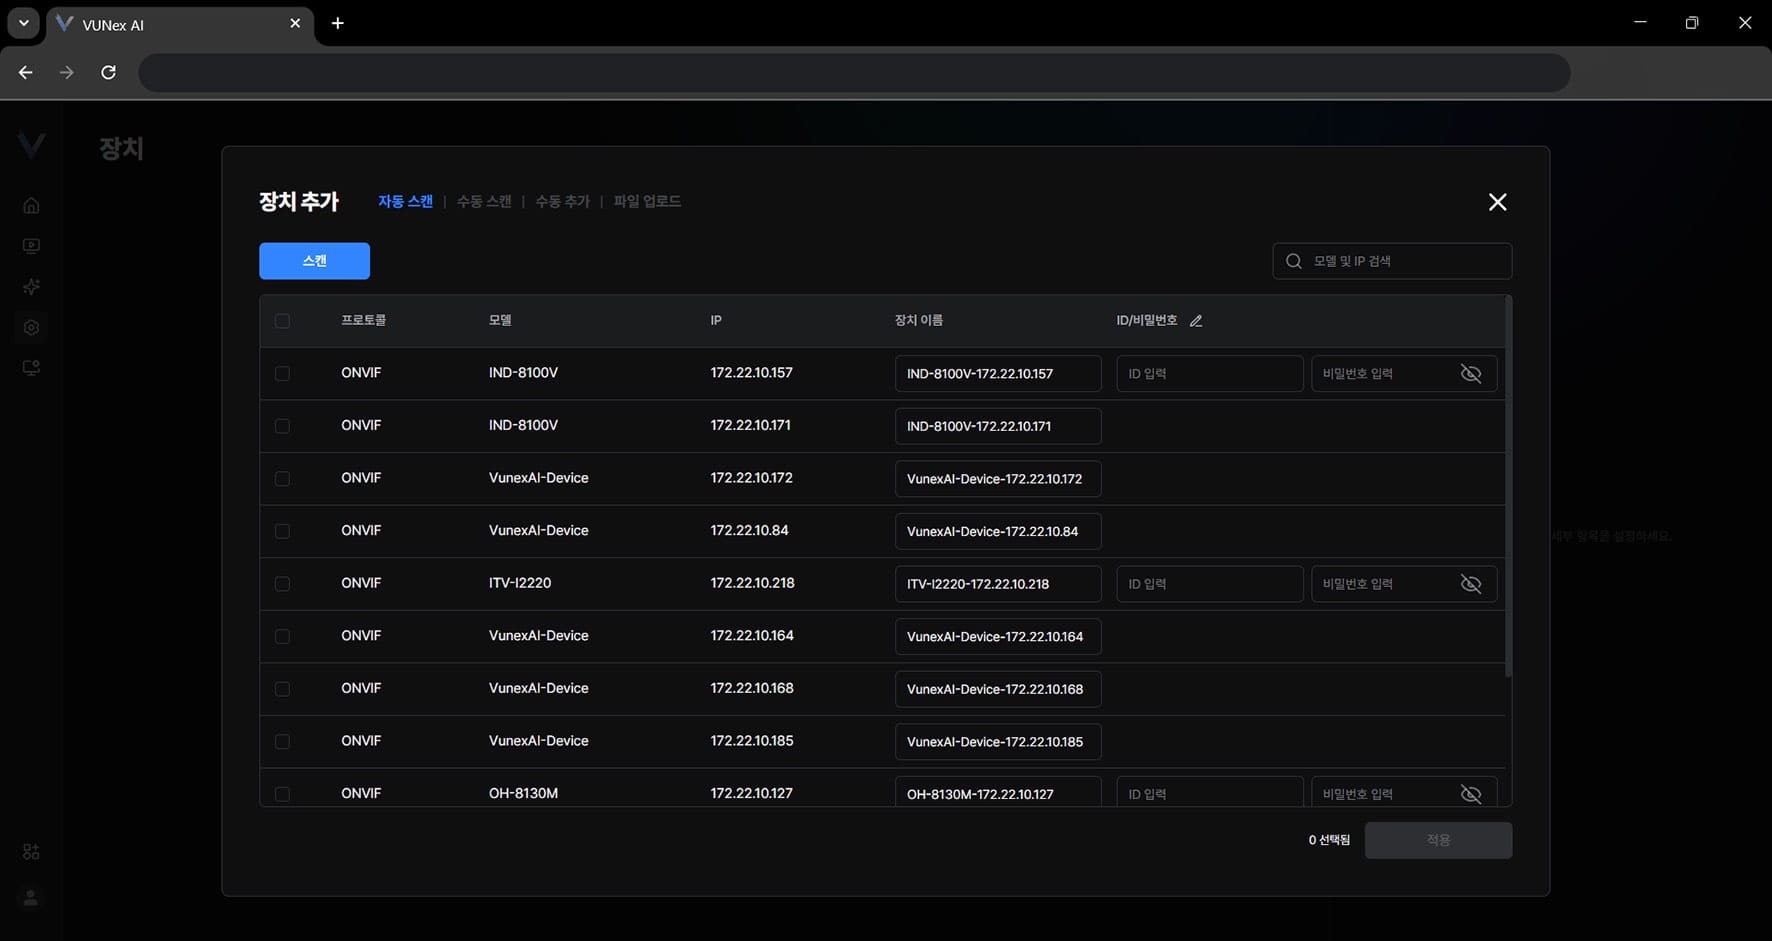 Figure 6-4. Auto Scan
 - Click [Apply]
- Check the result of the added devices
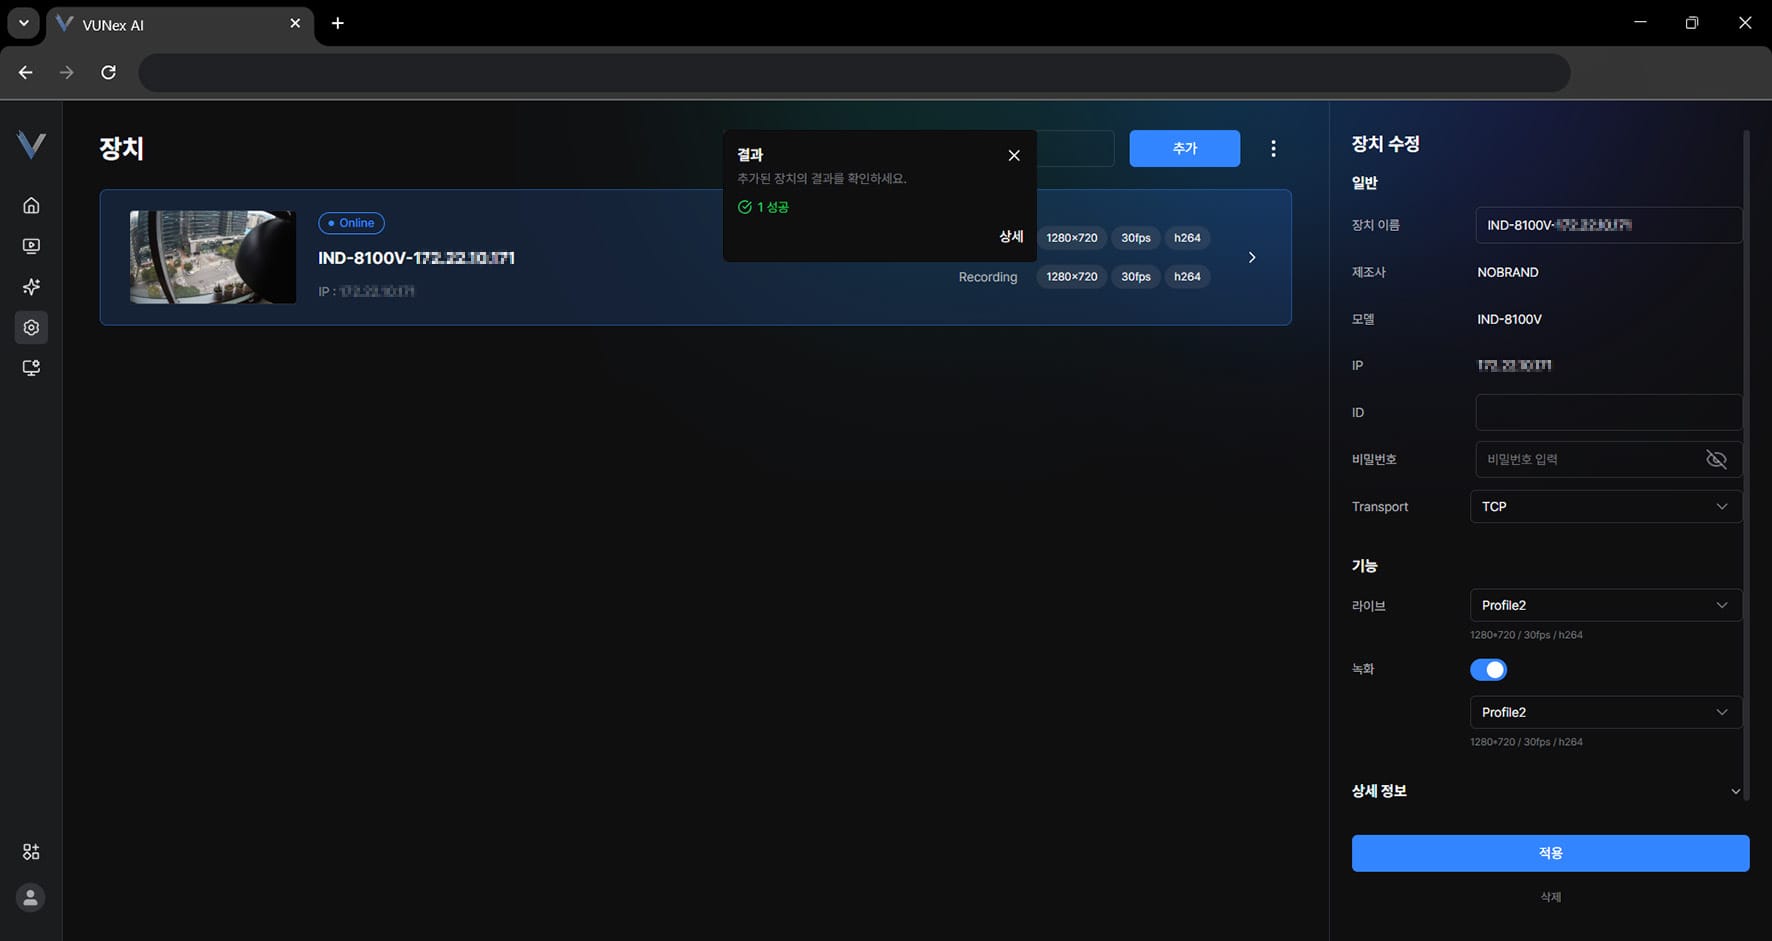 Figure 6-6. Device Registration Result
 - Click [X]
- Add the device
Note
Click [Detail] to see why adding a device failed and retry adding it.
Editing a Device
The device is updated.
- In the main menu, click [] > [Device]The Device settings screen appears.
- Select a device
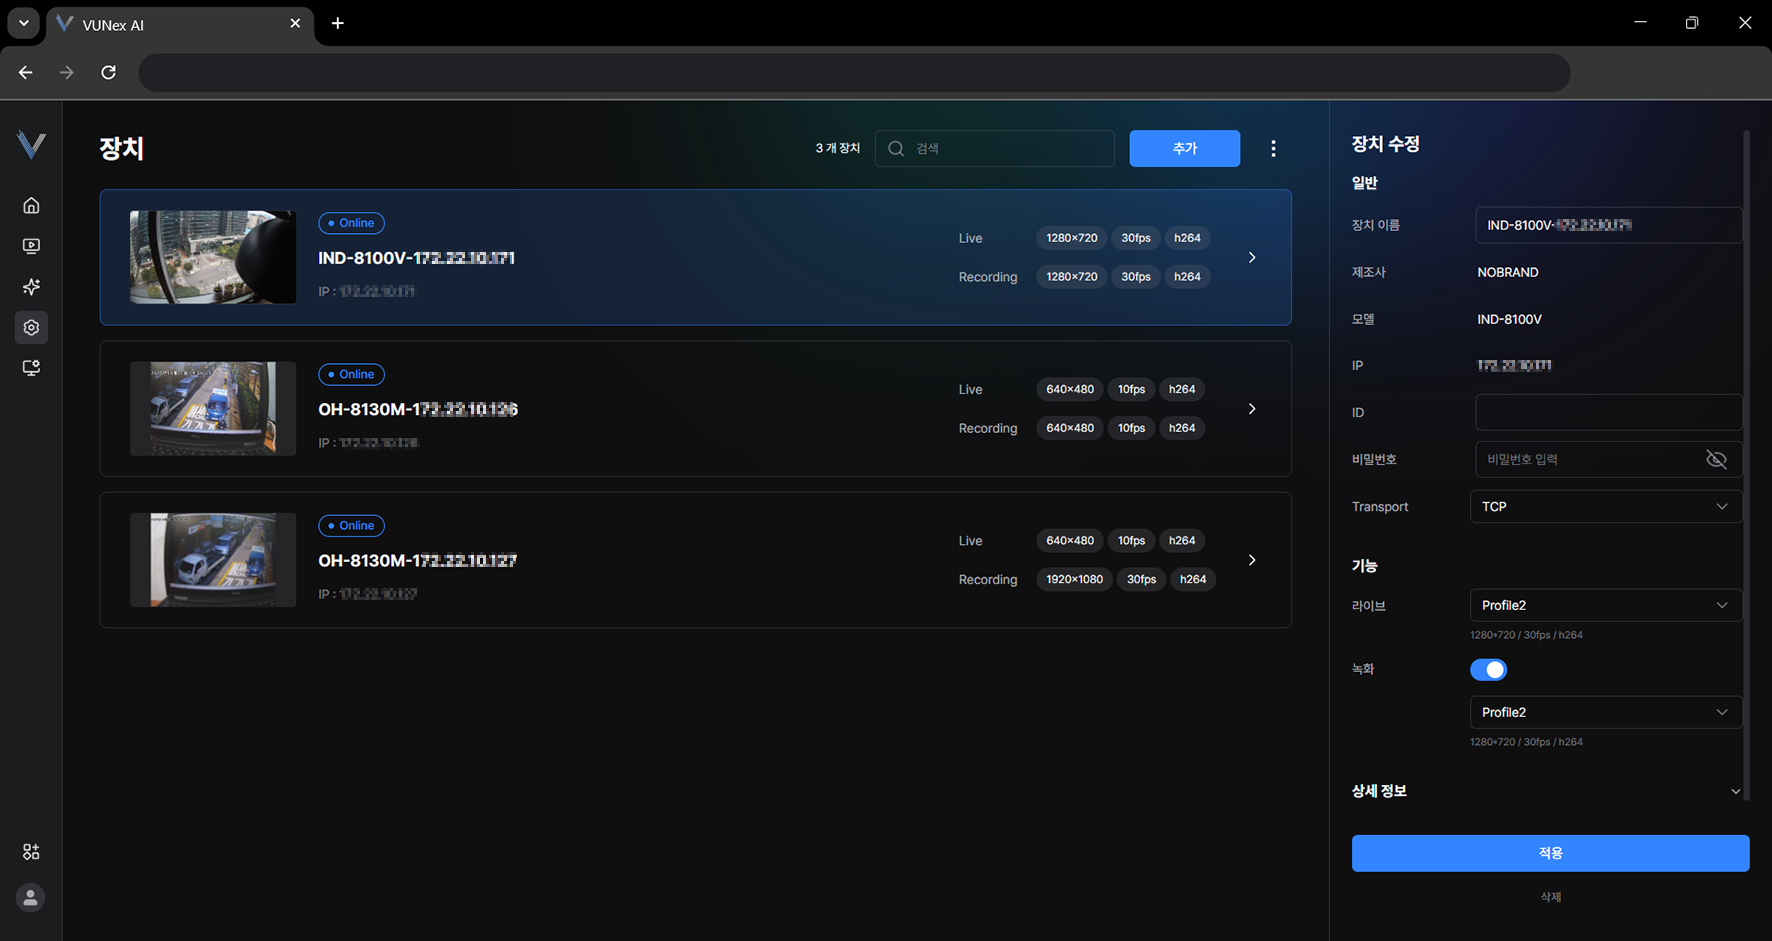 Figure 6-7. Editing a Device
 - Edit the items you want
- Click [Apply]The device is updated.
Deleting All Devices
All devices are deleted.
- In the main menu, click [] > [Device]The Device settings screen appears.
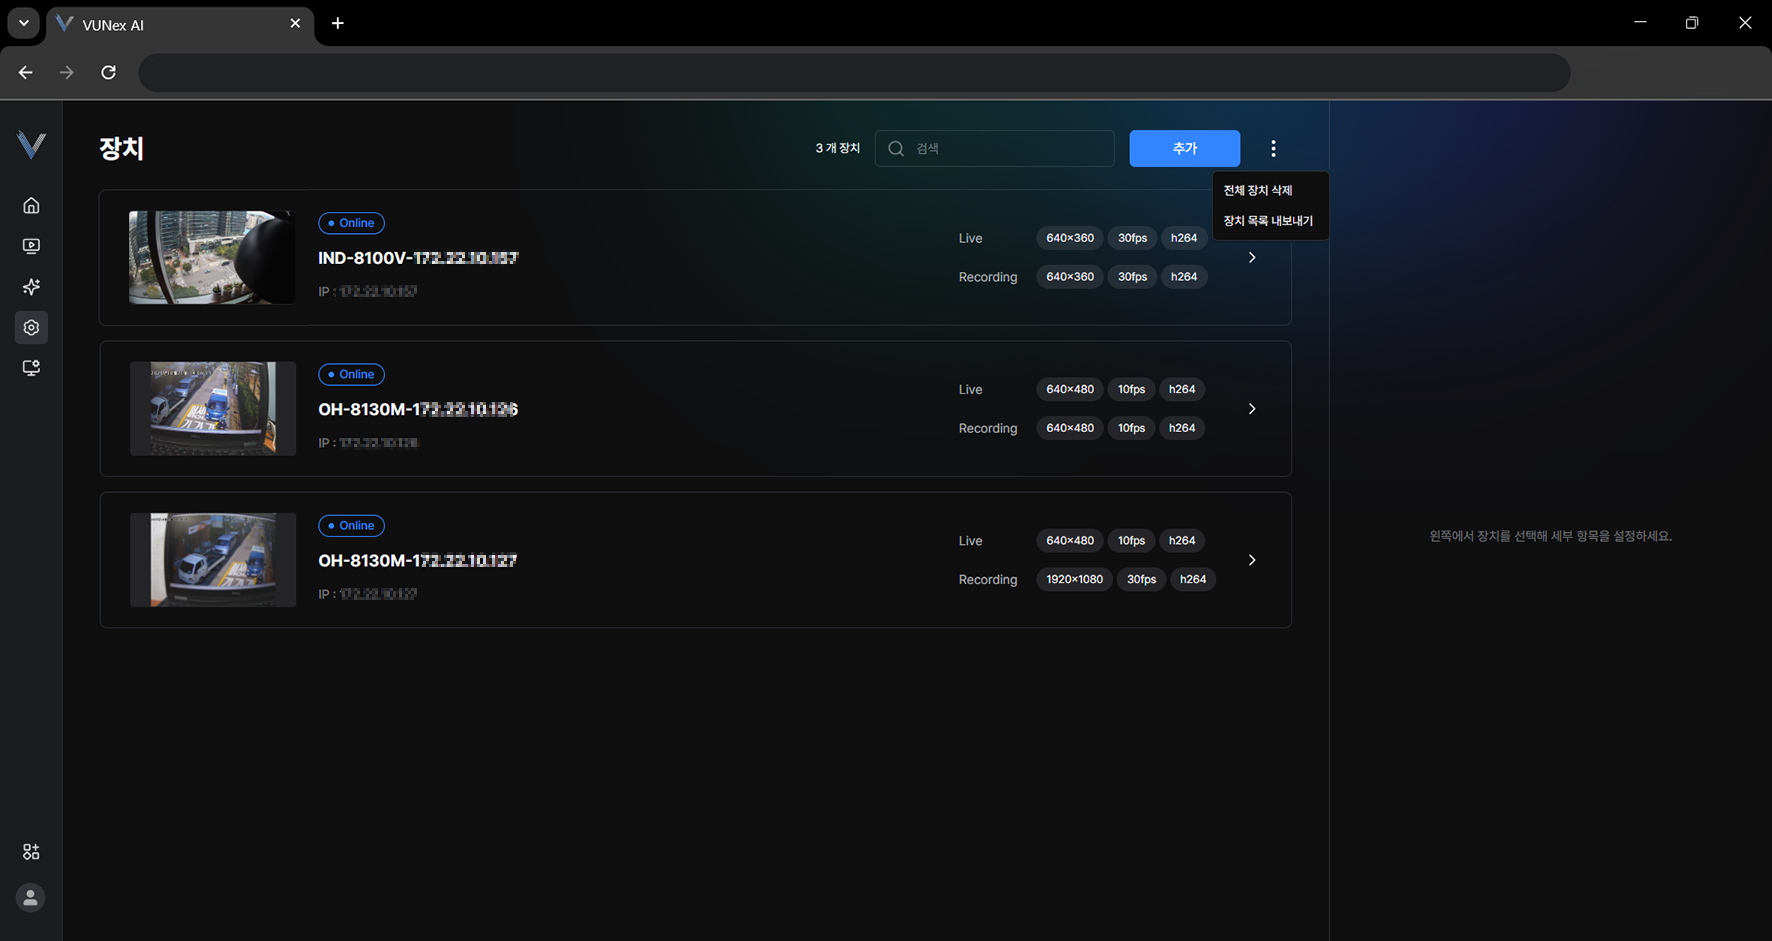 Figure 6-8. Deleting All Devices
 - Click [] > [Delete all devices]
- Click [Delete]All devices are deleted.
Exporting Devices
The devices are exported.
- In the main menu, click [] > [Device]The Device settings screen appears.
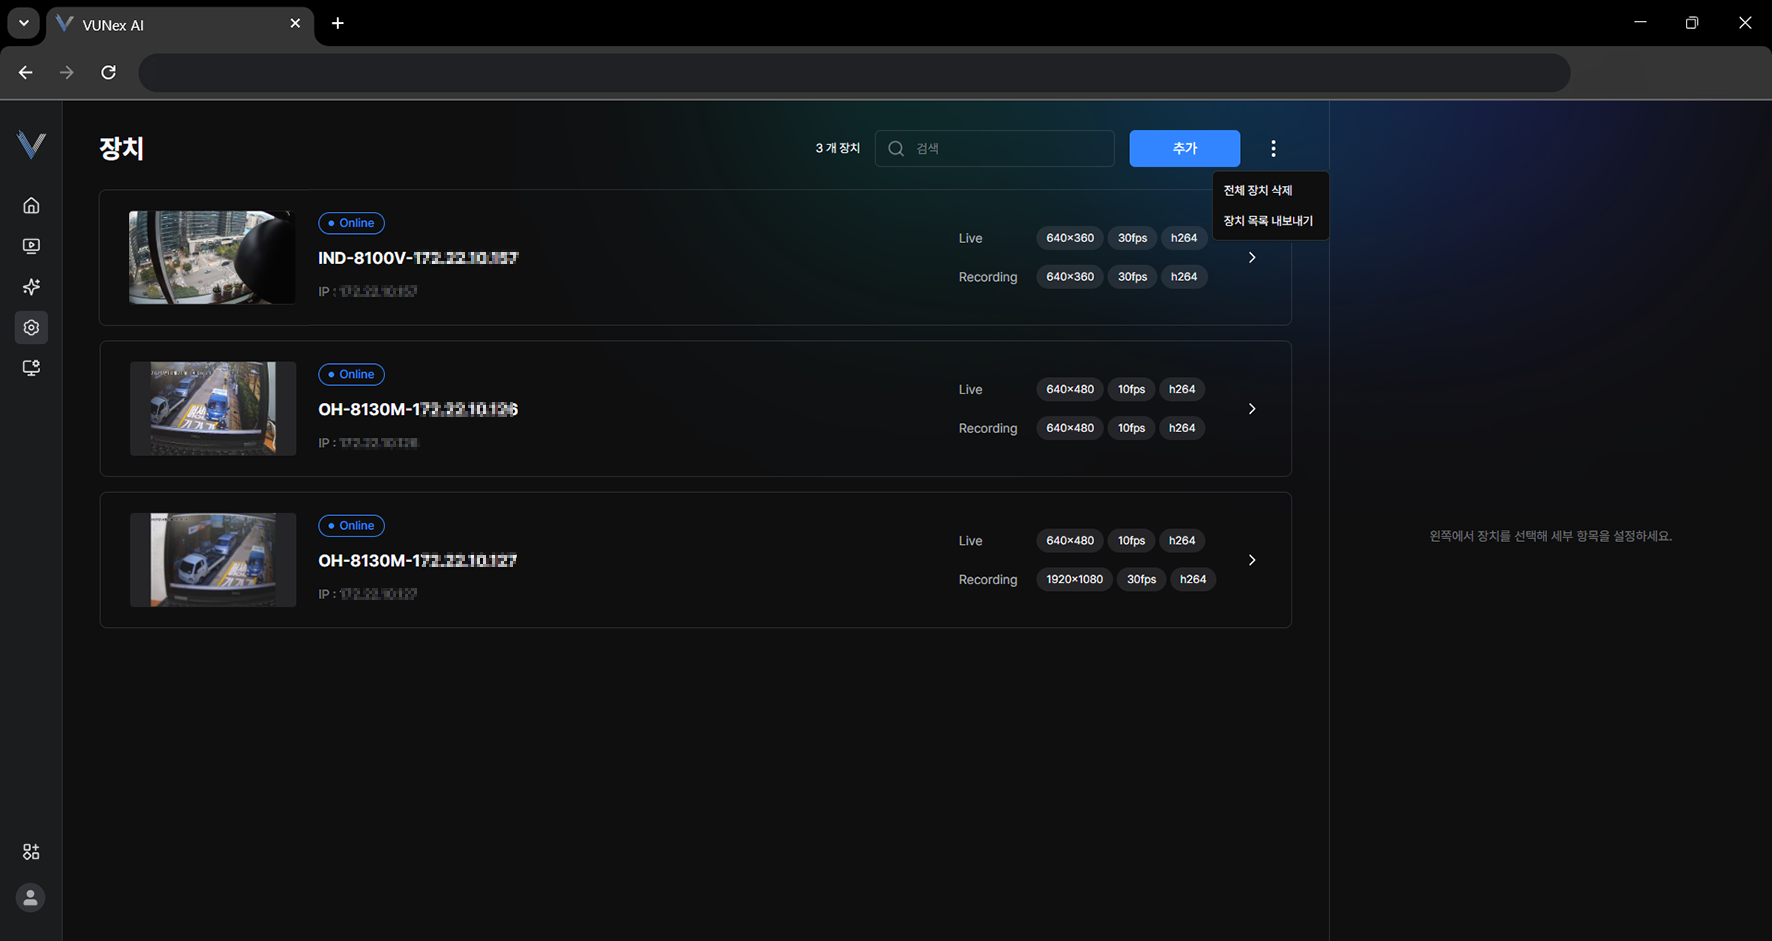 Figure 6-9. Exporting the Device List
 - Click [] > [Export device list]
- Enter the [File password]The devices are exported.
Importing Devices from a File
Register devices in bulk from an exported device list or a template file.
- In the main menu, click [] > [Device]
- Click [Add] > [File Upload]
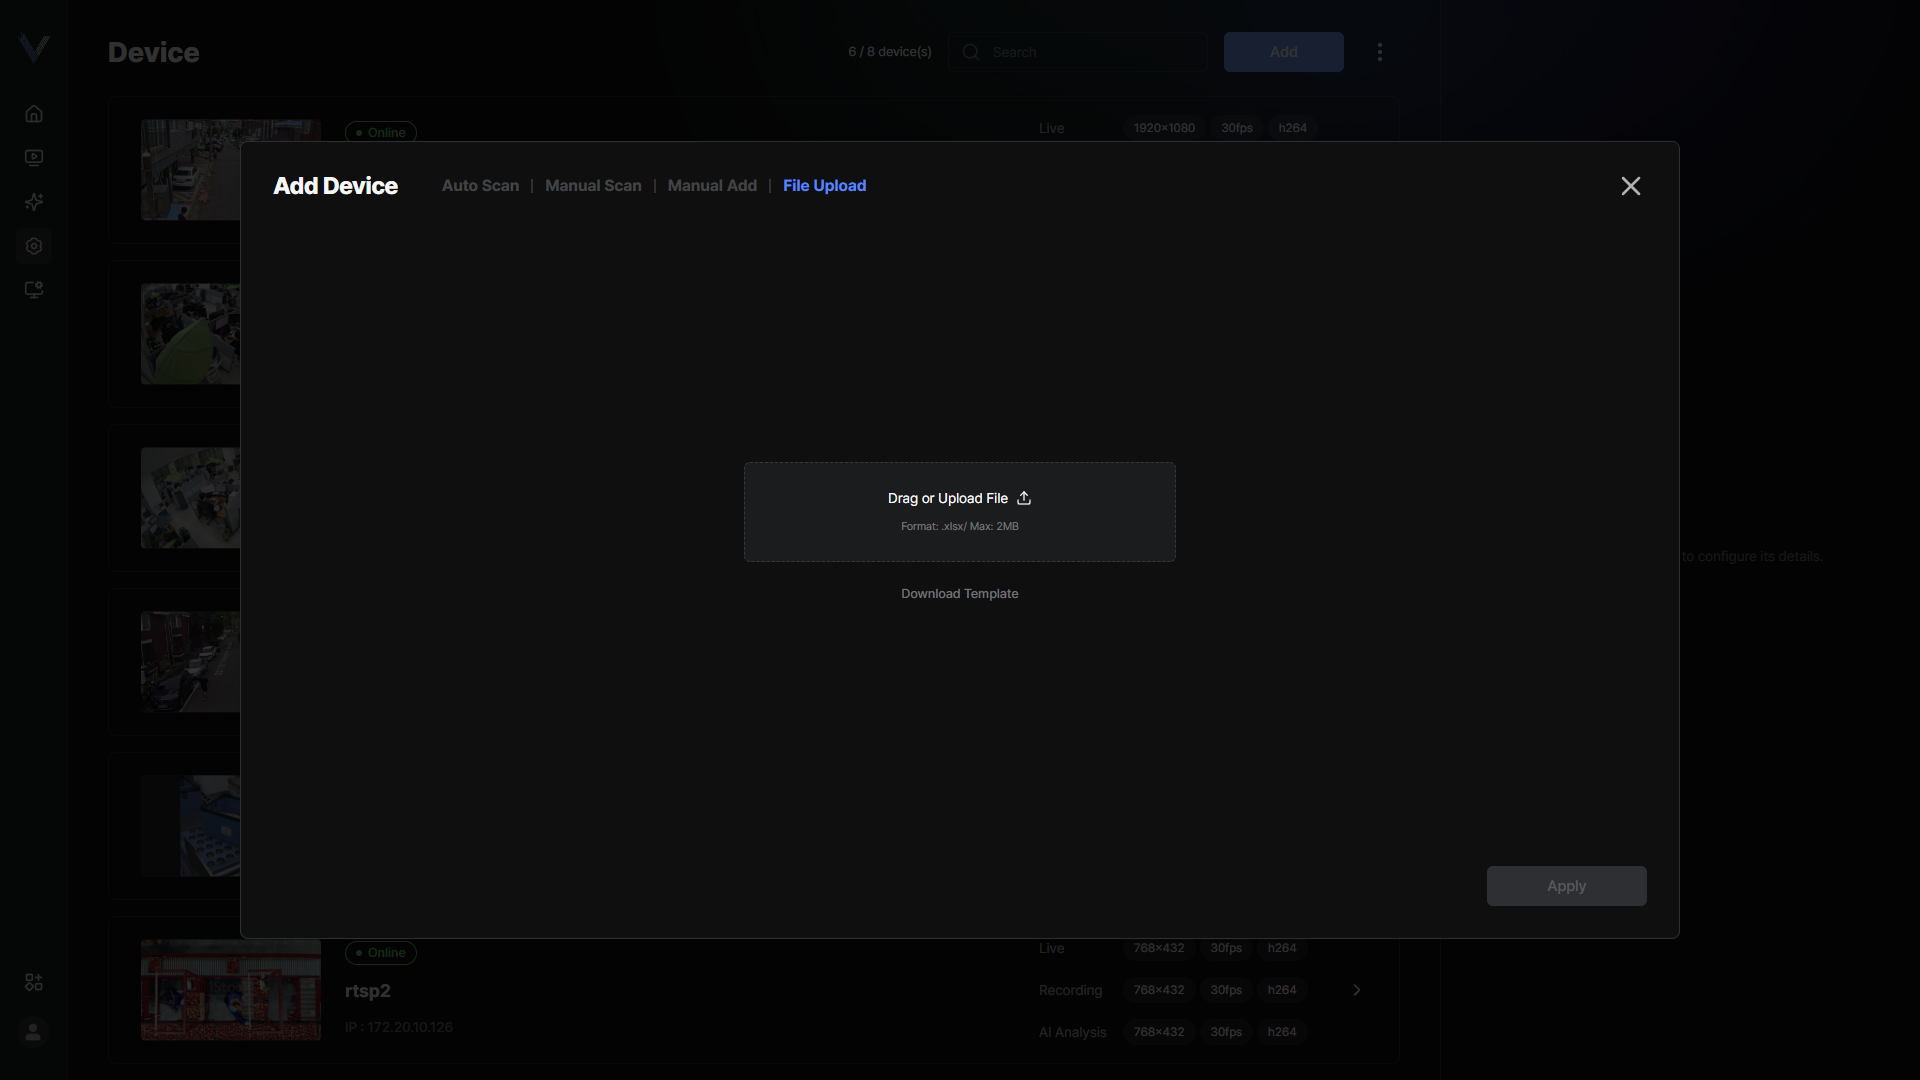 Figure 6-16. Device File Upload
 - Drag and drop the file, or fill in the form obtained from [Download template] and upload itOnly Excel files (.xlsx) are supported.
- For an encrypted file, enter the [File password]
- Click [Apply]
- Check the registration resultDevices that failed are listed with a [Failure reason], and you can register them again with [Retry].
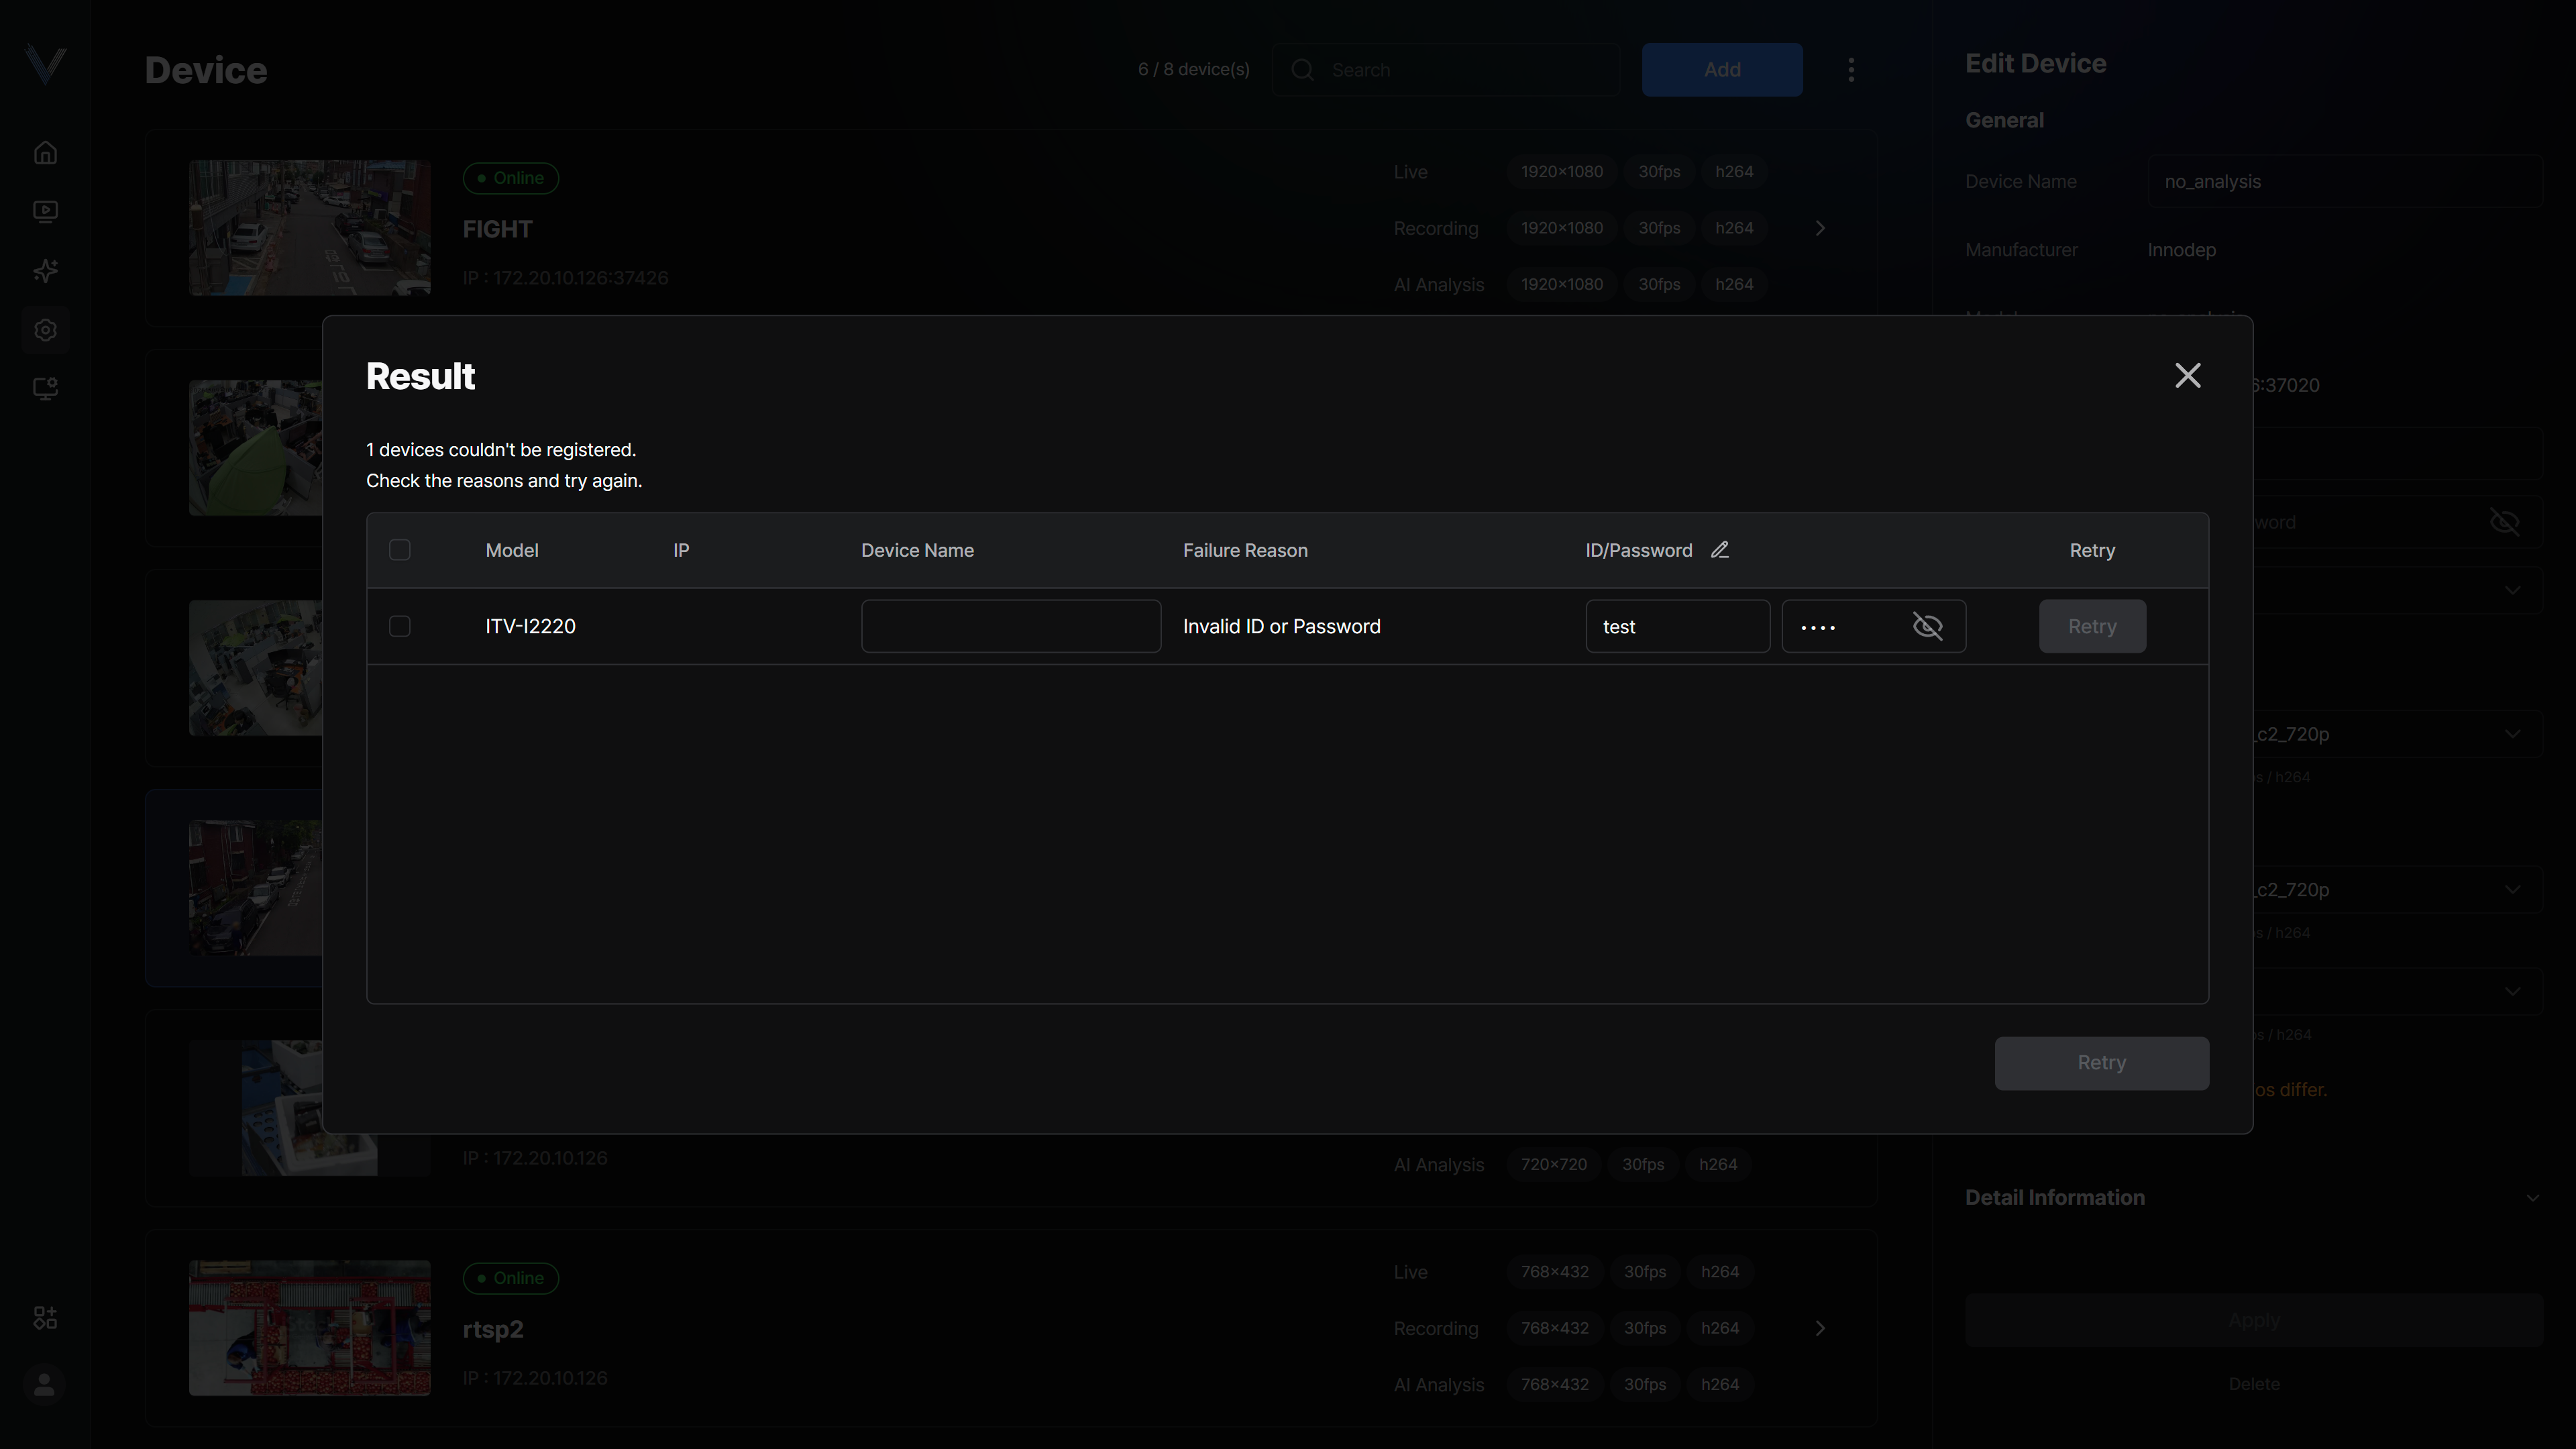 Figure 6-17. Device Registration Result
Note
The file password set when exporting the device list is required.
A warning is shown when the registrable device count is exceeded, and the excess devices are not registered.
If an ONVIF device with the same IP is already registered, that device is skipped.
Enabling the Cloud
The cloud is enabled.
- In the main menu, click [] > [Cloud]The Cloud settings screen appears.
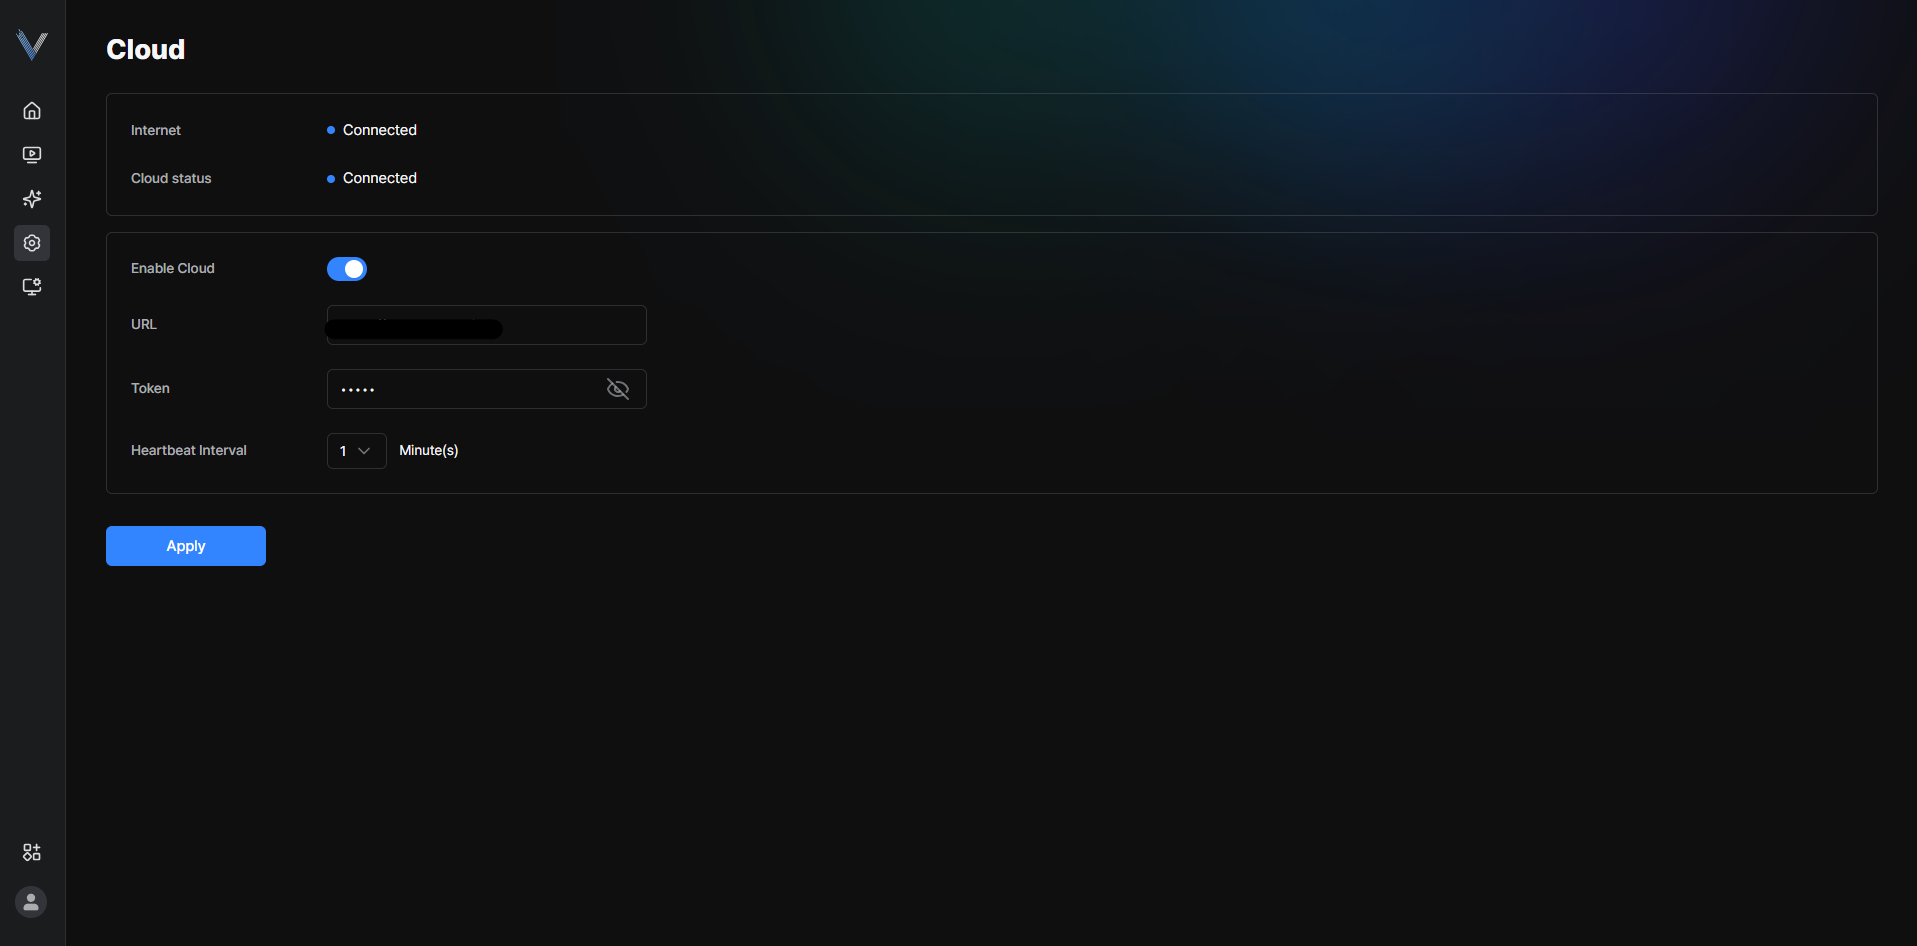 Figure 6-10. Cloud Settings
 - Click [Enable cloud]
- Click [Apply]The cloud is enabled.
Setting Usage and Retention Period
The storage usage limit and the retention period are configured.
- In the main menu, click [] > [Storage]The Storage settings screen appears.
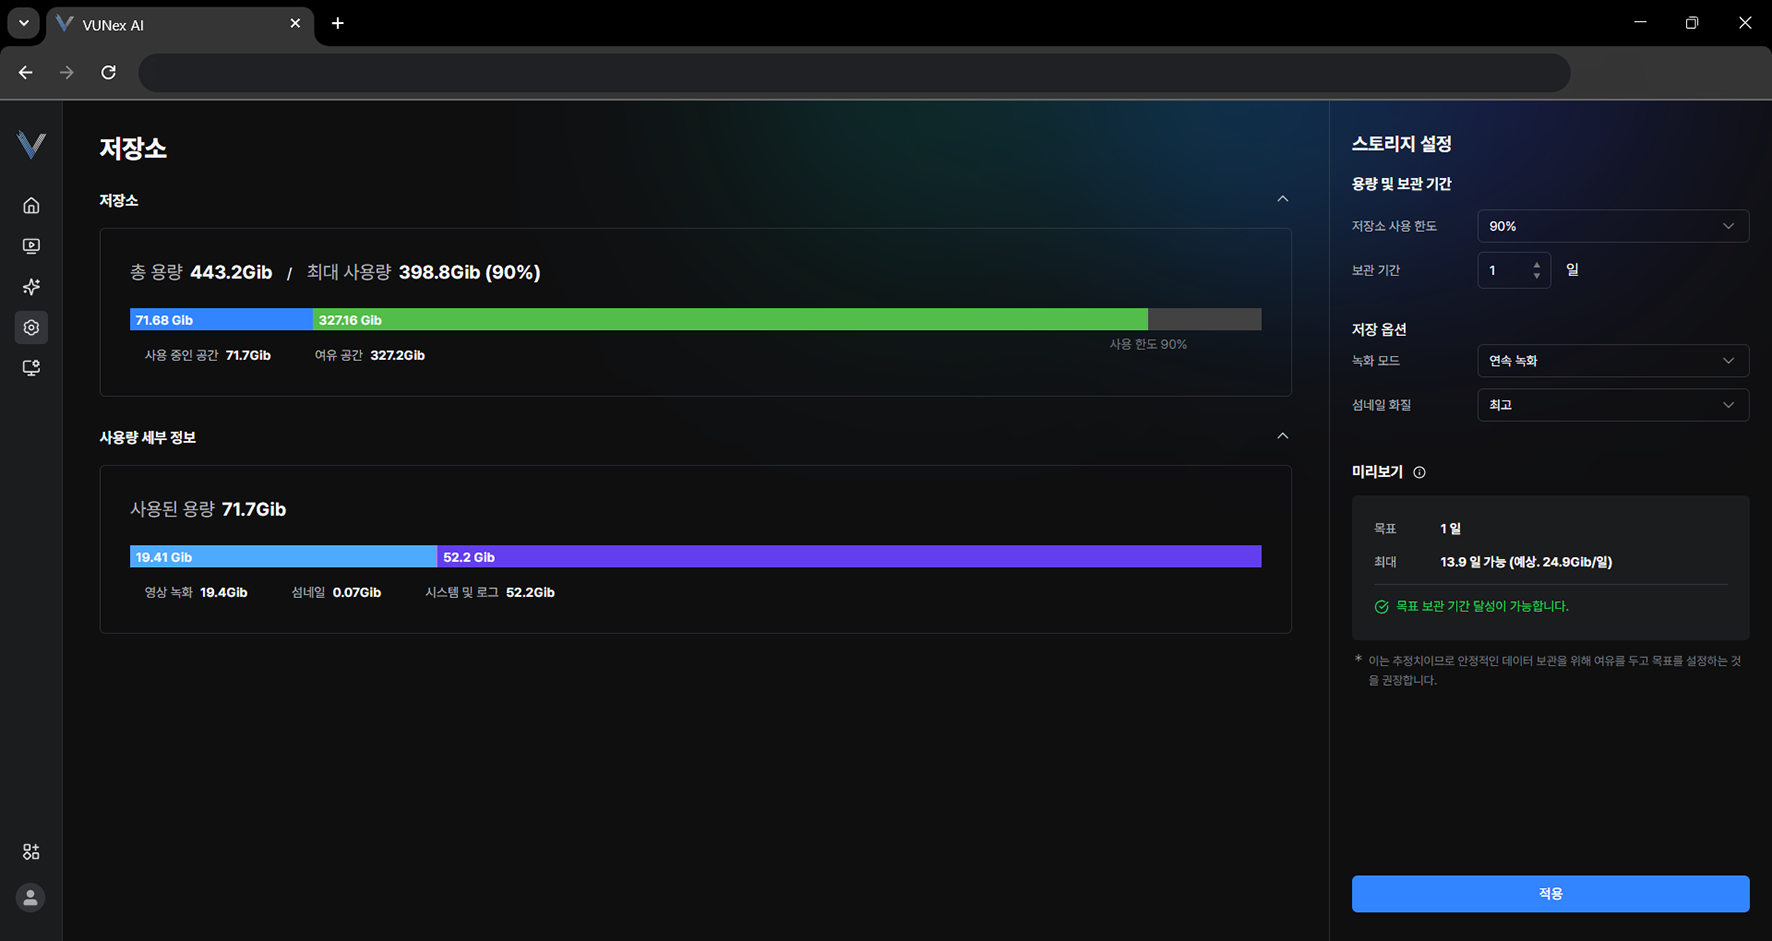 Figure 6-12. Storage Settings
 - Configure [Capacity and retention period][Storage usage limit]: sets the maximum amount of data stored out of the total storage space. [Retention period]: sets how long recorded video and thumbnails are kept.
- Click [Apply]The storage usage limit and the retention period are configured.
Note
[Preview] shows the target retention period and the maximum retention period based on the current settings.
Setting the Recording Mode and Thumbnails
The recording mode and the thumbnail quality are configured.
- In the main menu, click [] > [Storage]The Storage settings screen appears.
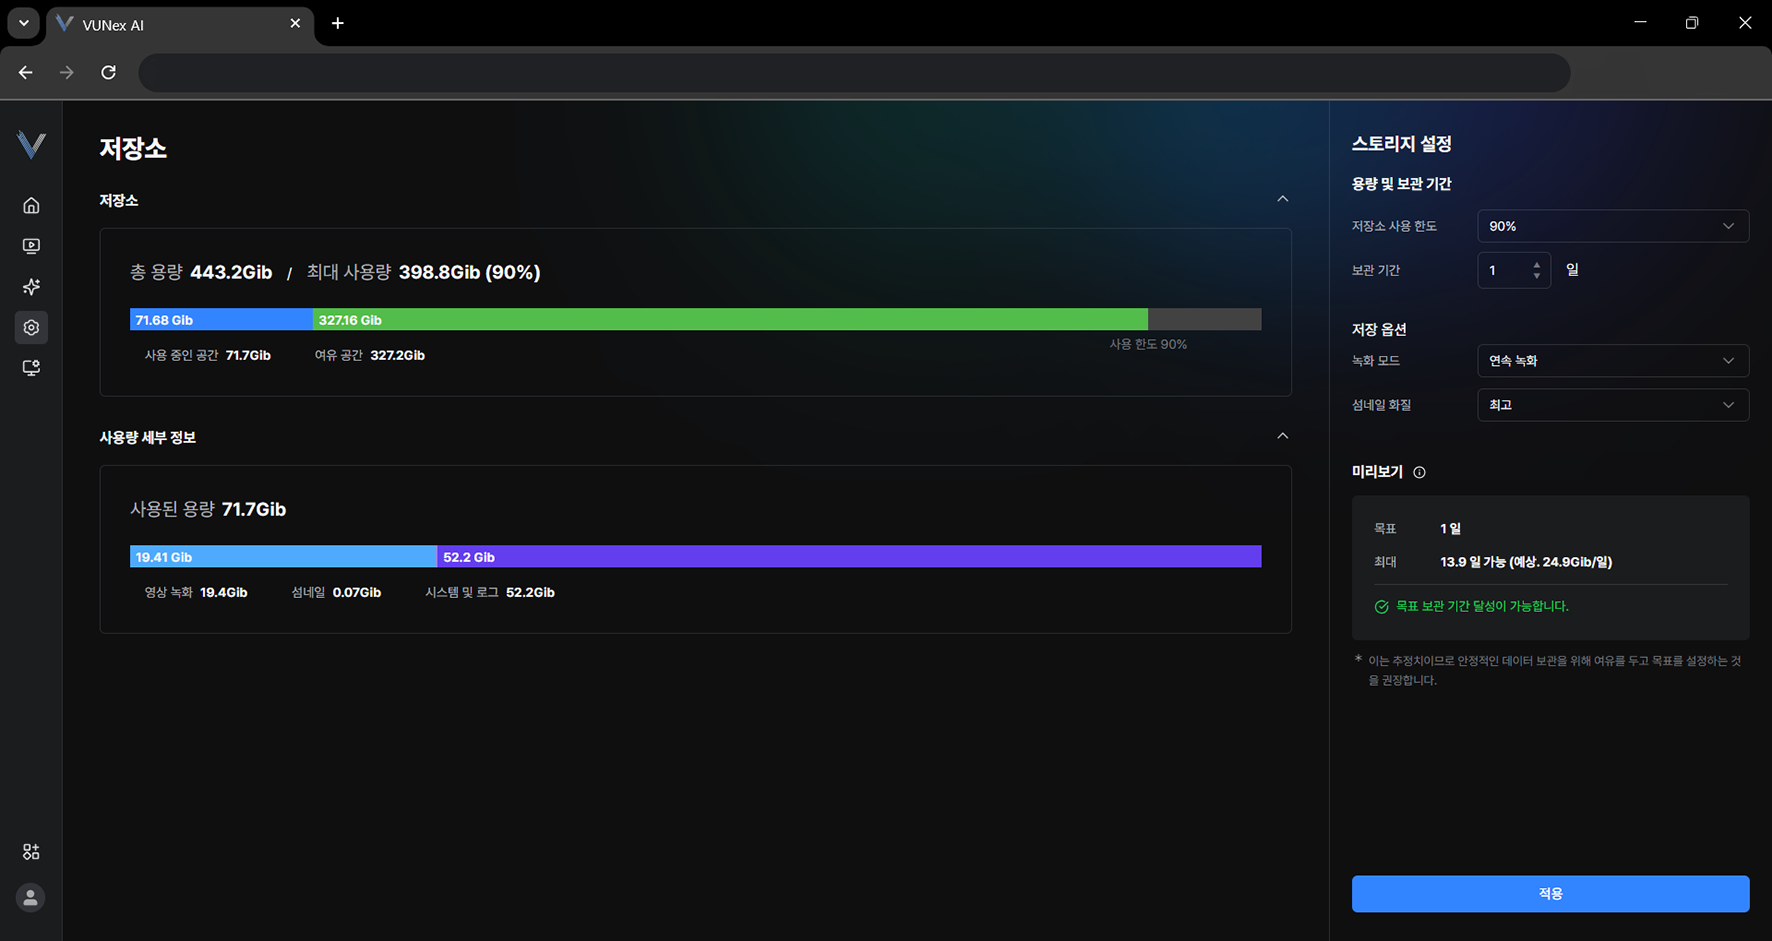 Figure 6-13. Recording Mode and Thumbnail Settings
 - Configure [Save options][Recording mode]: choose how recording works, such as continuous recording or recording only when an event occurs. [Thumbnail quality]: choose the thumbnail quality.
- Click [Apply]The recording mode and the thumbnail quality are configured.
Setting the Log Retention Period
Specify how long the system log and the event log are kept.
- In the main menu, click [] > [Storage]
- Set the periods for [System log] and [Event log] in [Log retention period]
- Click [Apply]
Note
Logs older than the retention period are deleted automatically. Export the records you need to keep from the [Logs] screen in advance.
The usage breakdown shows how much space [System & Logs] takes.