Event Settings
Check events and set actions according to events. The event list may vary depending on the applied model and settings.
Viewing the Event and Action List
Check the recommended actions for each event.
- In the main menu, click [] > [AI Event]The AI Event screen appears.
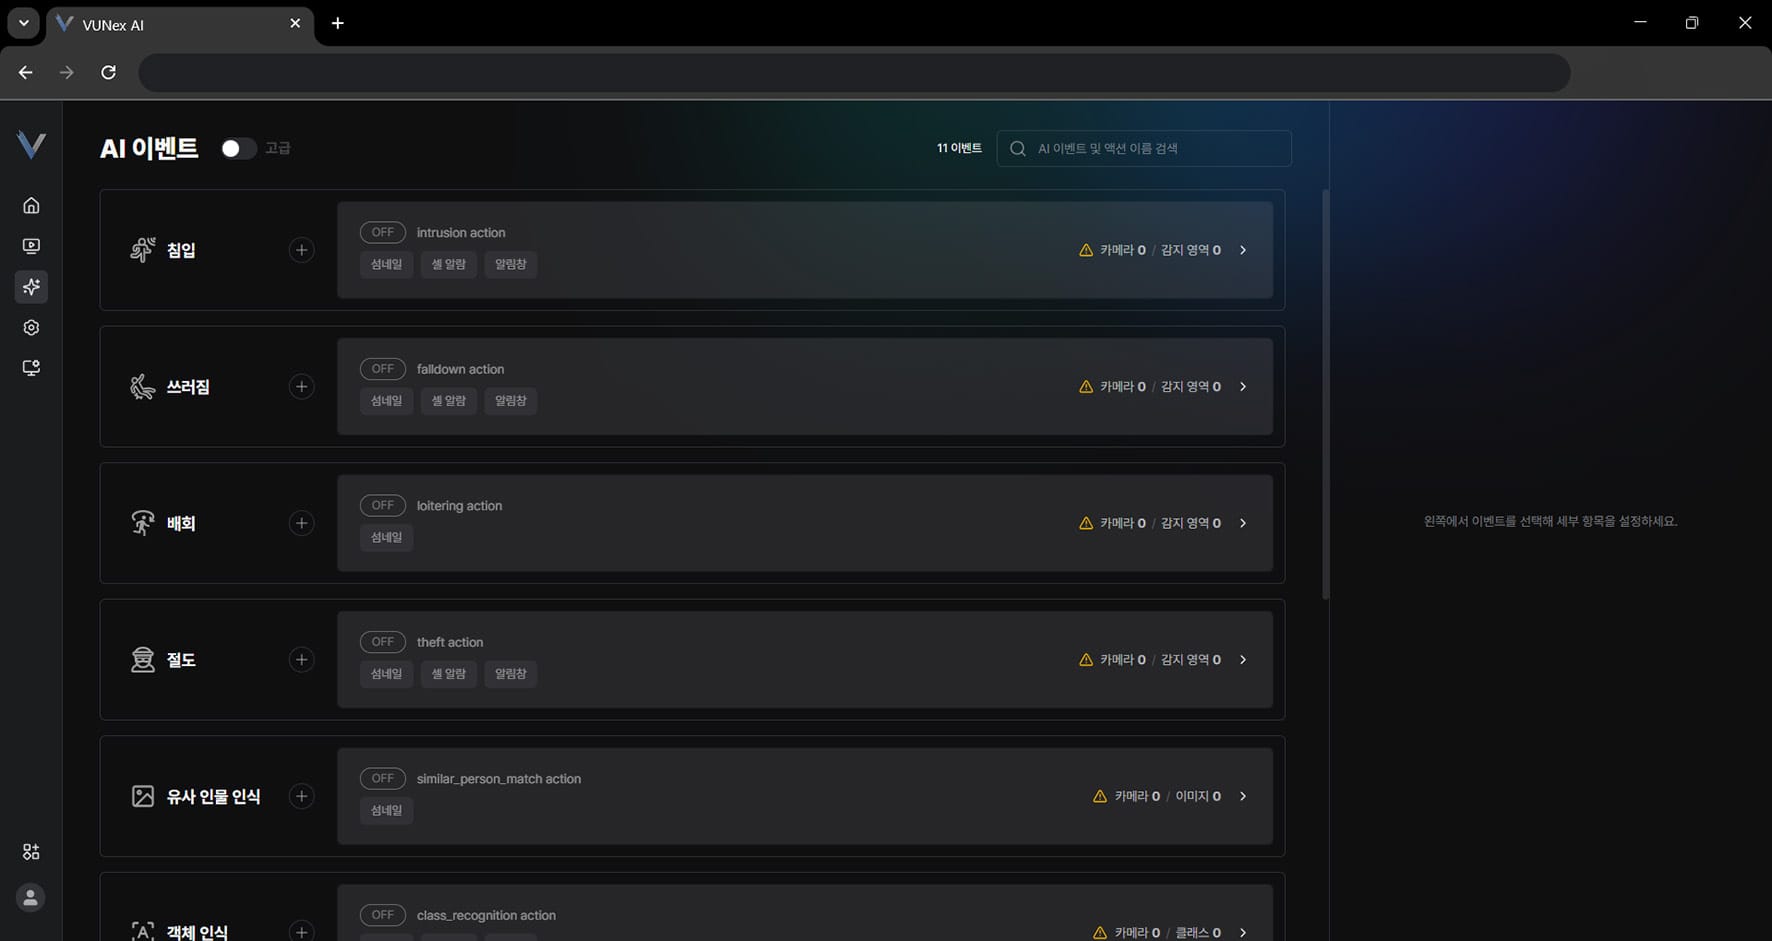 Figure 5-1. AI Event Screen
 - Select the item you want[Intrusion]: detects a person entering the designated detection zone. [Fall down]: detects a person falling or lying down in the designated detection zone. [Loitering]: detects a person staying for a long time in the designated detection zone. [Theft]: detects the act of stealing an item in the designated detection zone. [Similar person match]: register a person image to detect similar people. [Class recognition]: detects a specific object of your choice. [Looking around]: detects looking around in the designated detection zone. [Gaze detection]: detects a gaze toward the camera in the designated detection zone. [Fire]: detects fire such as flames or smoke. [Forklift overspeed]: calculates forklift speed against a reference zone to detect overspeeding. [Wrong-way movement]: detects objects moving against the allowed direction of travel. [Concealing]: detects the act of hiding an item. [Line crossing]: detects objects crossing a defined reference line and counts the crossings.
- Check the recommended actions for each event
Configuring Actions
Add, edit or delete actions.
- In the main menu, click [] > [AI Event]The AI Event screen appears.
- Select the event and action you want
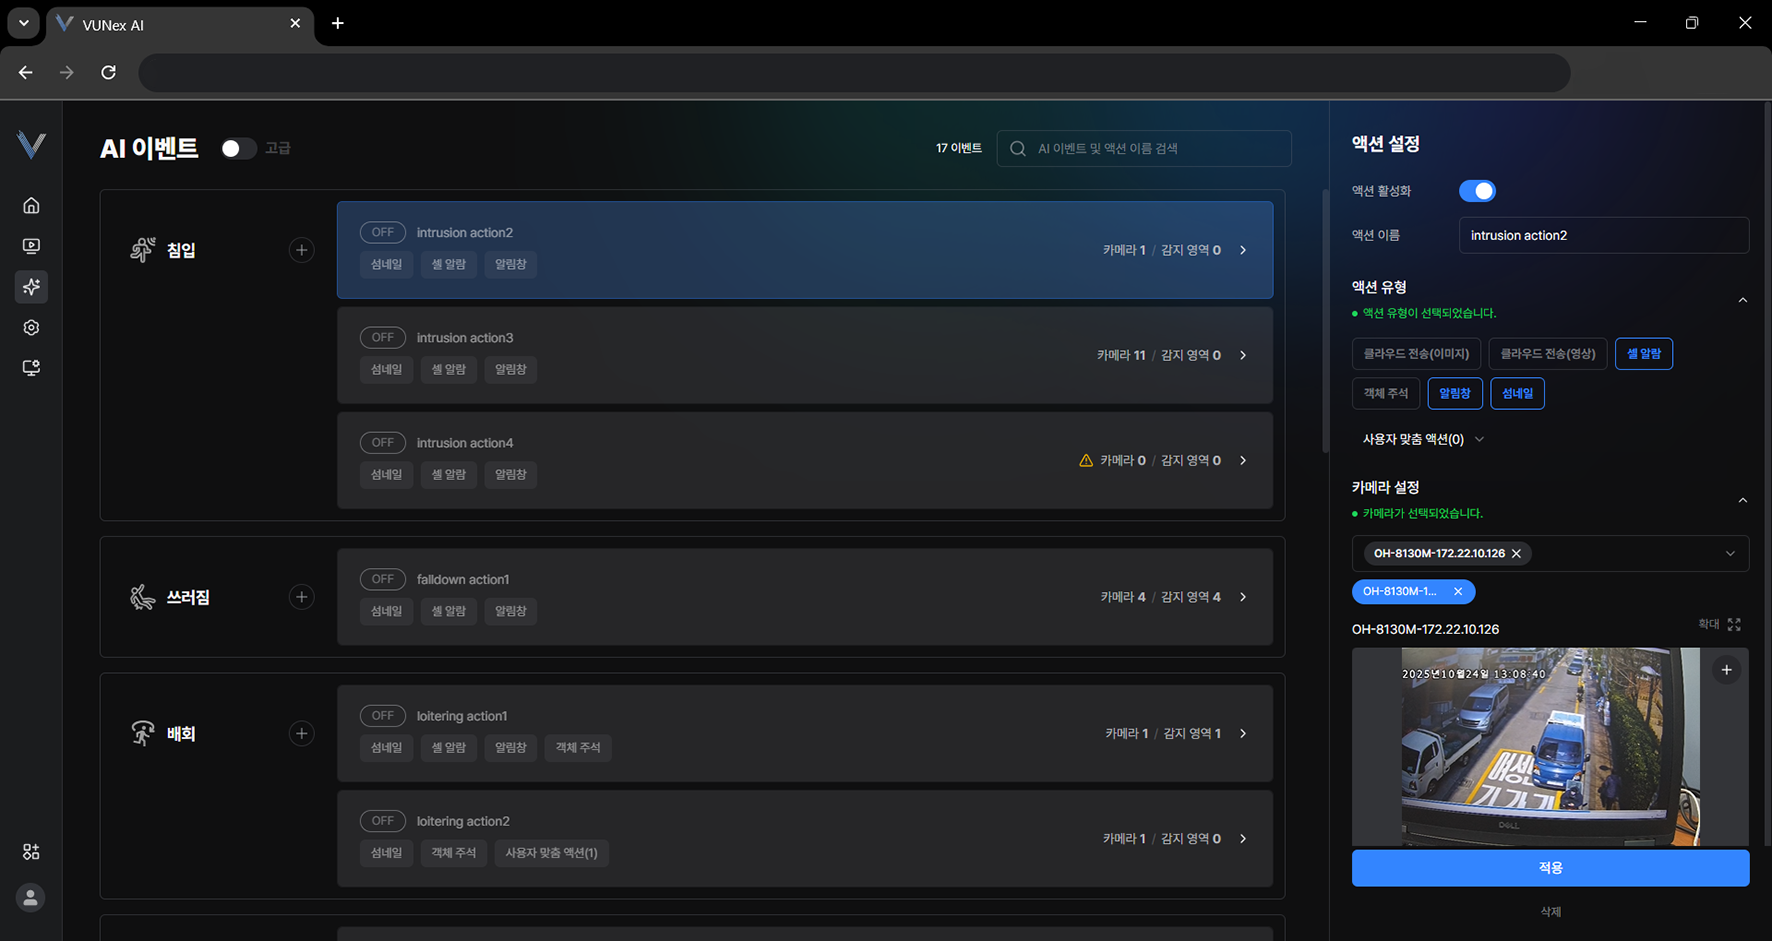 Figure 5-3. Action Settings Screen
 - Configure [Action Trigger][Enable action]: enables the action. [Action name]: enter the action name. [Action type]: choose from cloud transfer (image/video), cell alarm, ONVIF, pop-up message, thumbnail and custom action. [Camera Setup]: select the cameras the event applies to. [Target person image]: register the target person image. Applies only to the [Similar person match] event. [Target object]: select the objects to detect. Applies only to the [Class recognition] event.
- Click [Apply]The action is configured.
Configuring Custom Actions
Configure custom actions.
- In the main menu, click [] > [AI Event]The AI Event screen appears.
- Click [Advanced]
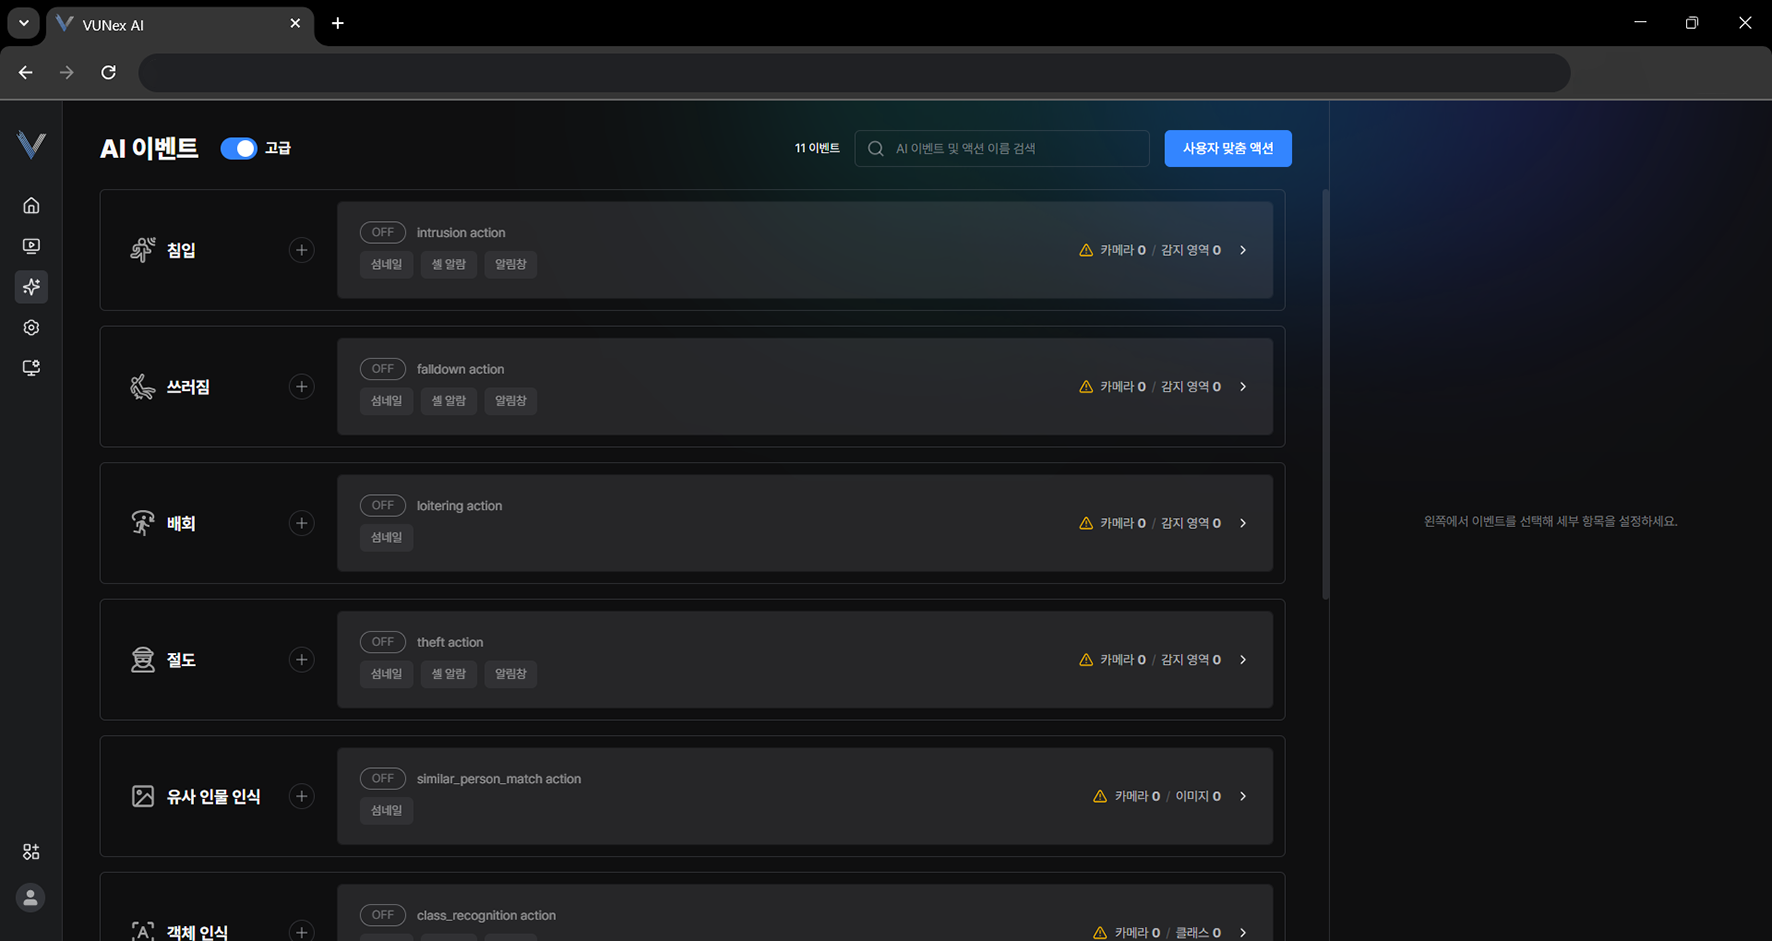 Figure 5-5. Advanced Settings Menu
 - Click [Custom action]
- Click [Add]
- Click the item you want[Action type]: choose from HTTP.
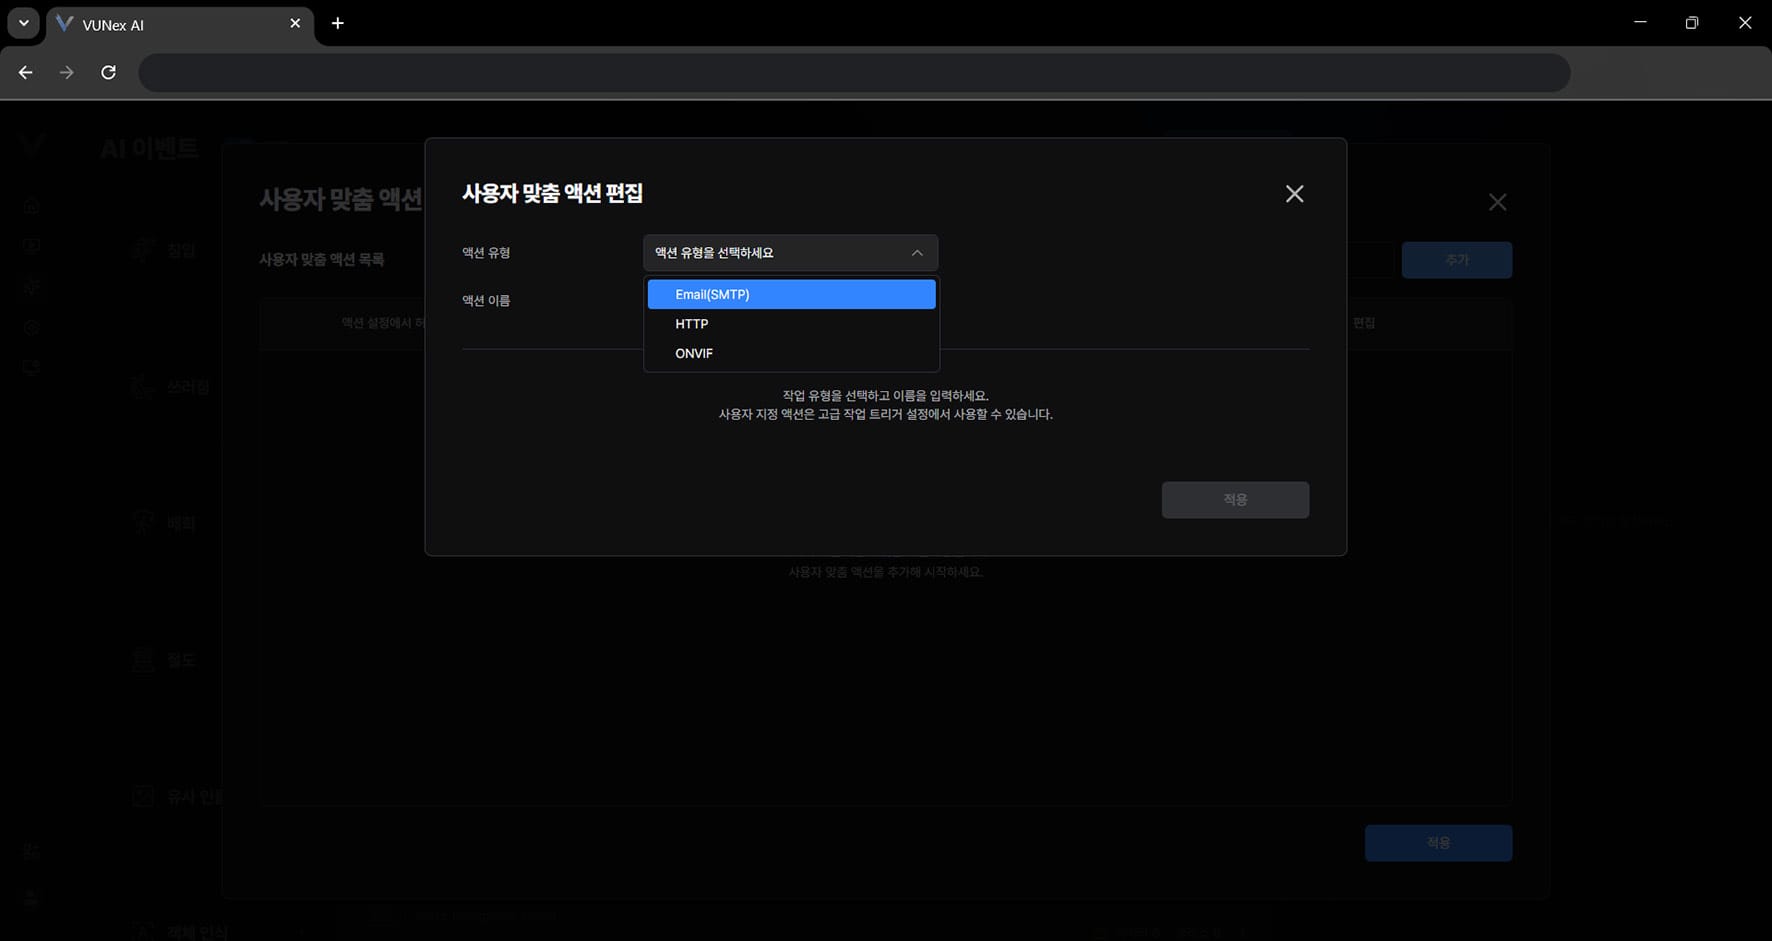 Figure 5-6. Email (SMTP) Action Settings
 - Click [Apply]
- Click the item you want[Allow in action trigger]: makes a custom action added to the list available in the default action settings of an event. [Edit]: edits a custom action added to the list. [Delete]: deletes a custom action added to the list.
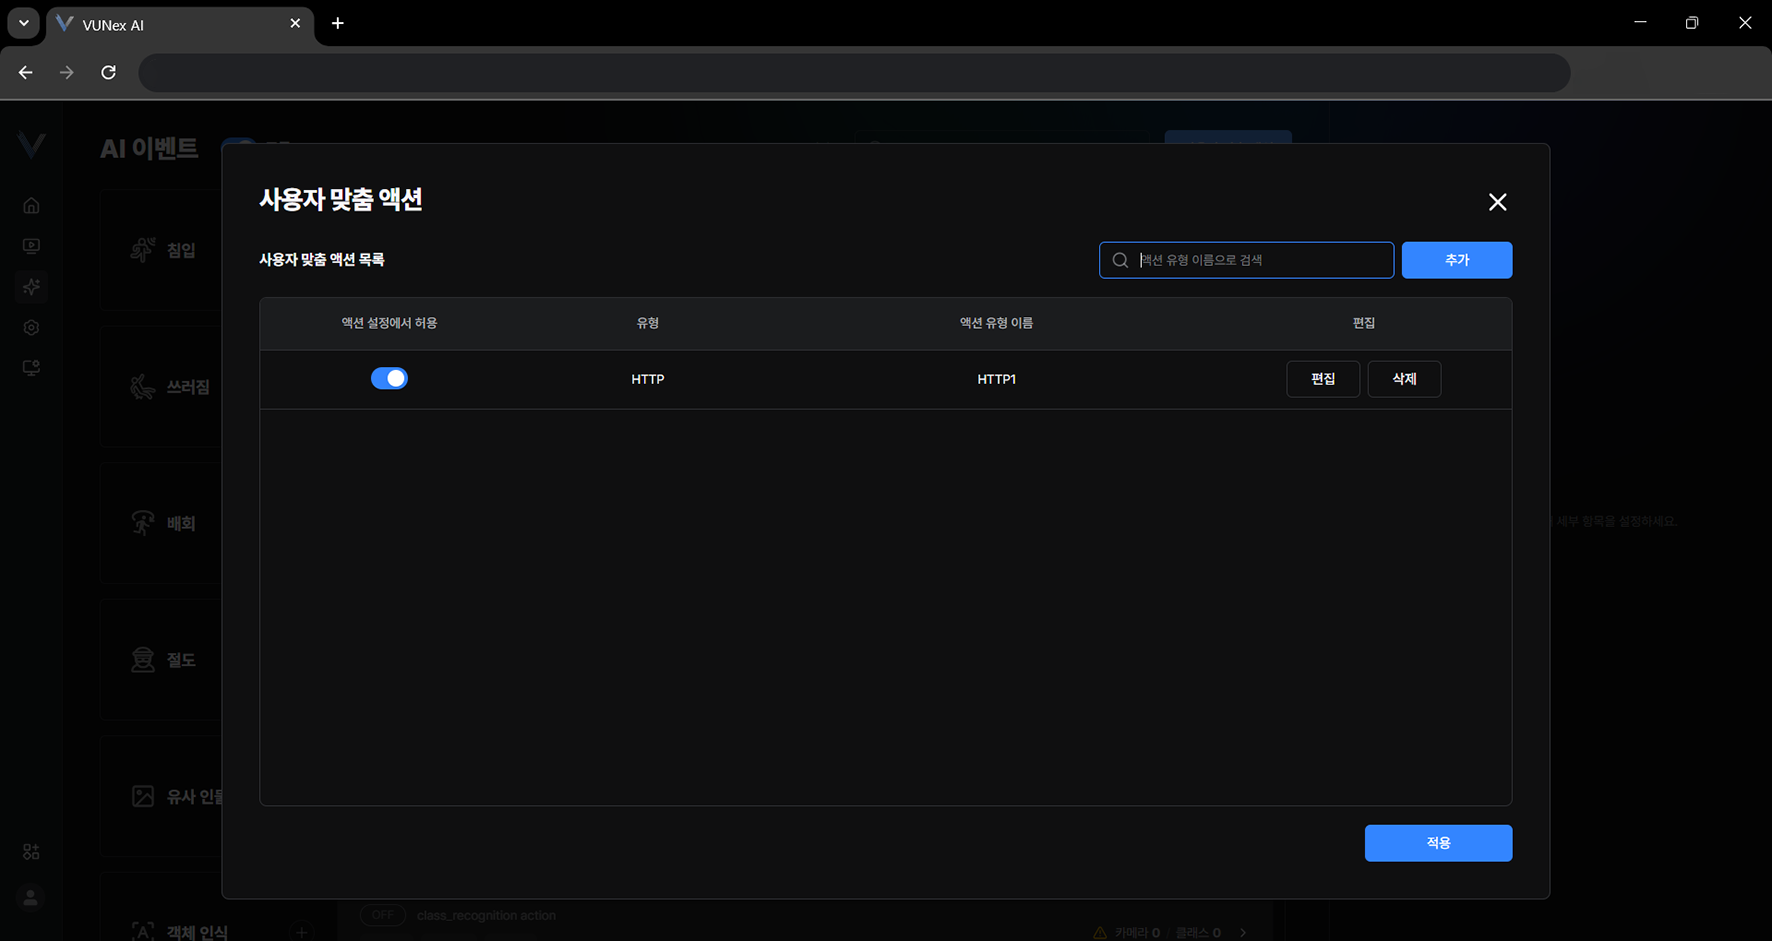 Figure 5-8. Managing Custom Actions
 - Click [Allow in action trigger] > [ ]
- Click [Apply]The action is configured.
Configuring the Action Schedule
Specify the days and time slots in which the action runs when an event occurs.
- In the main menu, click [] > [AI Event]
- Select the event and action you want
- Click [Schedule] > [Use schedule]If the schedule is not used, detection runs at all times.
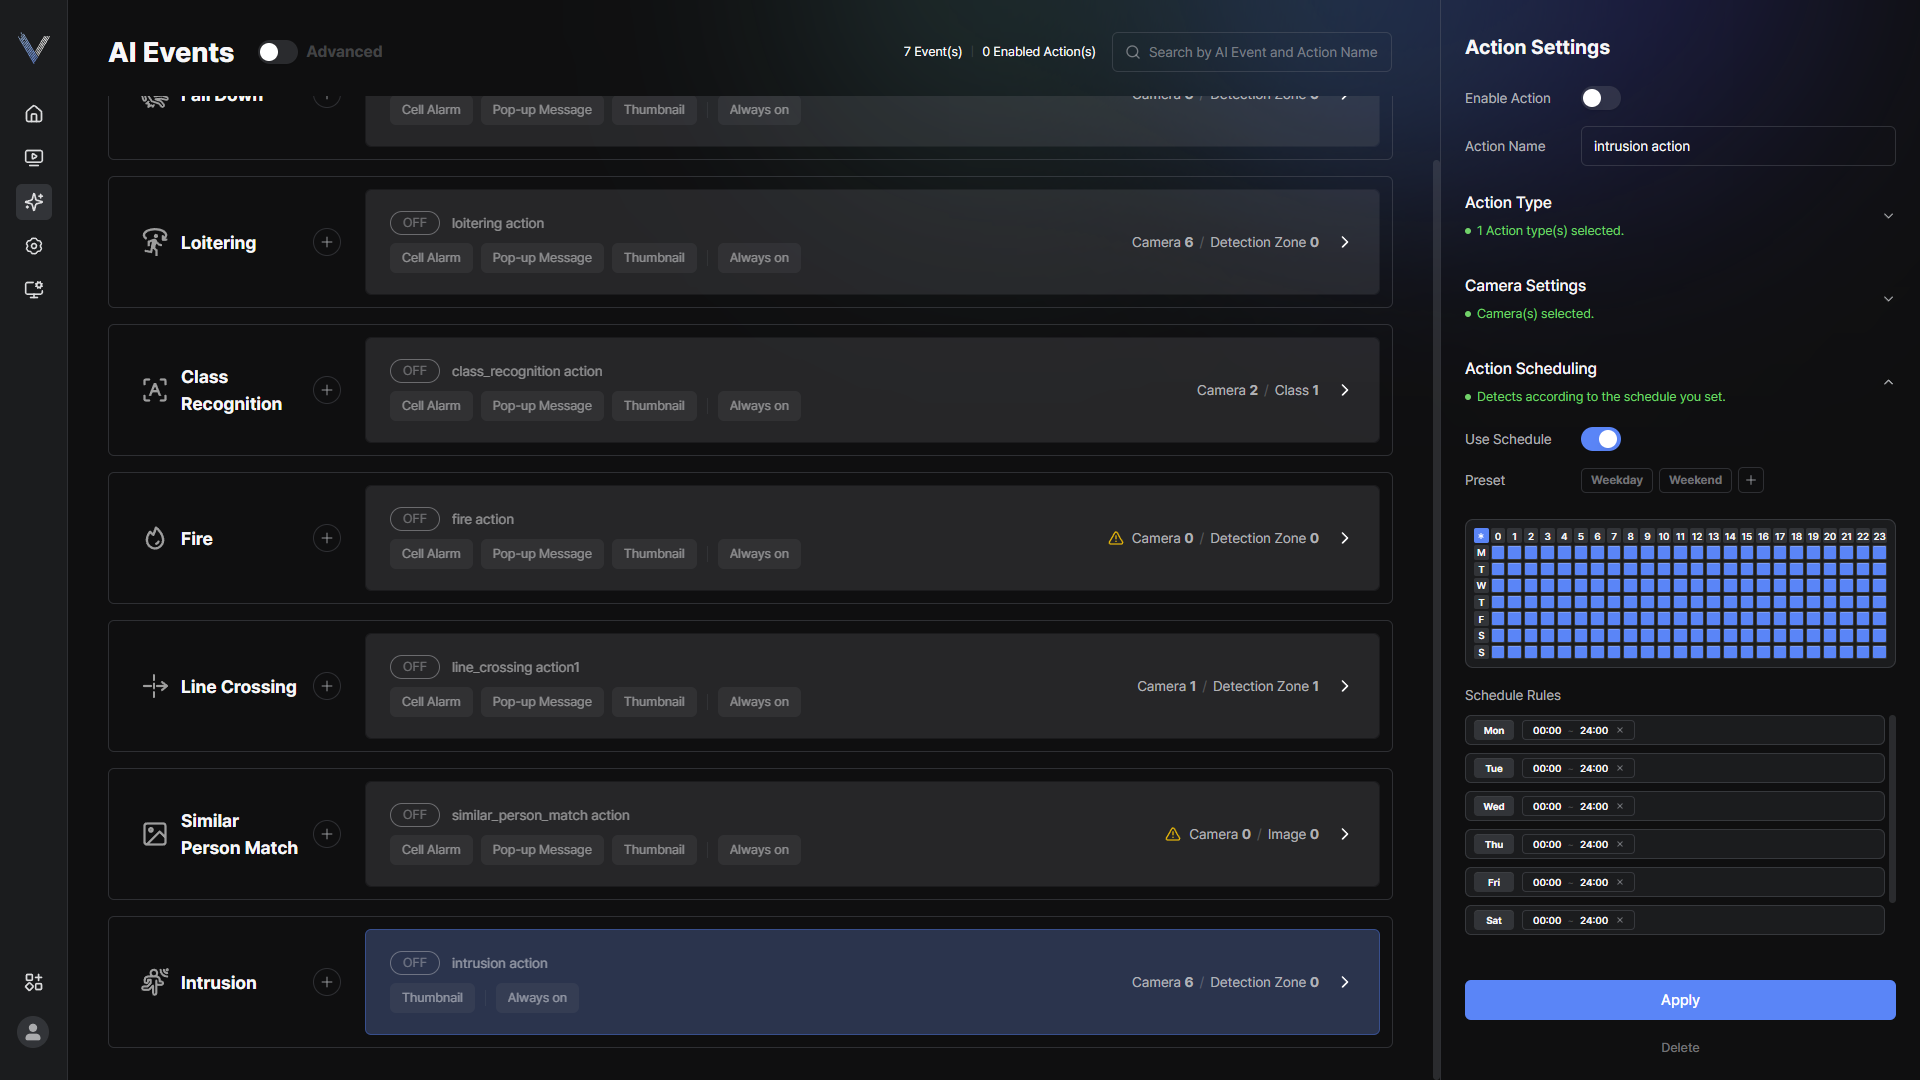 Figure 5-18. Schedule Settings
 - Set the days and the [Start] and [End] times in [Schedule rules]Use [Everyday], [Weekday] or [Weekend] to select days at once; enter times in HH:MM format. A single rule cannot exceed 24 hours.
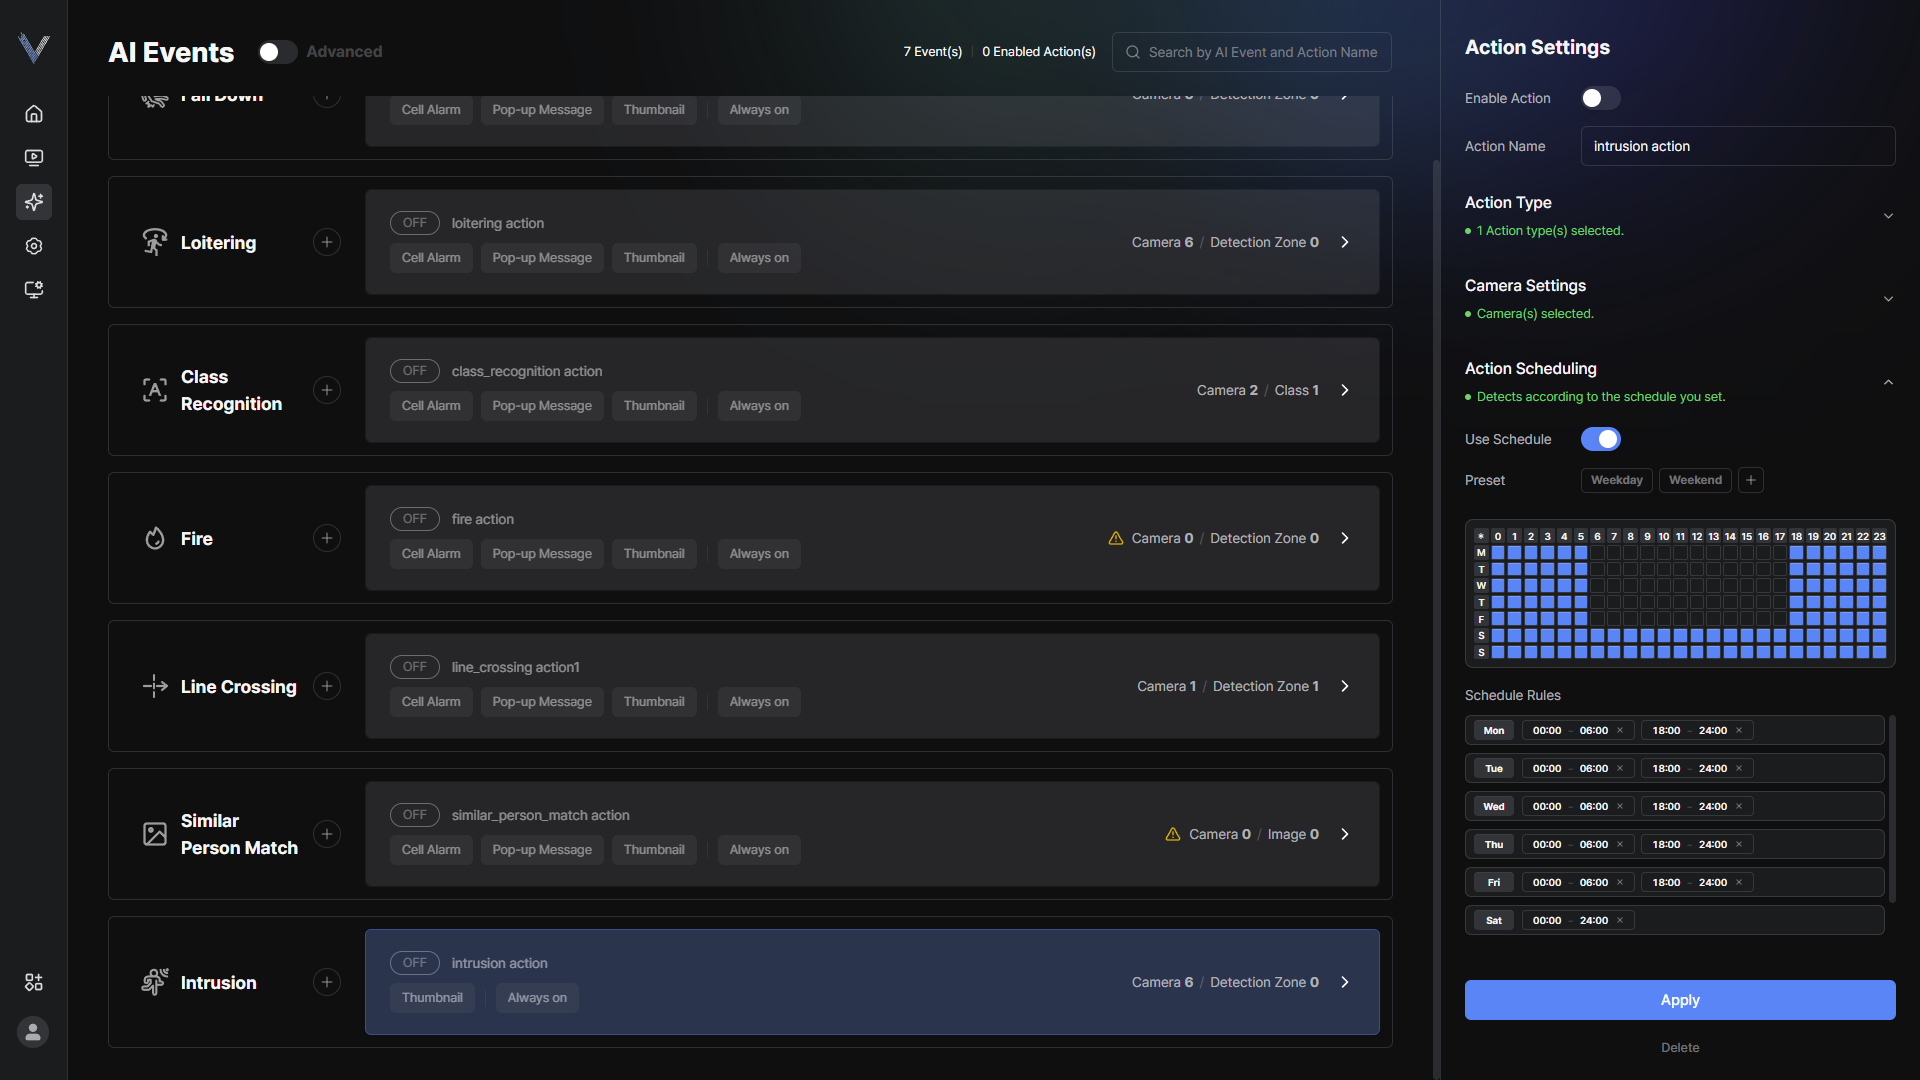 Figure 5-19. Schedule Rules
 - Click [Apply]
Using Schedule Presets
Save frequently used schedules as presets and apply them to other actions.
- In the main menu, click [] > [AI Event]
- Select the event and action you want
- Click [Schedule] > [Preset] > [+]
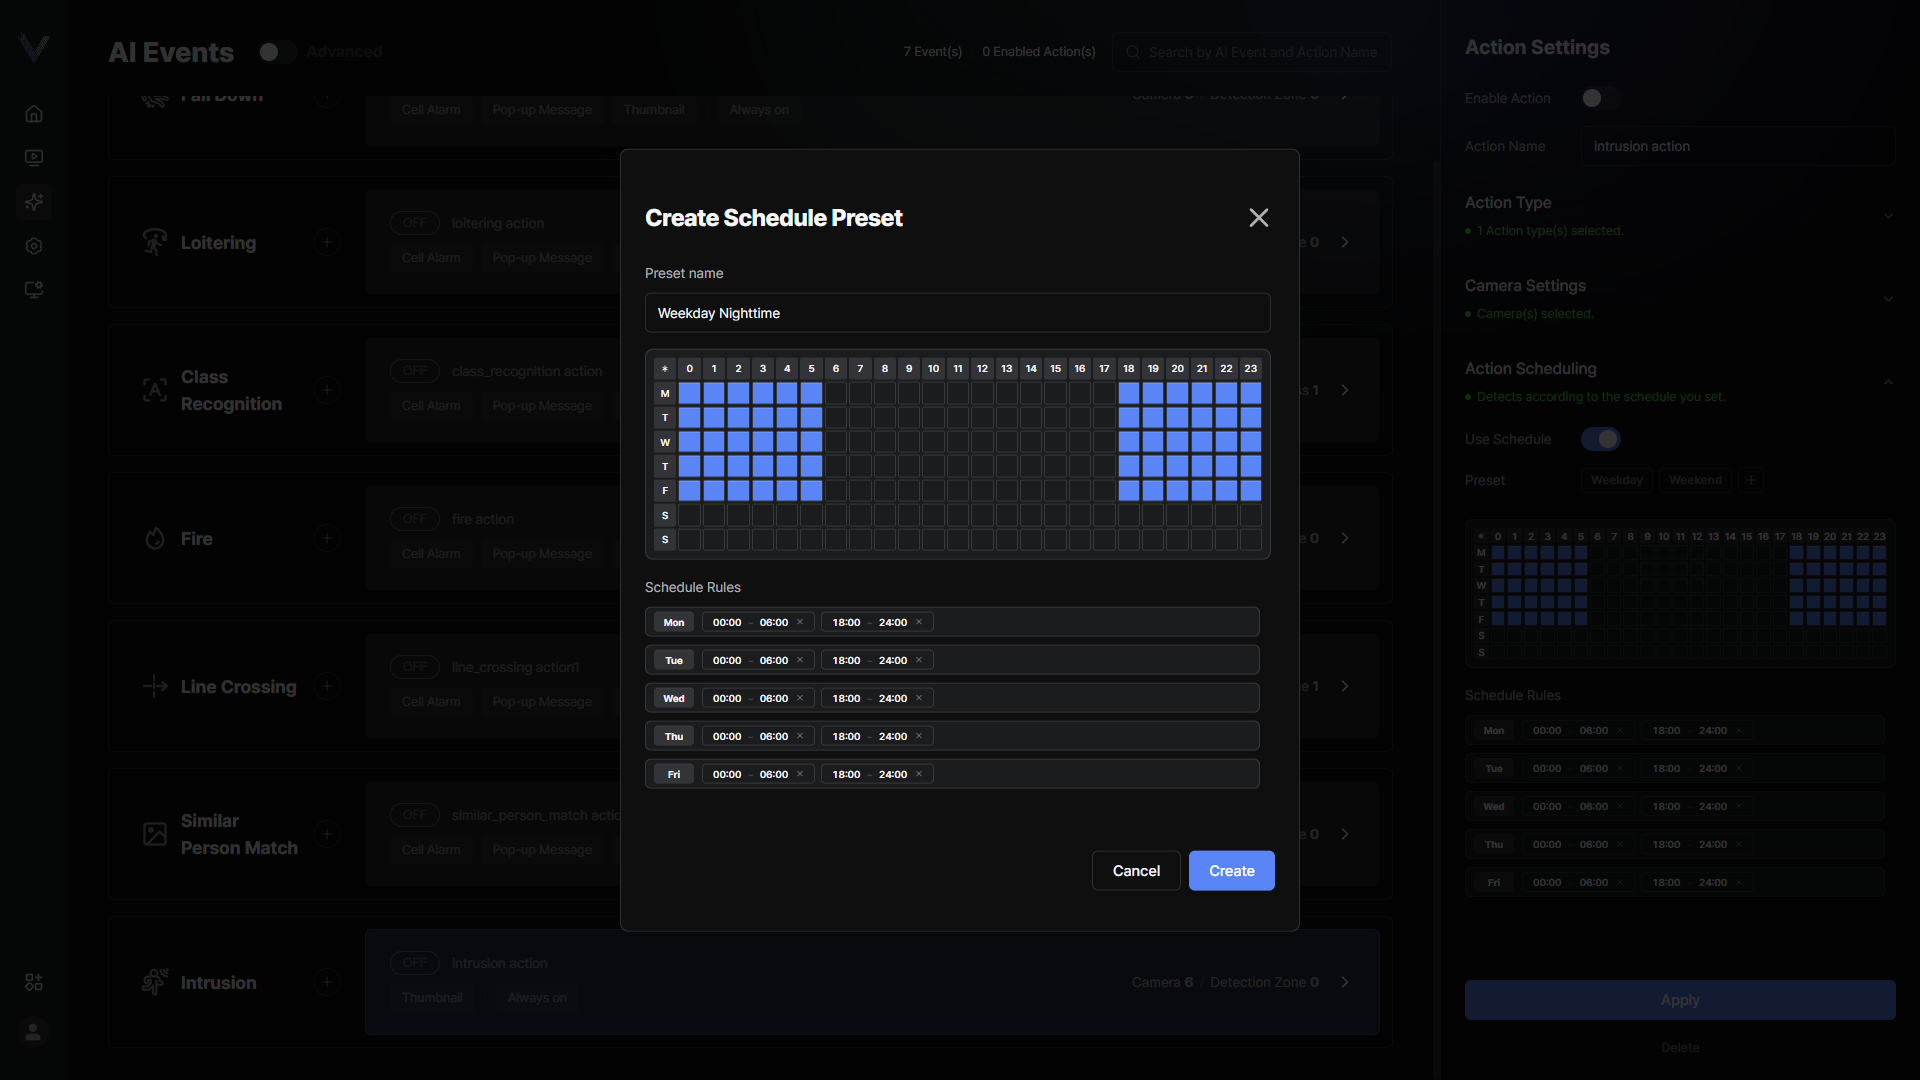 Figure 5-20. Saving a Schedule Preset
 - Enter the [Preset name] and click [Create]
- In another action, select the [Saved preset] and click [Apply]
Creating a Detection Zone
Create and manage detection zones on a camera. A detection zone can be enabled or disabled per event.
- In the main menu, click [] > [AI Event]The AI Event screen appears.
- Select the event and action you want
- Click [Action Trigger] > [Camera Setup]Select a camera.
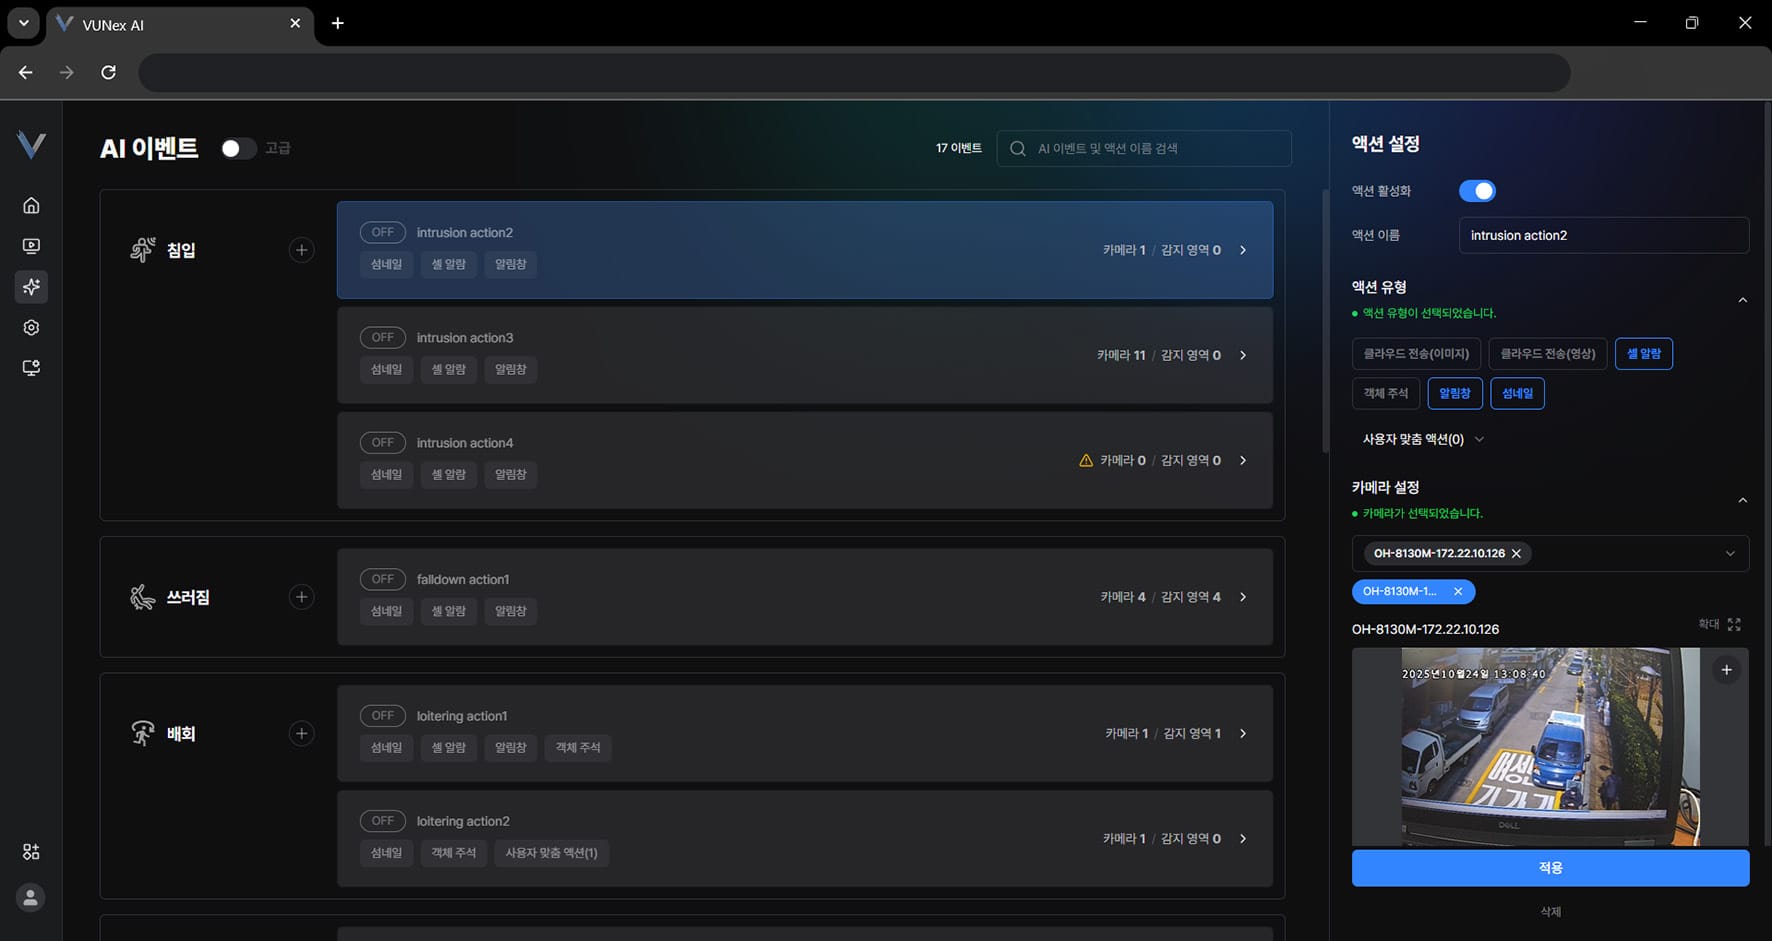 Figure 5-9. Creating a Detection Zone
 - Click [+] on the preview screen
- Click the points you want with the mouseThe zone is created.
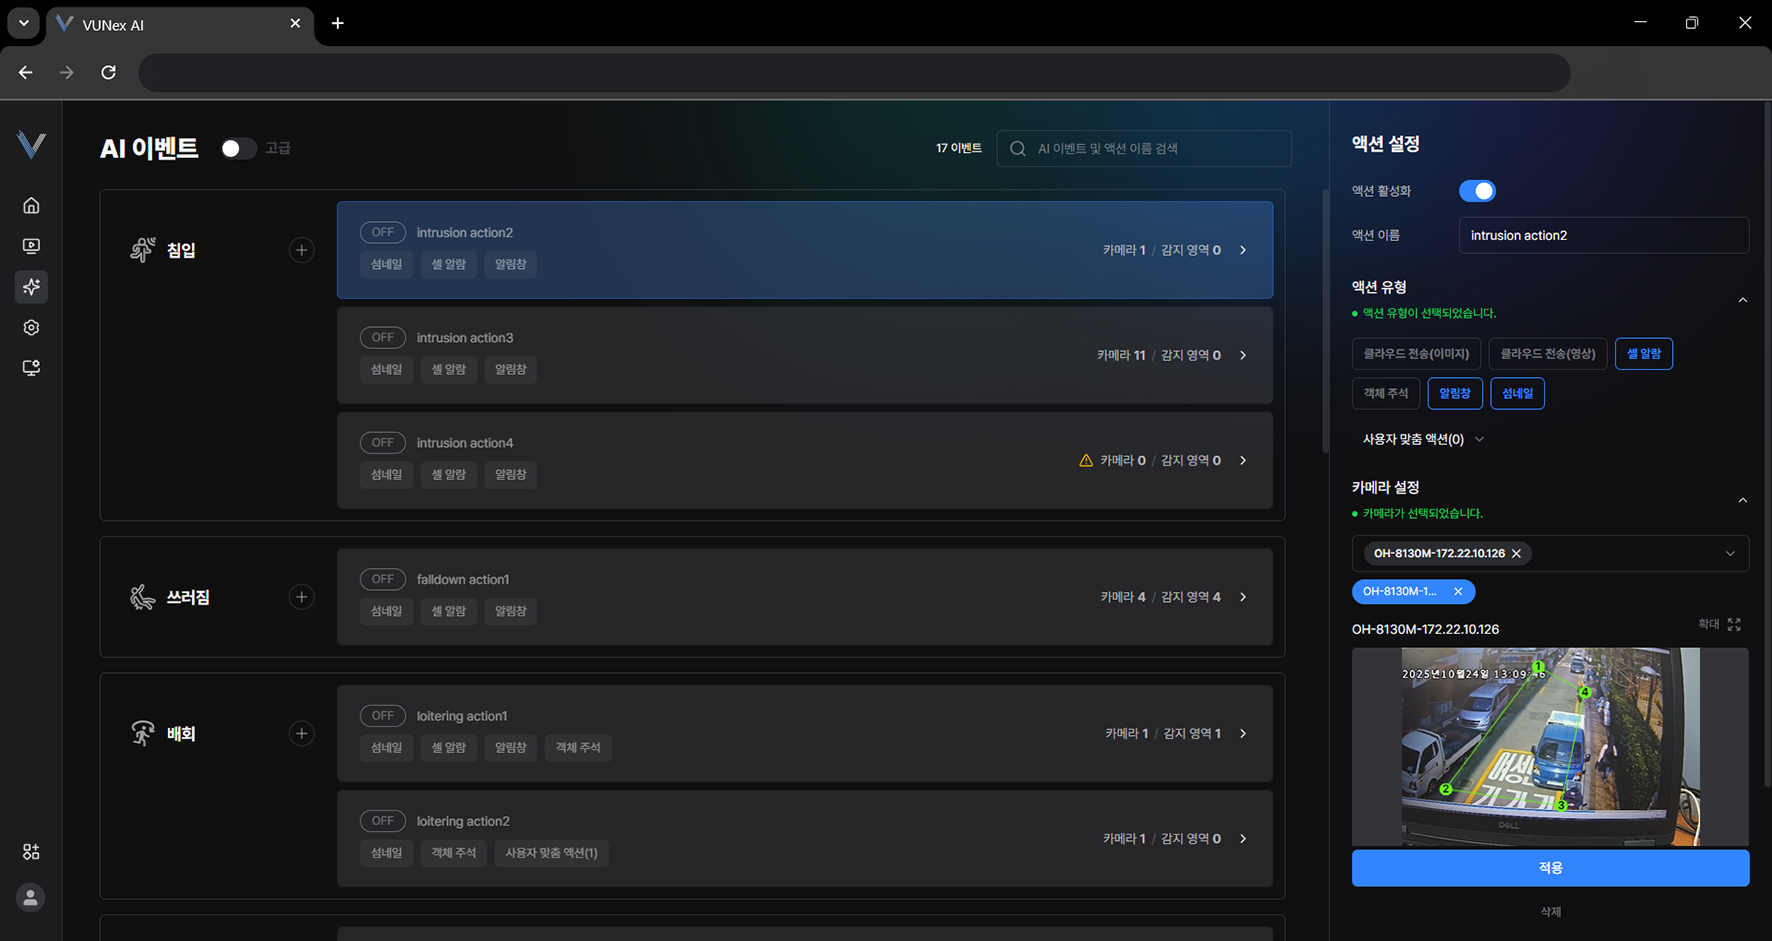 Figure 5-10. Designating a Detection Zone
 - Click [Apply]The detection zone is created.
Deleting a Detection Zone
The detection zone is deleted.
- In the main menu, click [] > [AI Event]The AI Event screen appears.
- Select the event and action you want
- Click [Action Trigger] > [Camera Setup]
- Select a camera
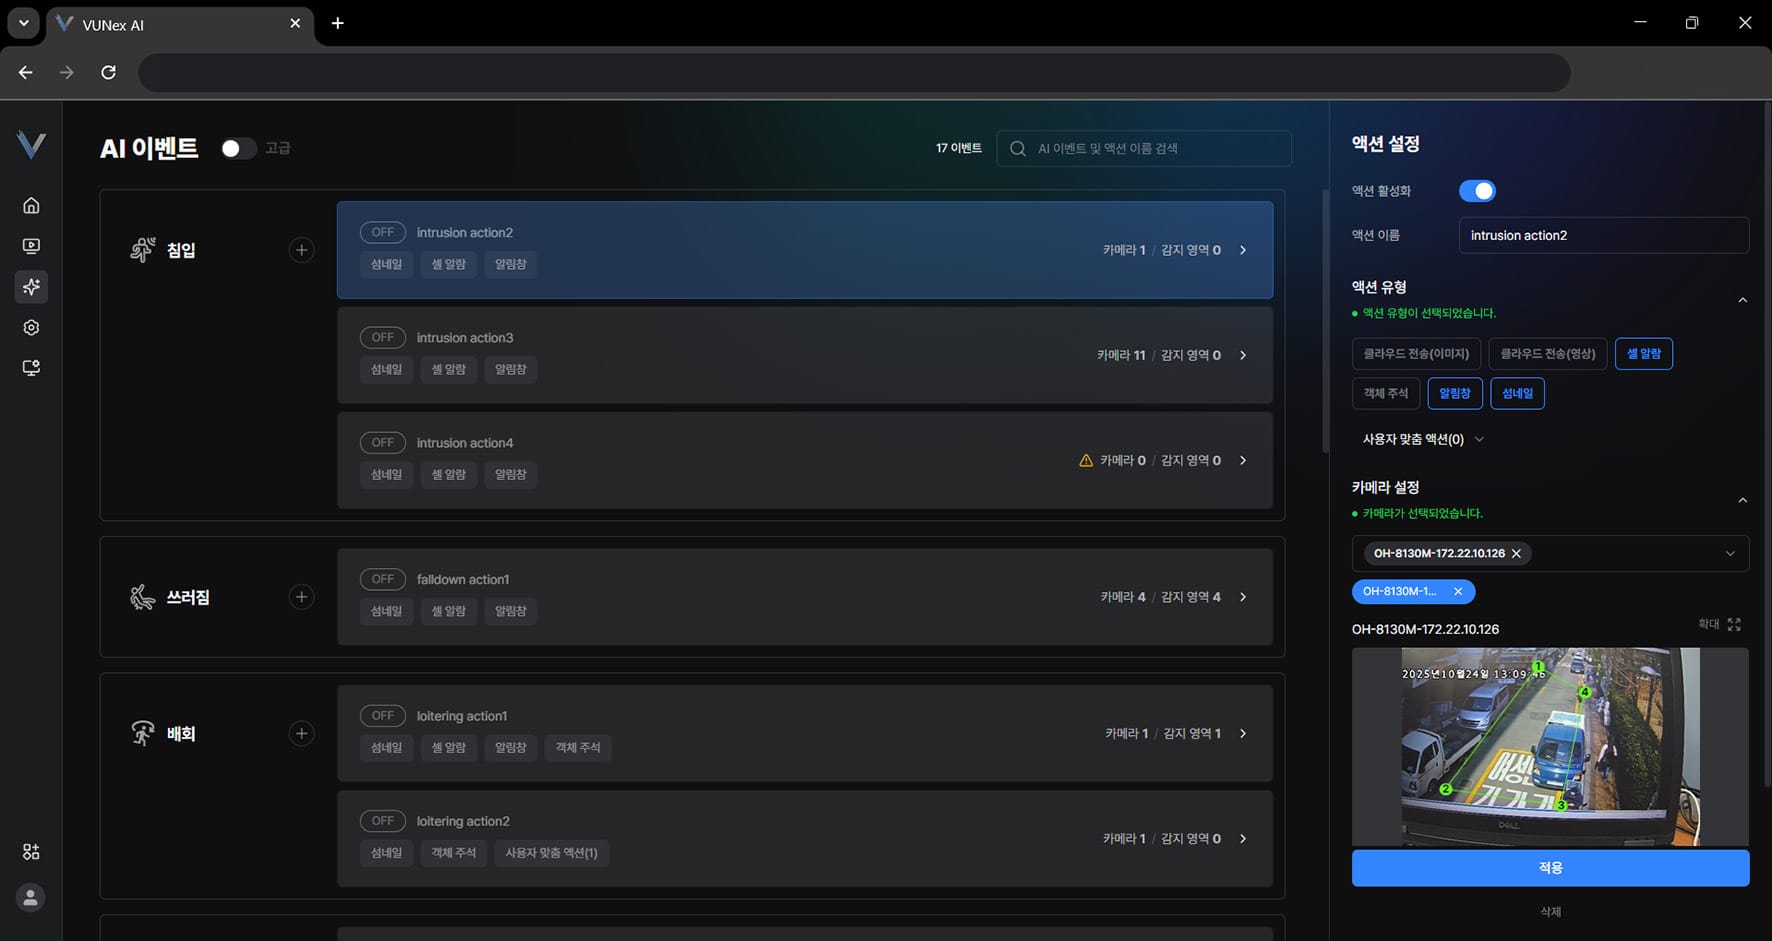 Figure 5-11. Deleting a Detection Zone
 - Click [] > [Delete '(zone name)' zone]
- Click [Apply]The detection zone is deleted.
Configuring Line Crossing
Draw a reference line on the video and detect objects that cross it.
- In the main menu, click [] > [AI Event]
- Select the [Line crossing] event and an action
- Click [Action Trigger] > [Camera & Line Setup]
- Select a camera, then click [+] on the preview screen.
- Drag on the video to draw the reference line.Drag the start and end points of the line to adjust its position.
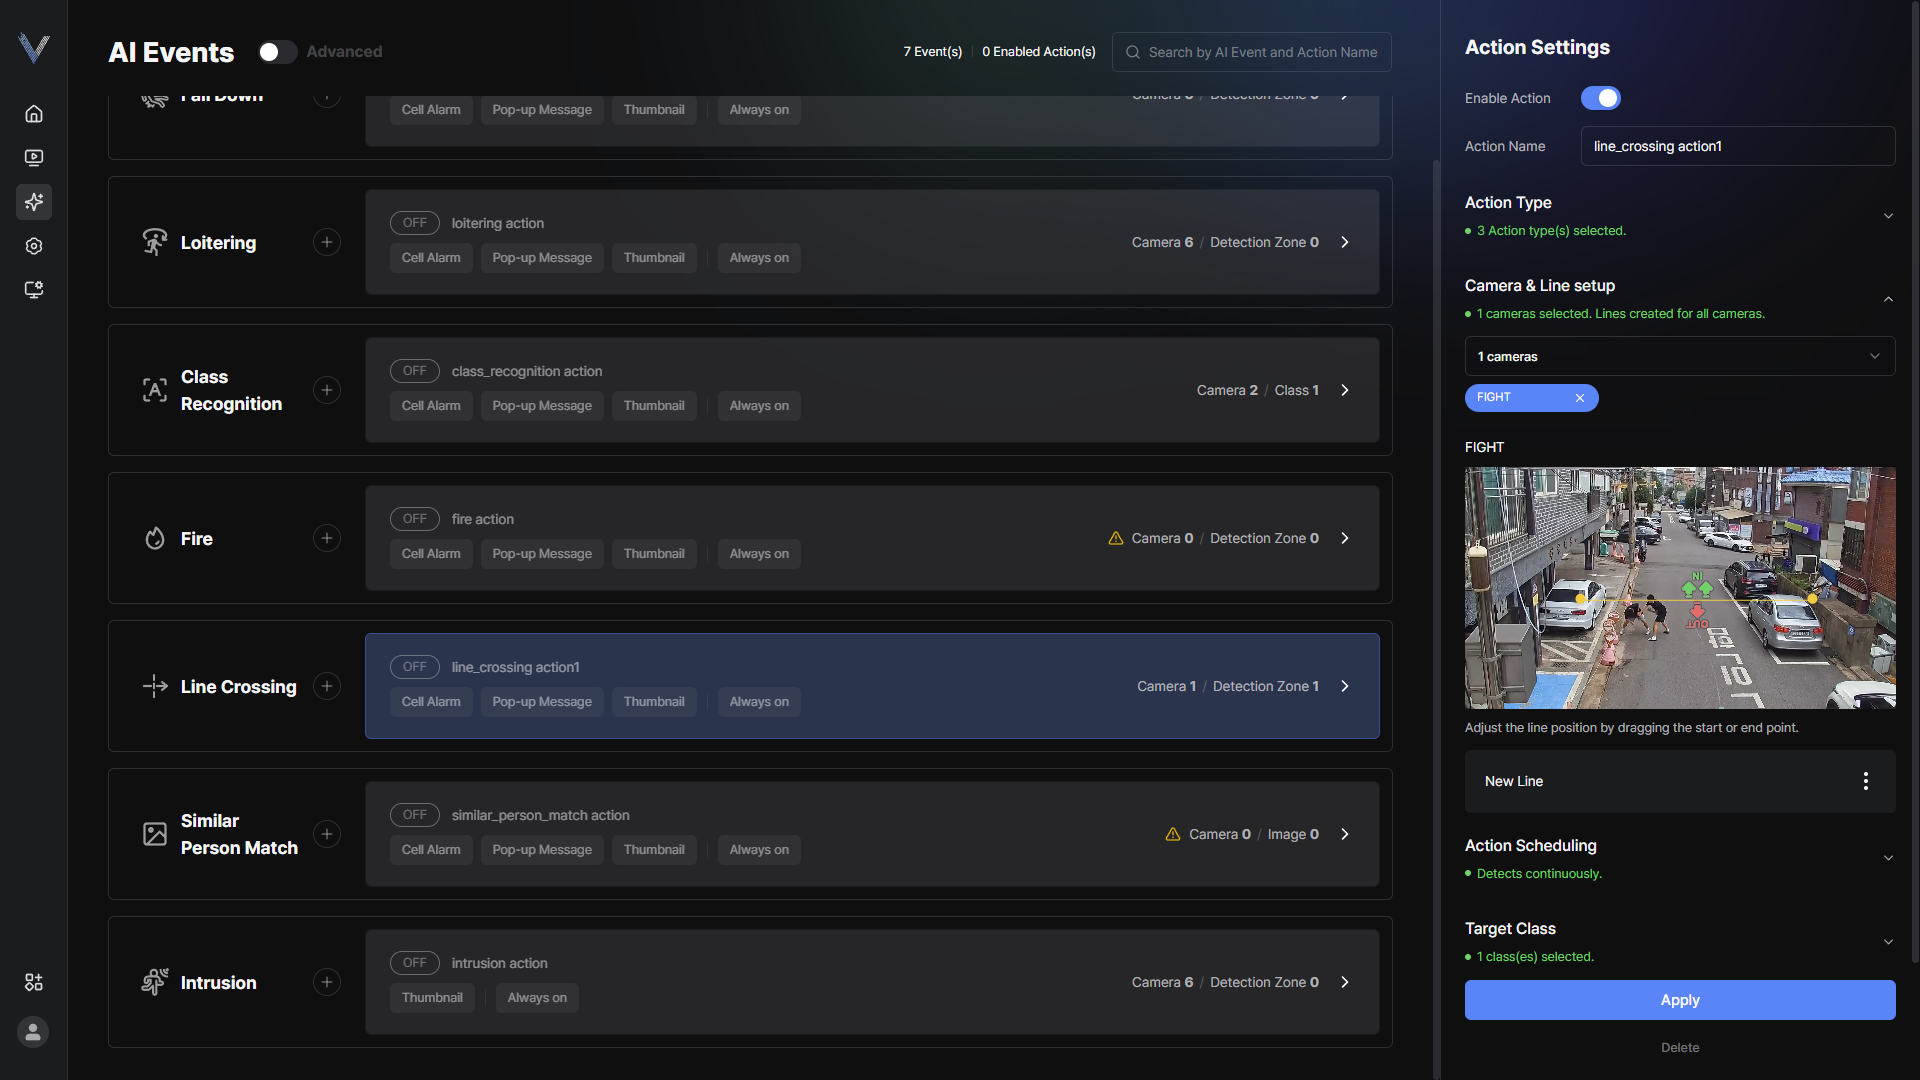 Figure 5-21. Line Crossing Reference Line
 - Enter the [Line name]
- Check the [Allowed direction] and click [Reverse direction] if needed
- Select the objects to detect in [Target object]You can select several object types at once.
- Set the [Trigger condition]Choose [IN] or [OUT] in [Detection direction], then set [Every n] or [More than n] with the count.
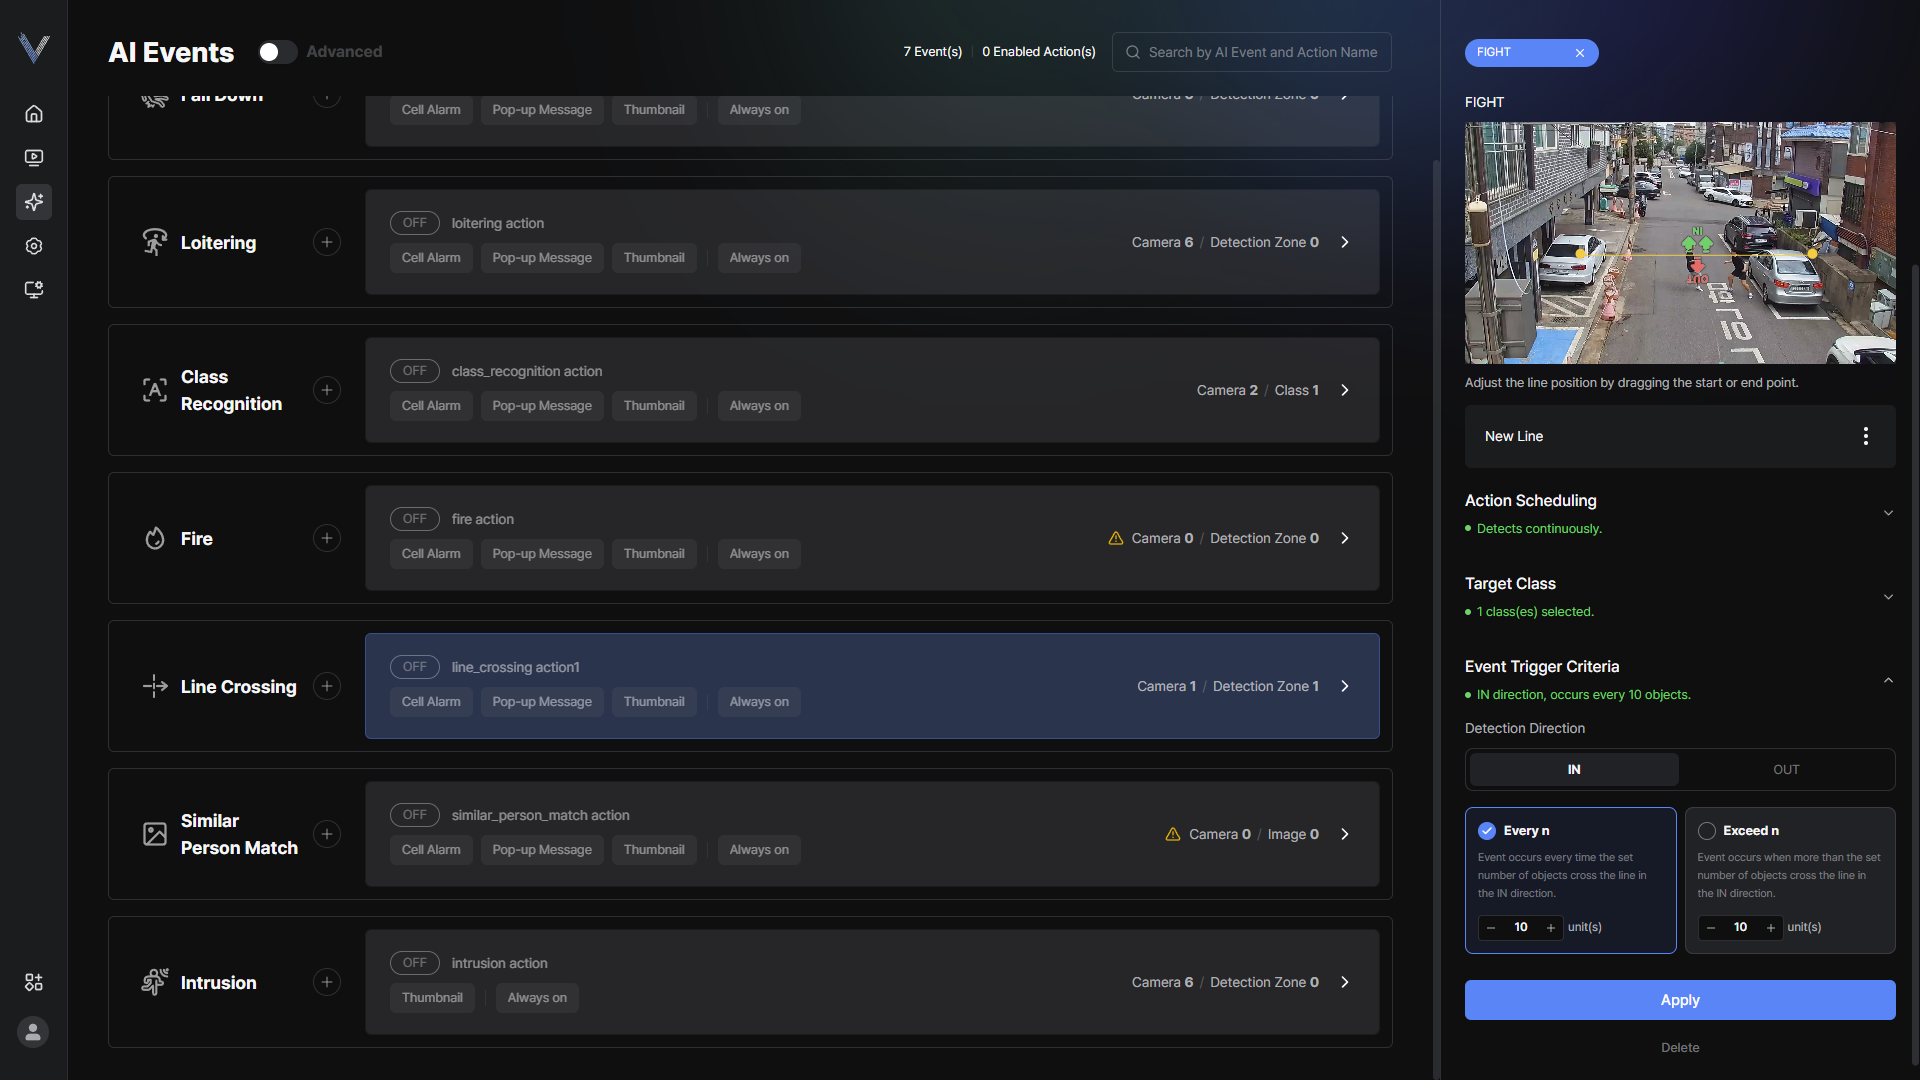 Figure 5-22. Line Crossing Trigger Condition
 - Click [Apply]
- [Every n]: an event occurs each time the set number of objects crosses the line in the chosen direction.
- [More than n]: an event occurs when more than the set number of objects crosses the line in the chosen direction.
- The event name is shown as [(line name) crossed n times].
Configuring Wrong-way Movement
Detect objects moving against the allowed direction of travel.
- In the main menu, click [] > [AI Event]
- Select the [Wrong-way movement] event and an action
- Click [Action Trigger] > [Camera & Line Setup]
- Select a camera, then click [+] on the preview screen.
- Draw the reference line on the video.A detection zone is created automatically based on the reference line.
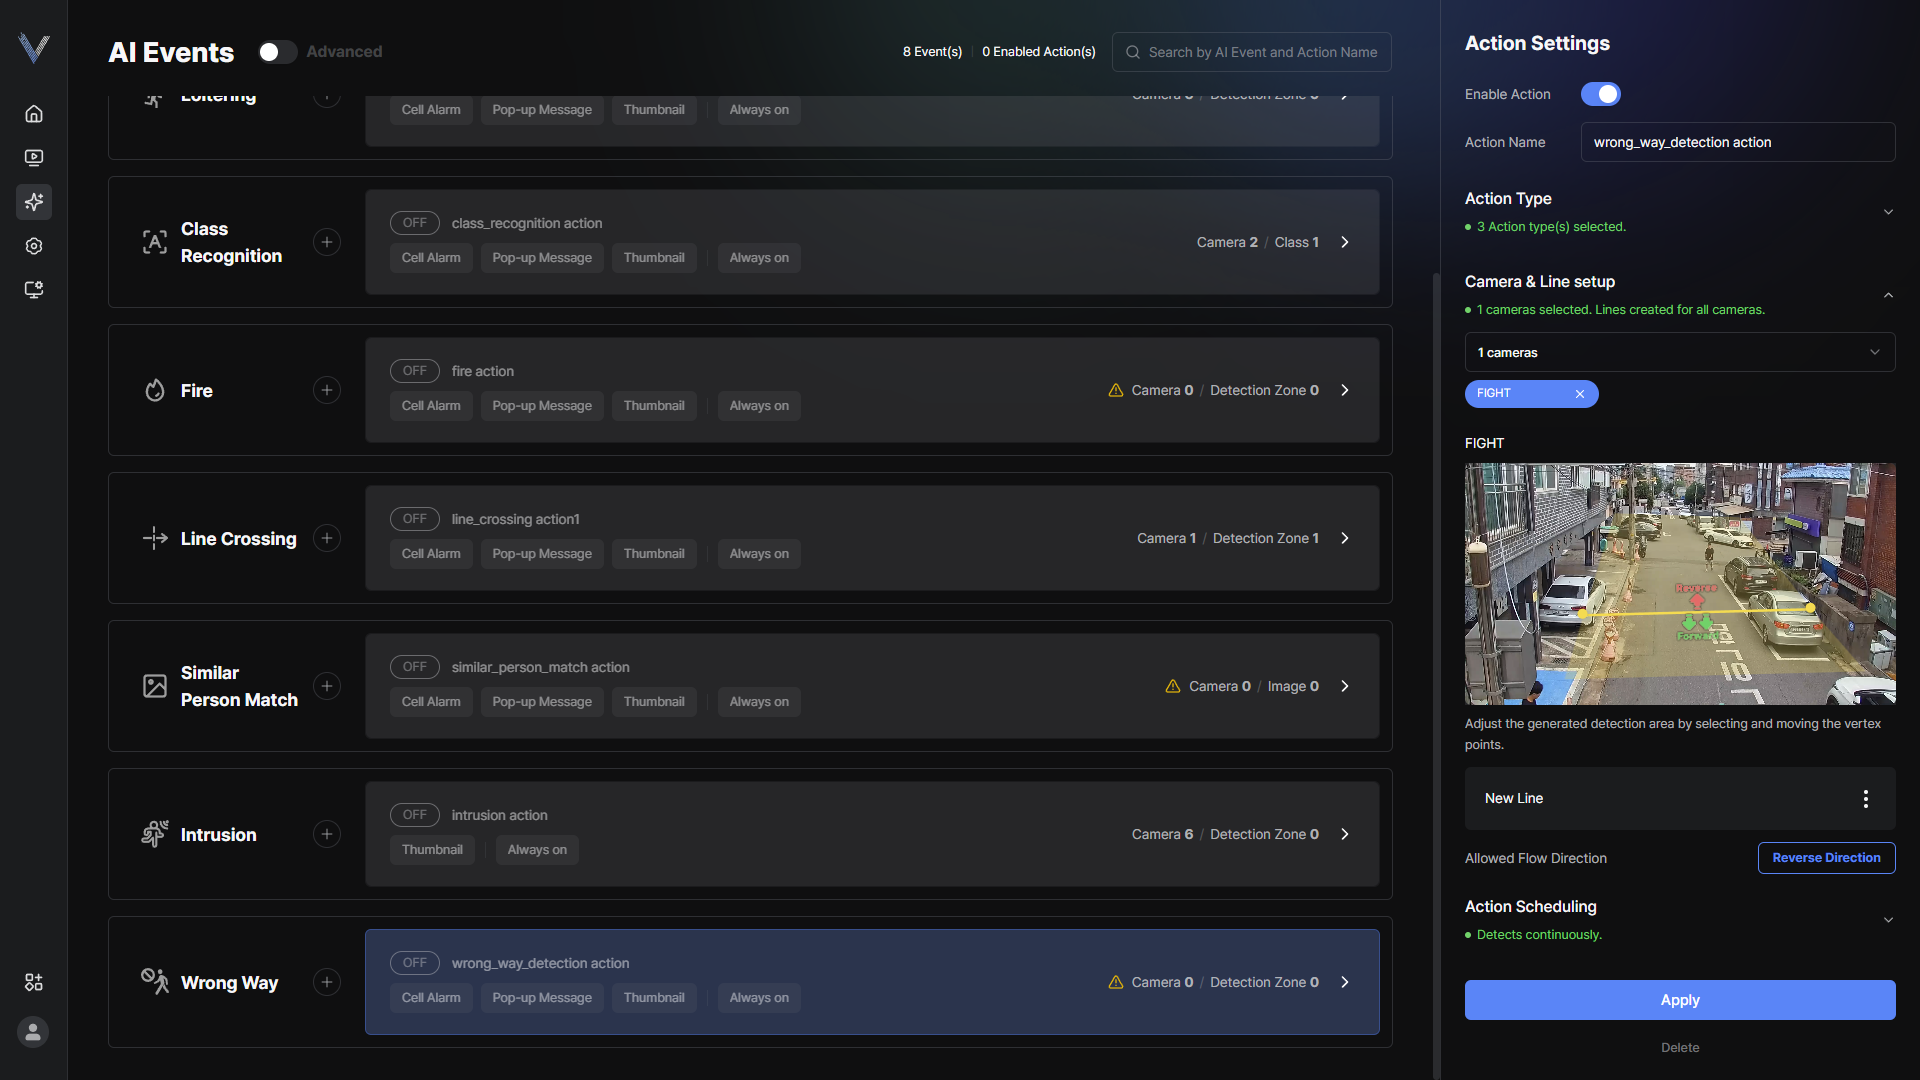 Figure 5-23. Wrong-way Movement Reference Line
 - Drag the vertices of the automatically created detection zone to adjust its range
- Check the [Allowed direction] and click [Reverse direction] if needed
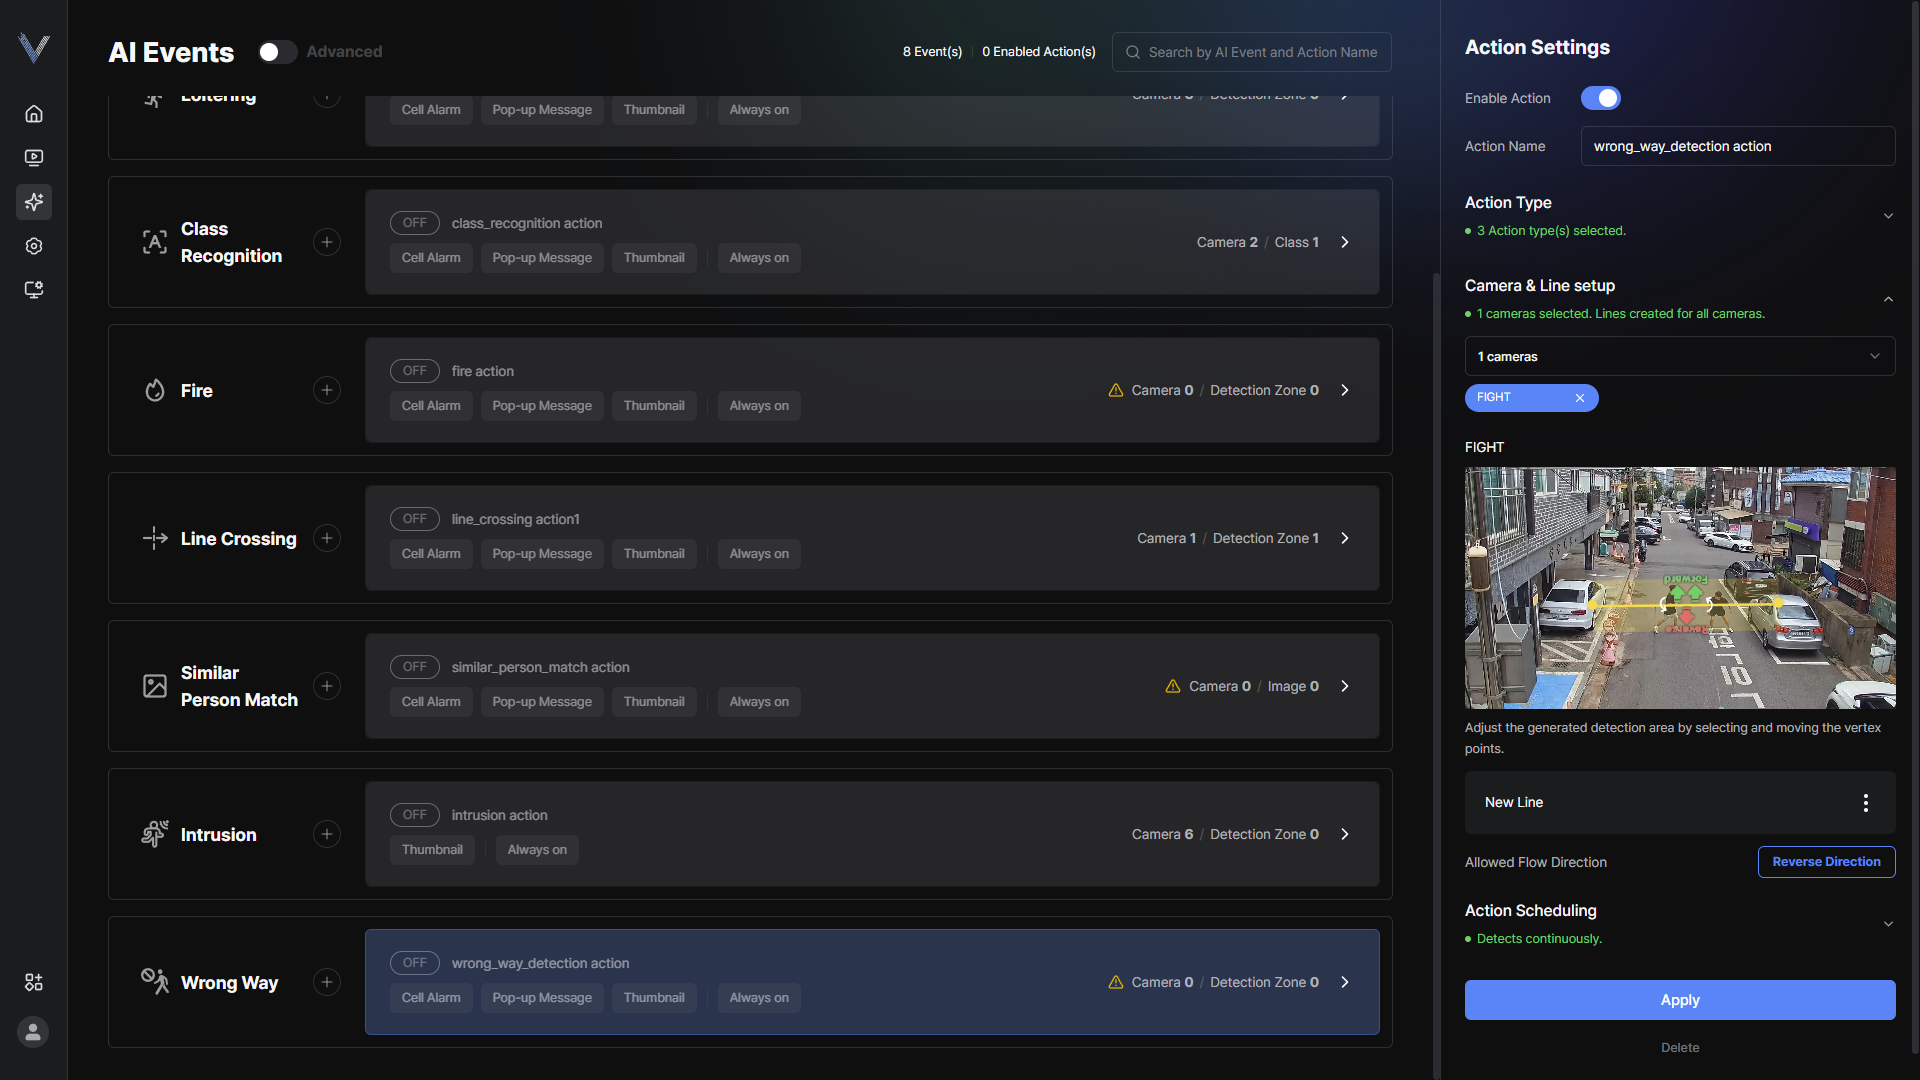 Figure 5-24. Allowed Direction of Travel
 - Click [Apply]
Configuring AI Services
- In the main menu, click [] > [AI Service]The AI Service screen appears.
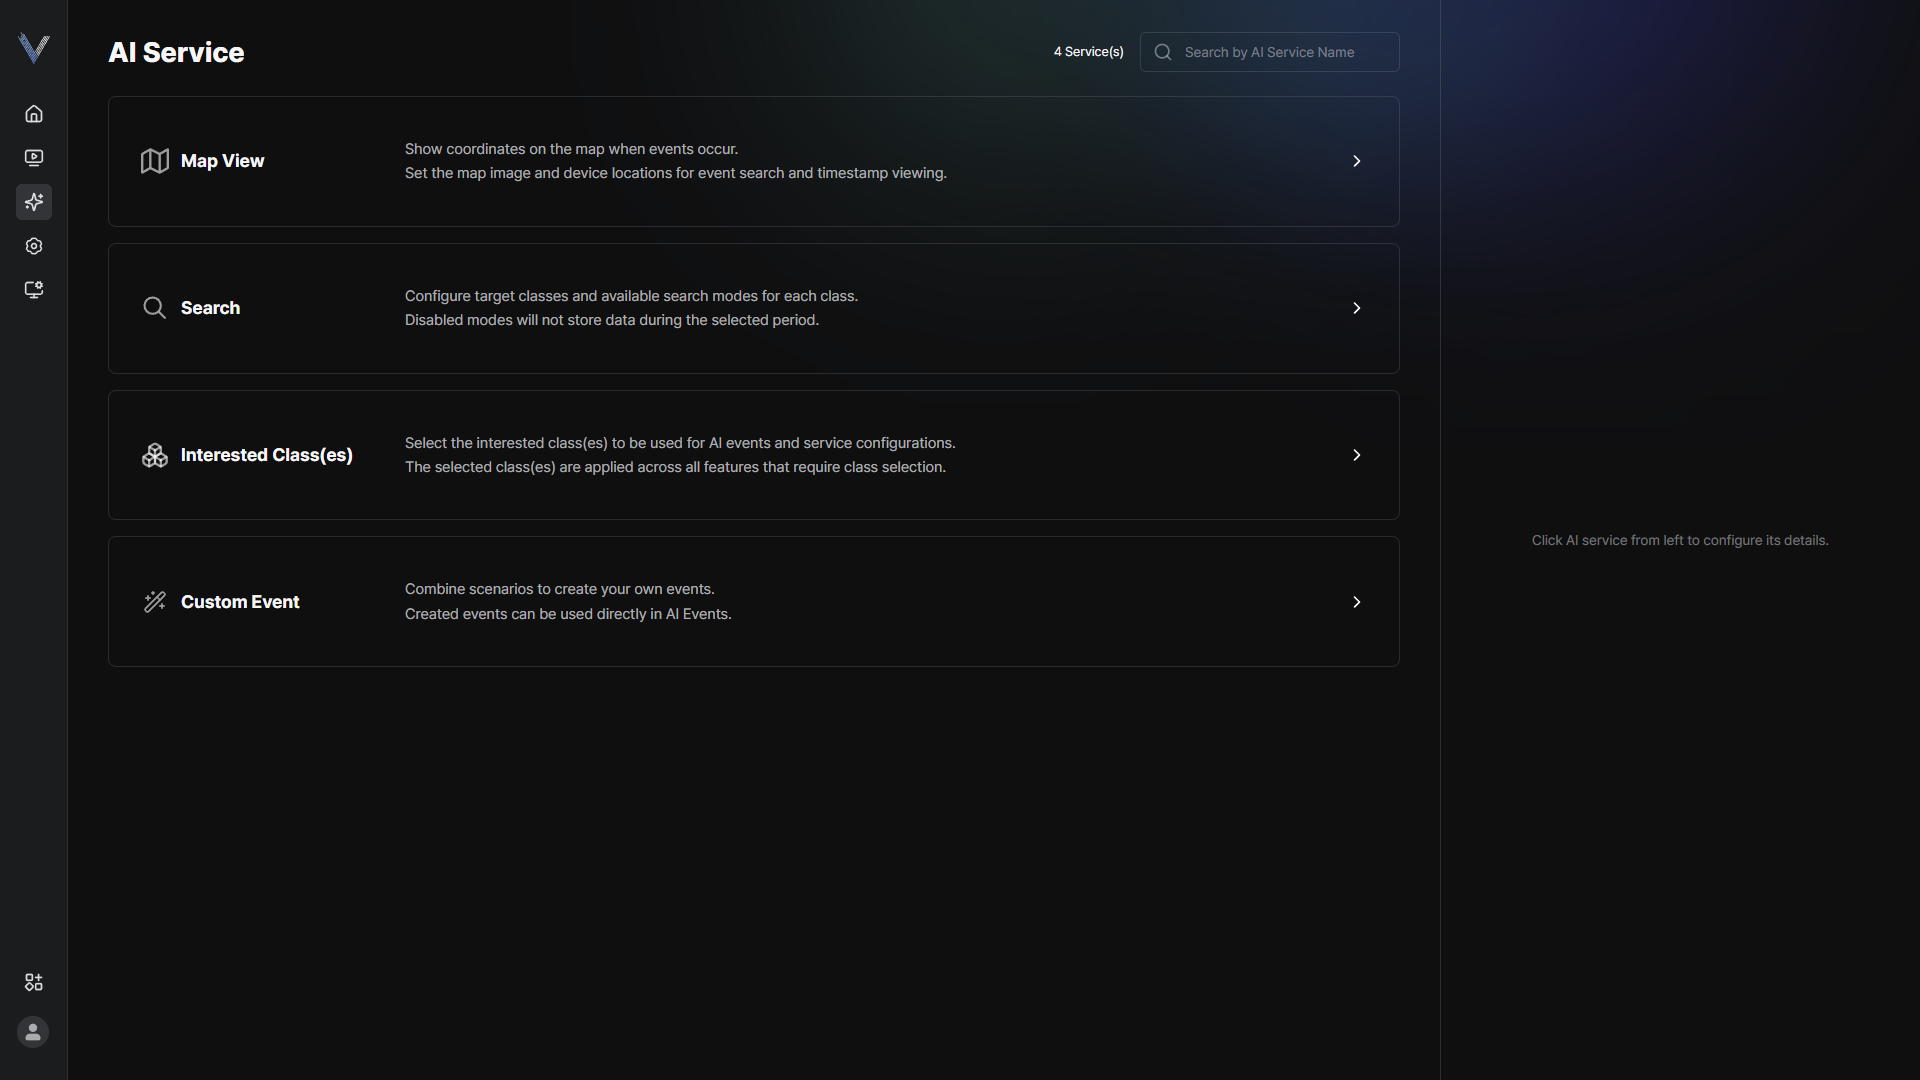 Figure 5-12. AI Service Screen
 - Click the item you wantThe service is configured.
Configuring the Map View Service
Configure the map view service.
- In the main menu, click [] > [AI Service] > [Map view]
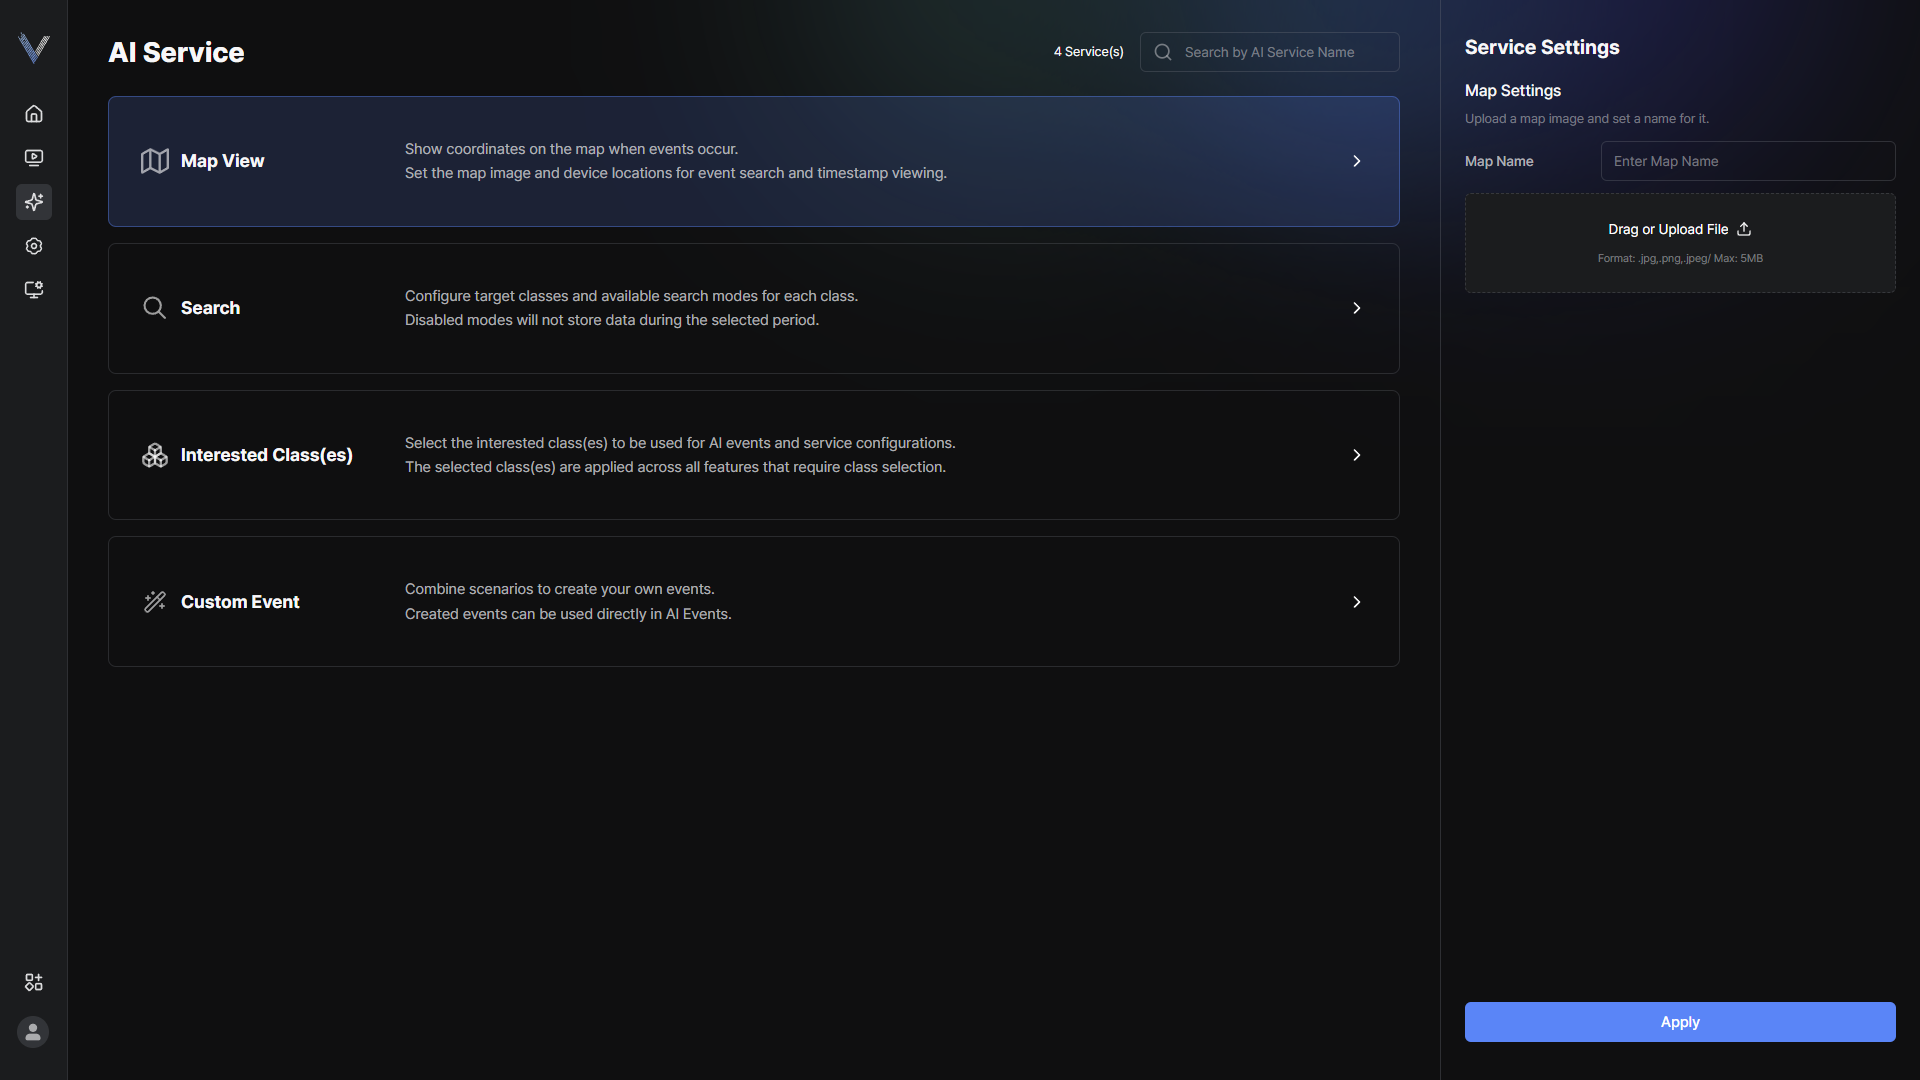 Figure 5-13. Map View Service Settings
 - Select [Drag or Upload File].
- Select the file and click [Open]
- Drag the camera onto the mapClick on the map with the mouse to set the camera position.
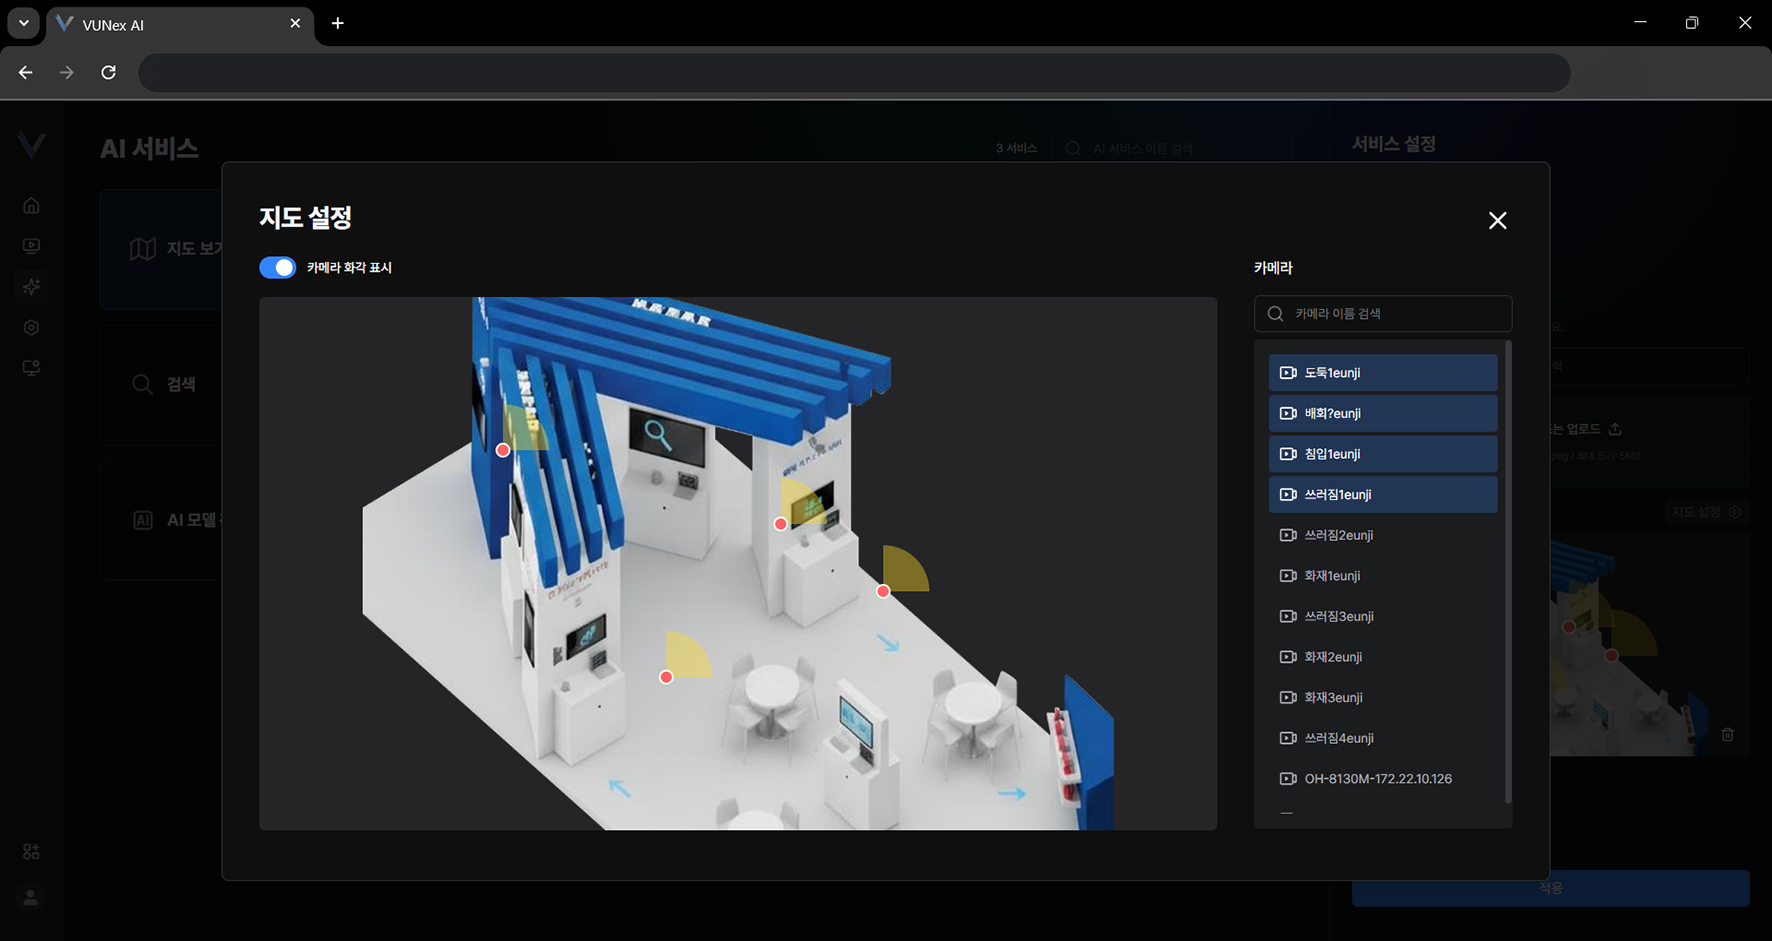 Figure 5-14. Setting Camera Positions on the Map
 - Click [Toggle]The camera field of view is shown.
- Drag the camera field of view left or right
- Click [X]
 Figure 5-15. Map View Setup Complete
 - Click [Apply]The service is configured.
Configuring the Search Service
Configure the search service.
- In the main menu, click [] > [AI Service] > [Search]
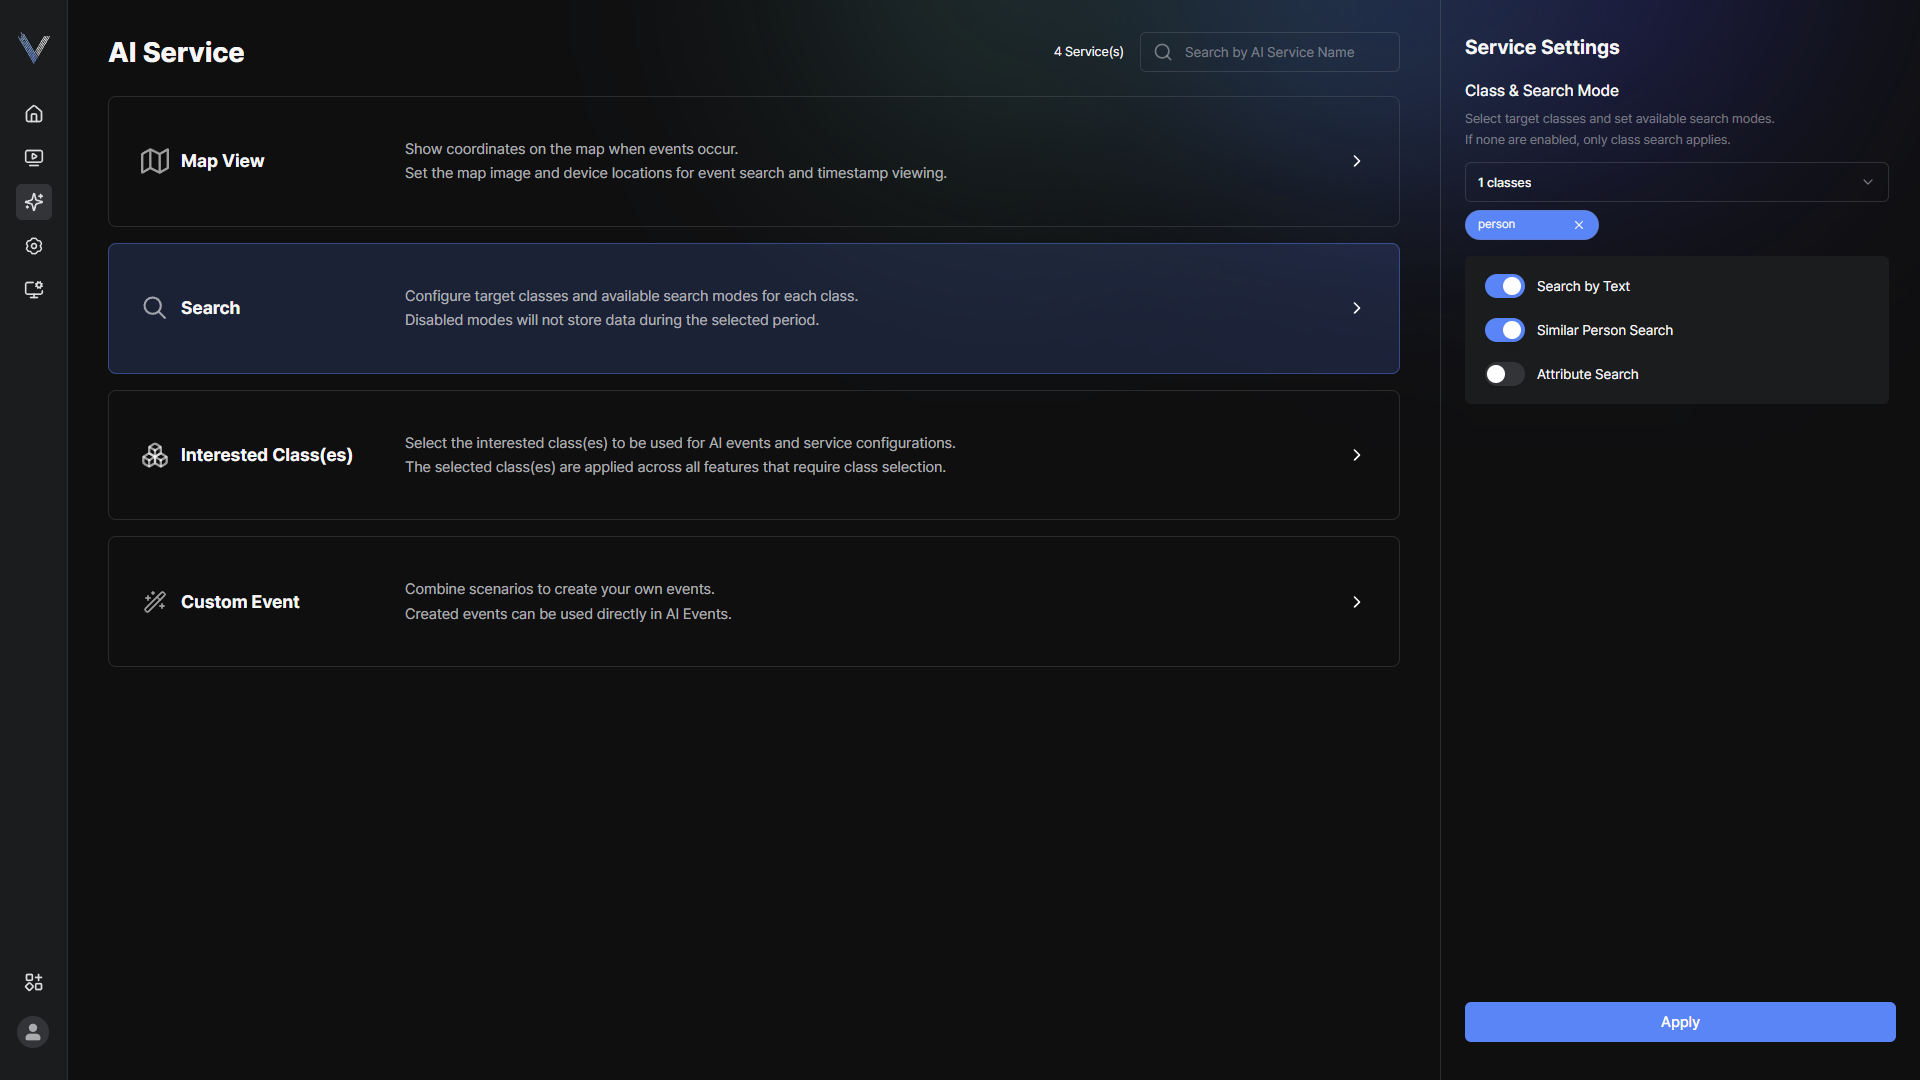 Figure 5-16. Search Service Settings
 - Configure the item you want
- Click [Apply]The service is configured.
Setting Interested Classes
Choose in advance the classes to use in AI Event and AI Service settings.
- In the main menu, click [] > [AI Service] > [Interested class]
- Select the classes to use in [All classes]You can find a class by typing its name in the search box. Selected classes are collected under [My interested classes].
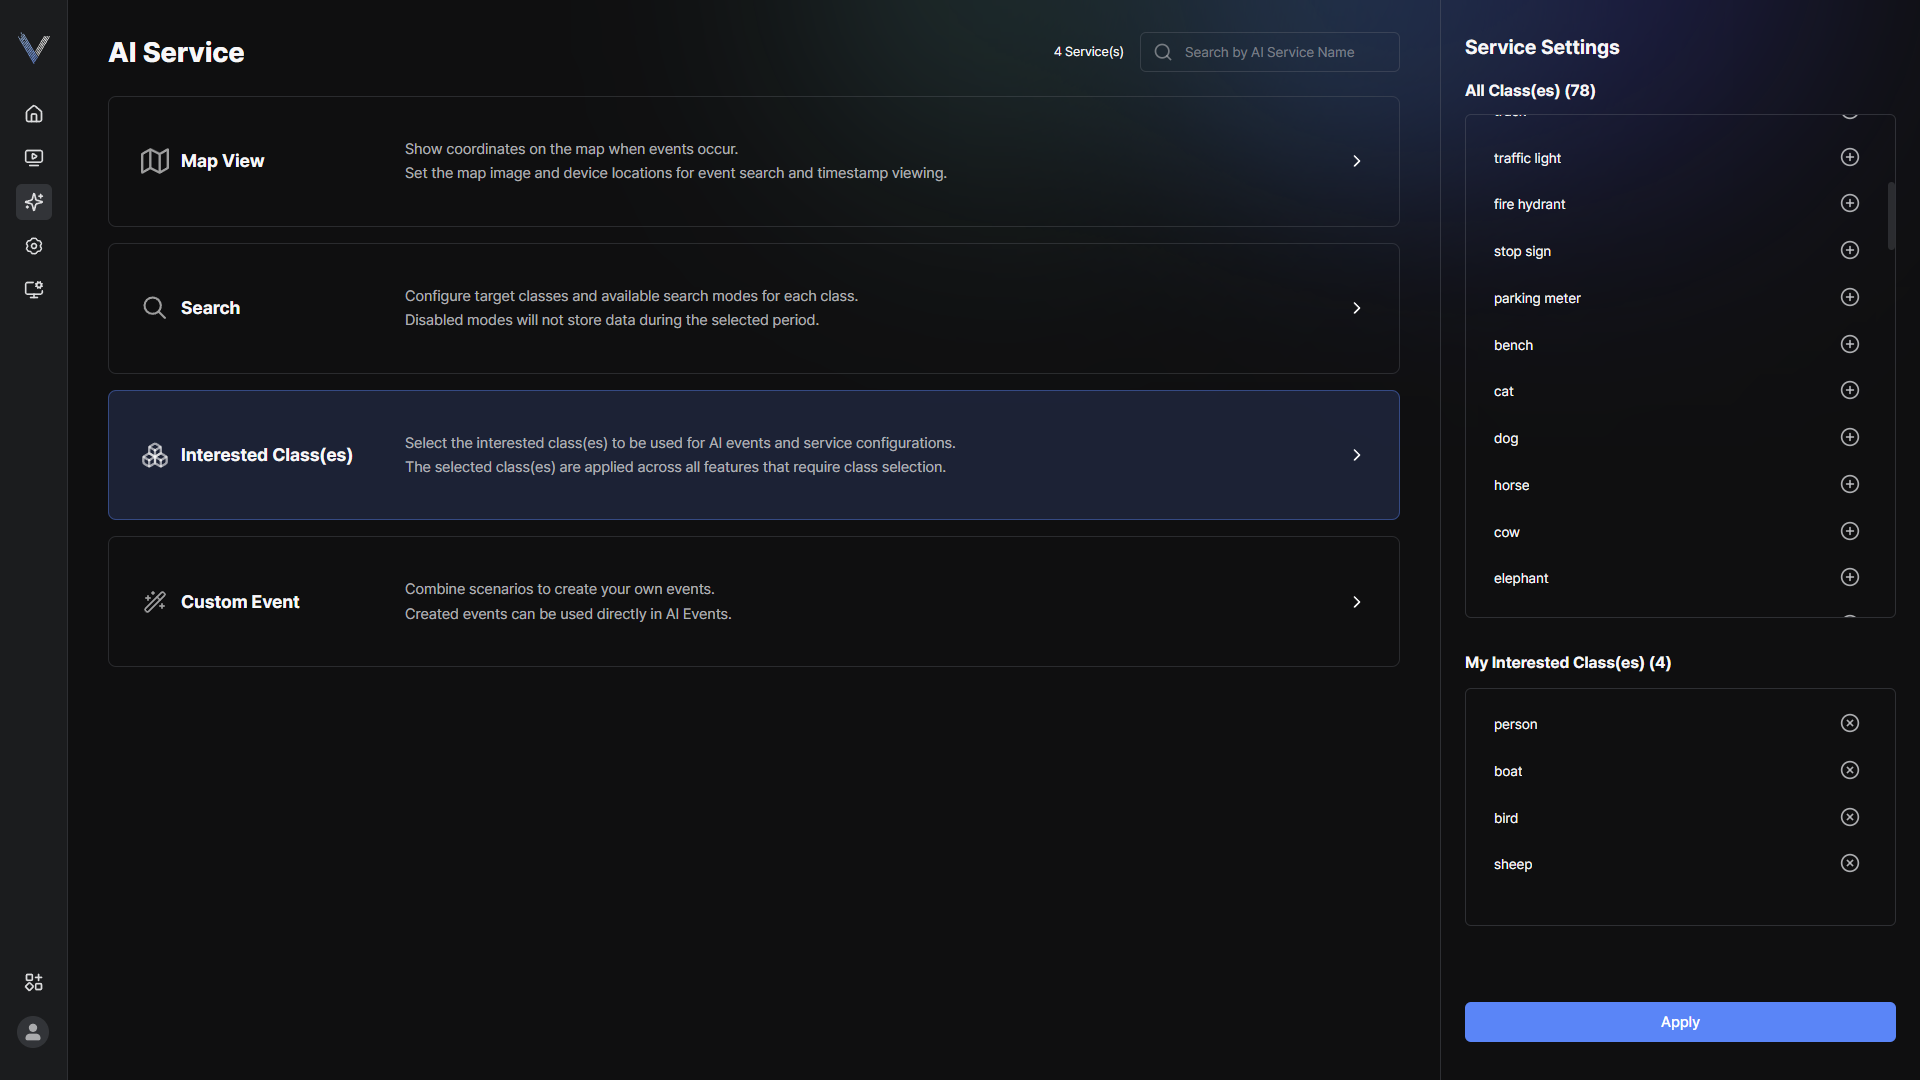 Figure 5-25. Interested Class Settings
 - Click [Apply]
Creating a Custom Event
Combine scenarios to build an event with the conditions you want.
- In the main menu, click [] > [AI Service] > [Custom event]
- Select the model to use in [Detection model]
- Click [Create event]
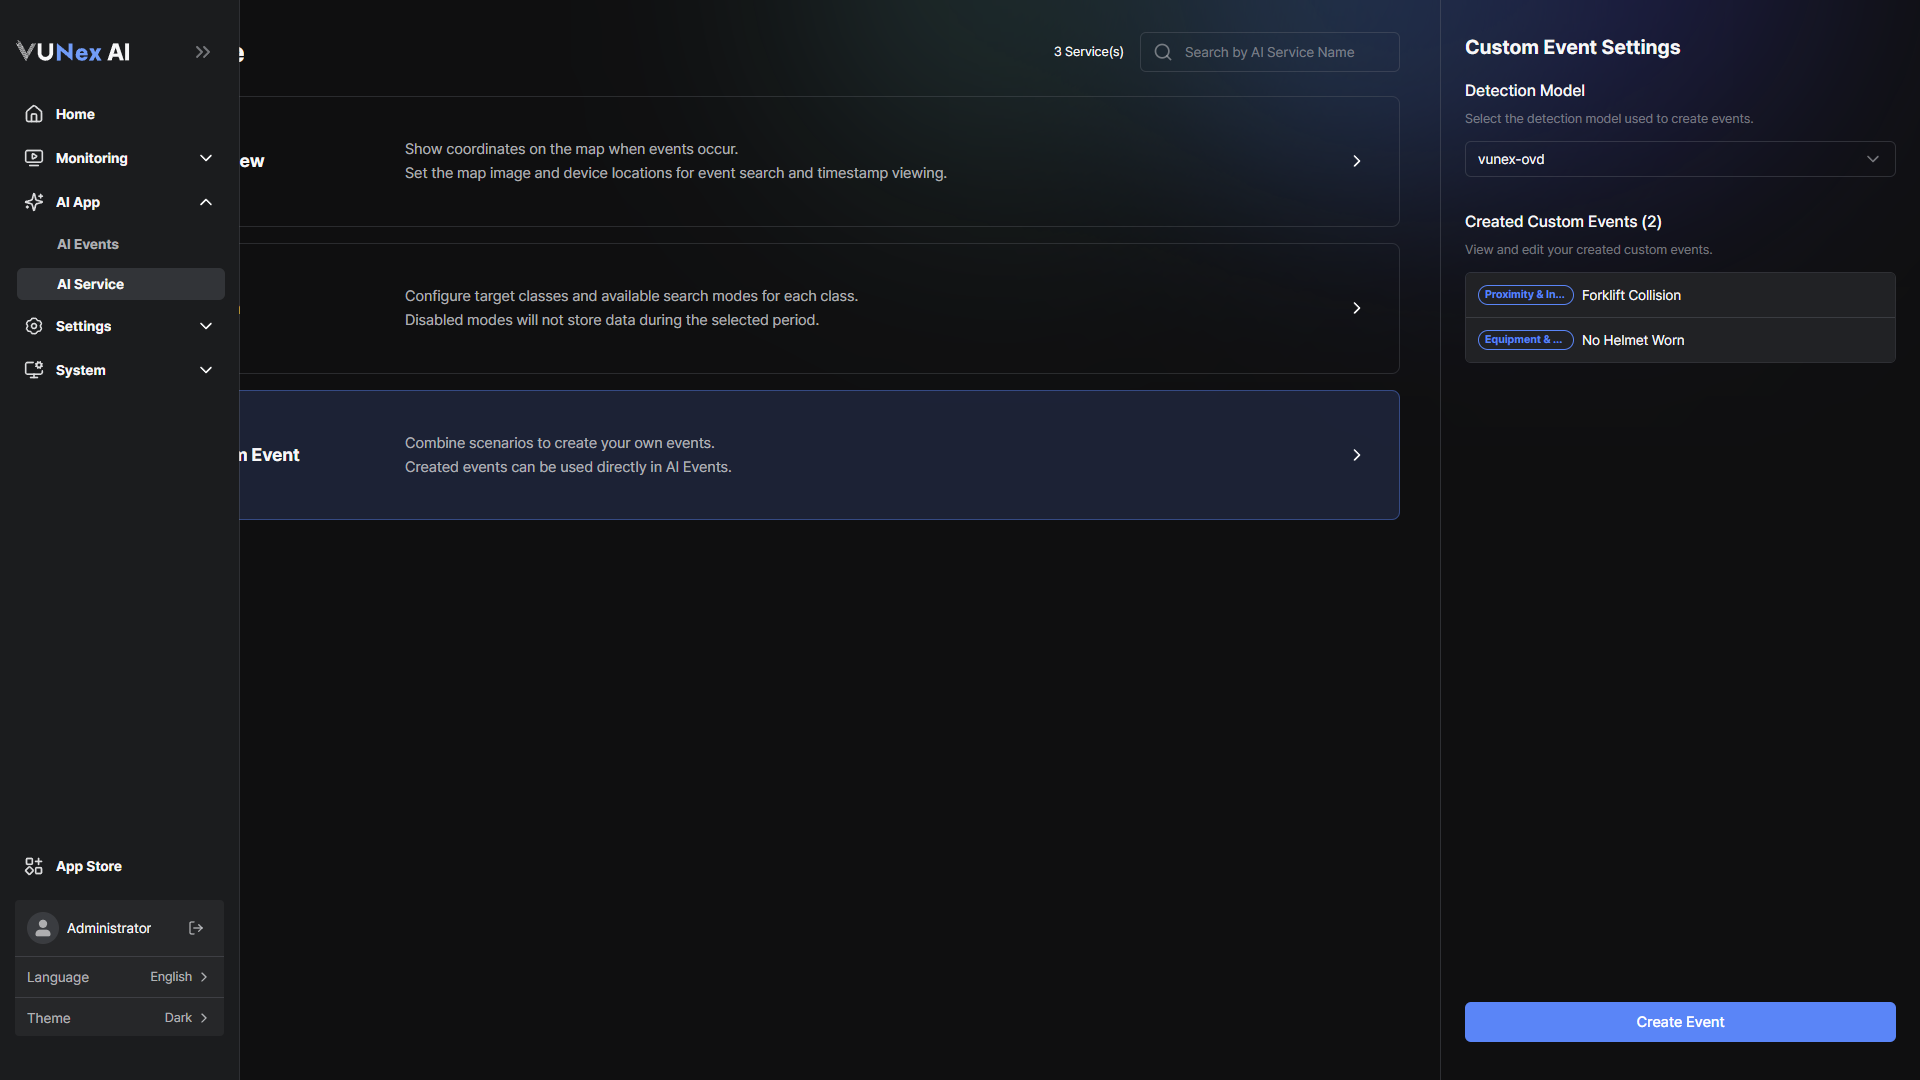 Figure 5-26. Custom Event List
 - Enter the [Event name] and select the [Camera]Only Korean characters, letters, numbers and spaces can be used in the event name.
- Select a scenario in [Step 1. Scenario logic]You can choose [Proximity & Interaction], [Absence & Missing], [Count & Grouping], [Loitering & Dwell] or [Equipment & Wearing].
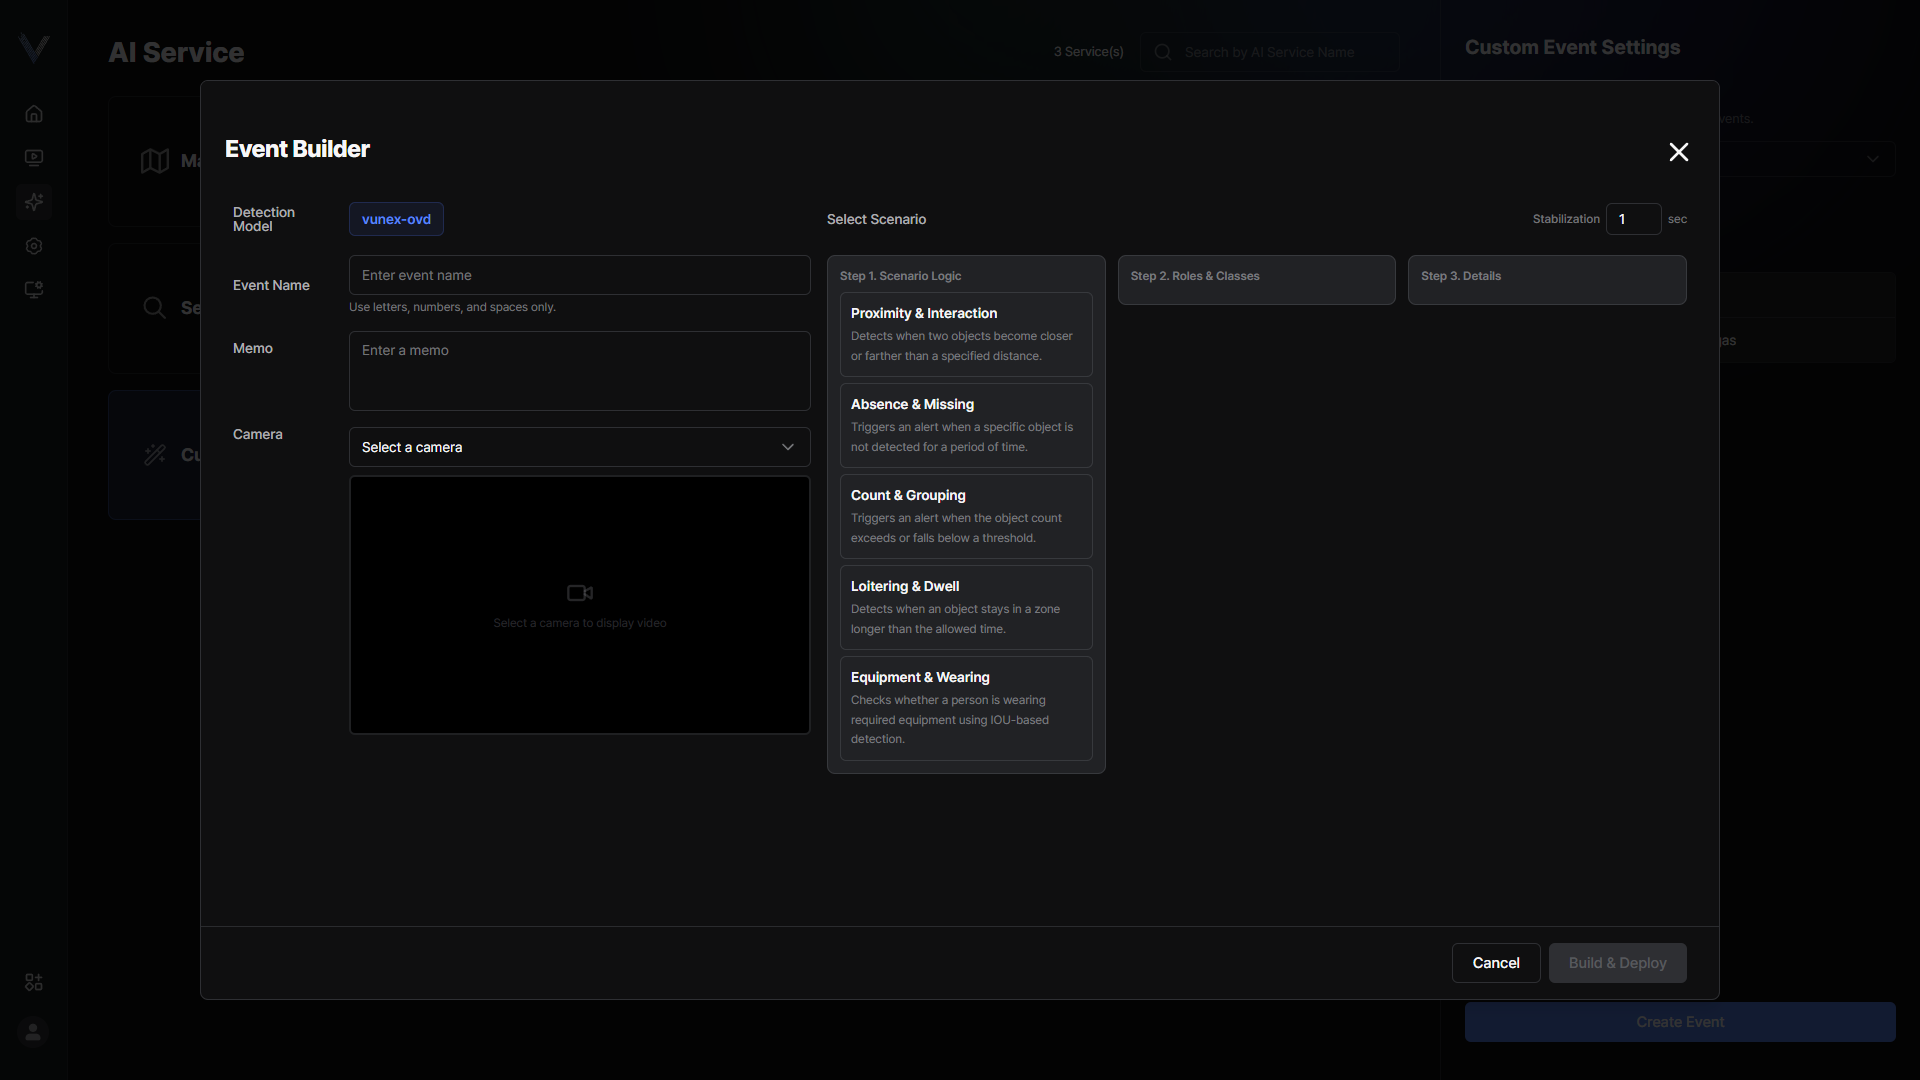 Figure 5-27. Event Builder Scenario
 - Select the target classes in [Step 2. Roles and classes]
- Set the evaluation conditions in [Step 3. Detailed conditions]Depending on the scenario, enter the distance, absence duration, threshold count, dwell duration, IOU threshold and stabilization time.
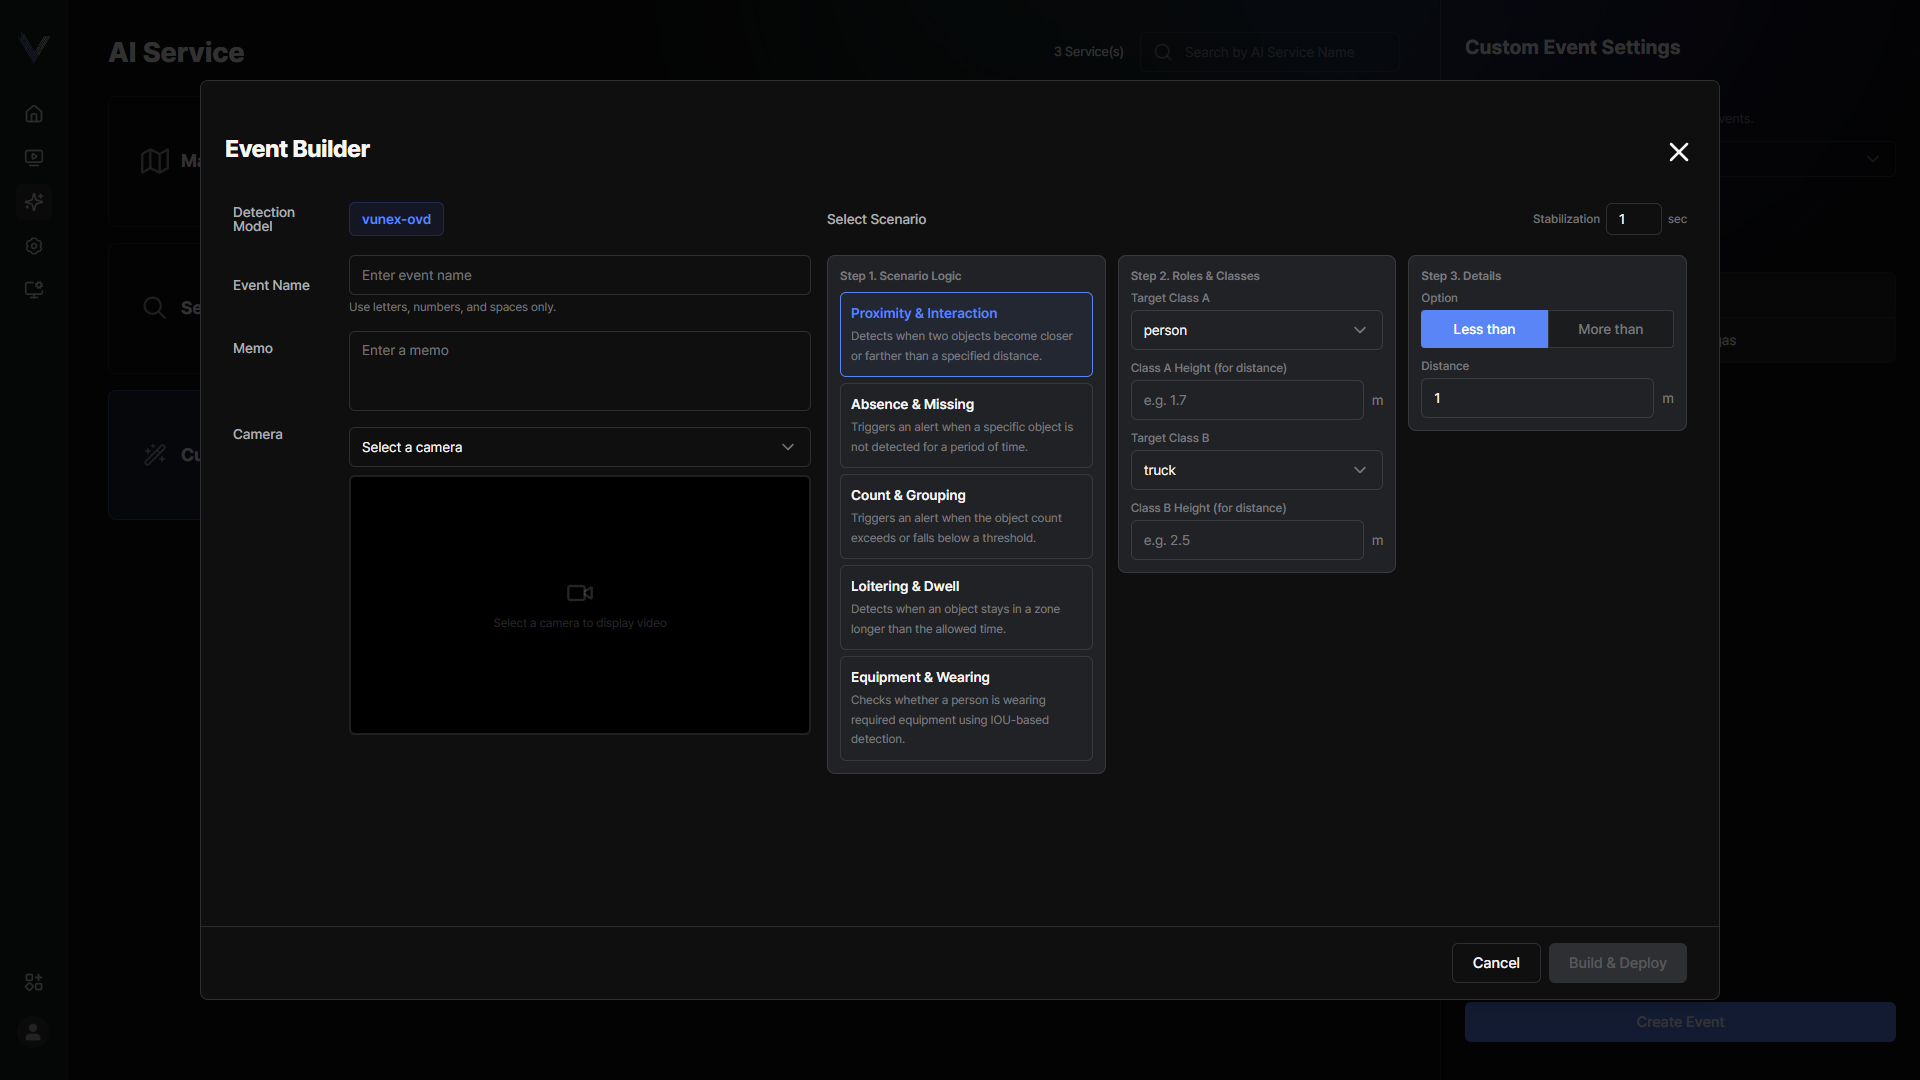 Figure 5-28. Event Builder Detailed Conditions
 - If needed, define an ROI on the videoClick to define the area, and right-click a vertex to remove it.
- Click [Start simulation] to check the behavior
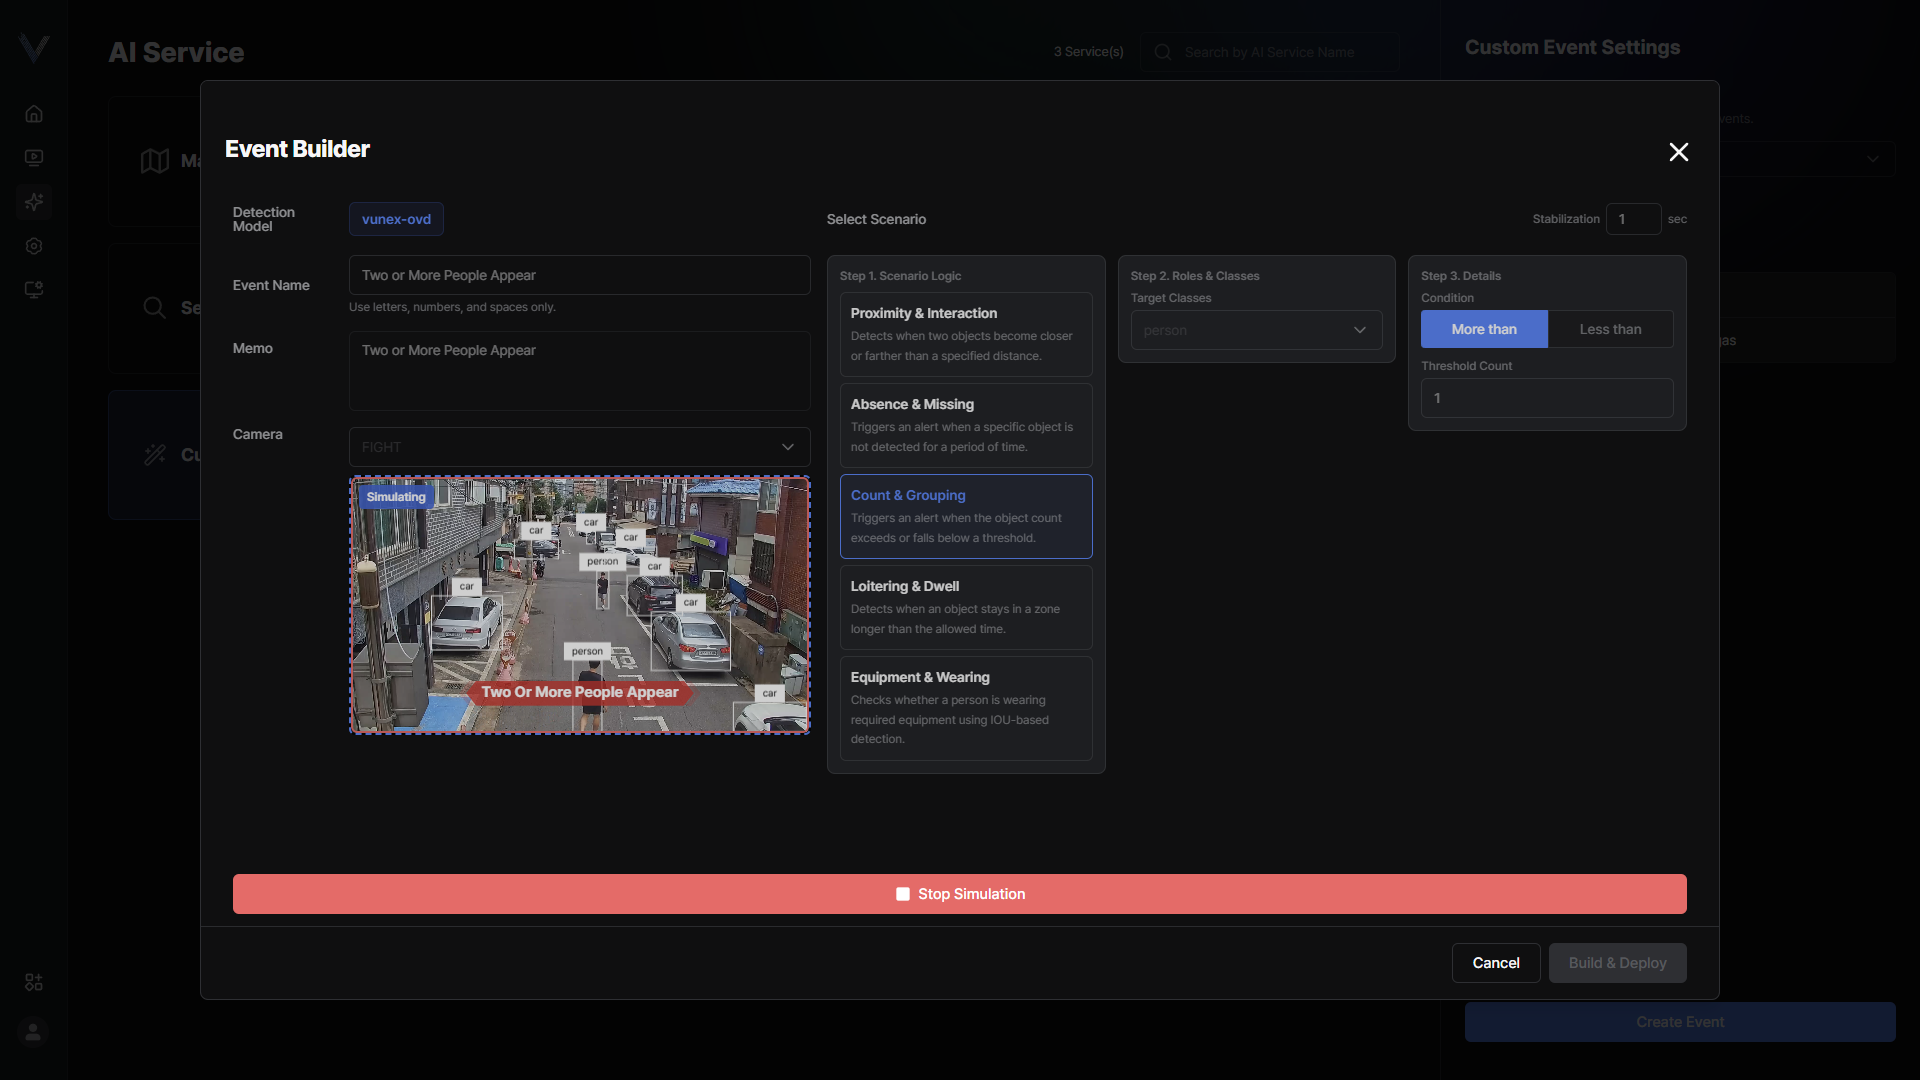 Figure 5-29. Custom Event Simulation
 - Click [Build & Deploy]