02
Live Monitoring
Check real-time video and menu.
Viewing Live Video
Check the live video.
- In the main menu, click [] > [AI Live View]The live video screen appears.
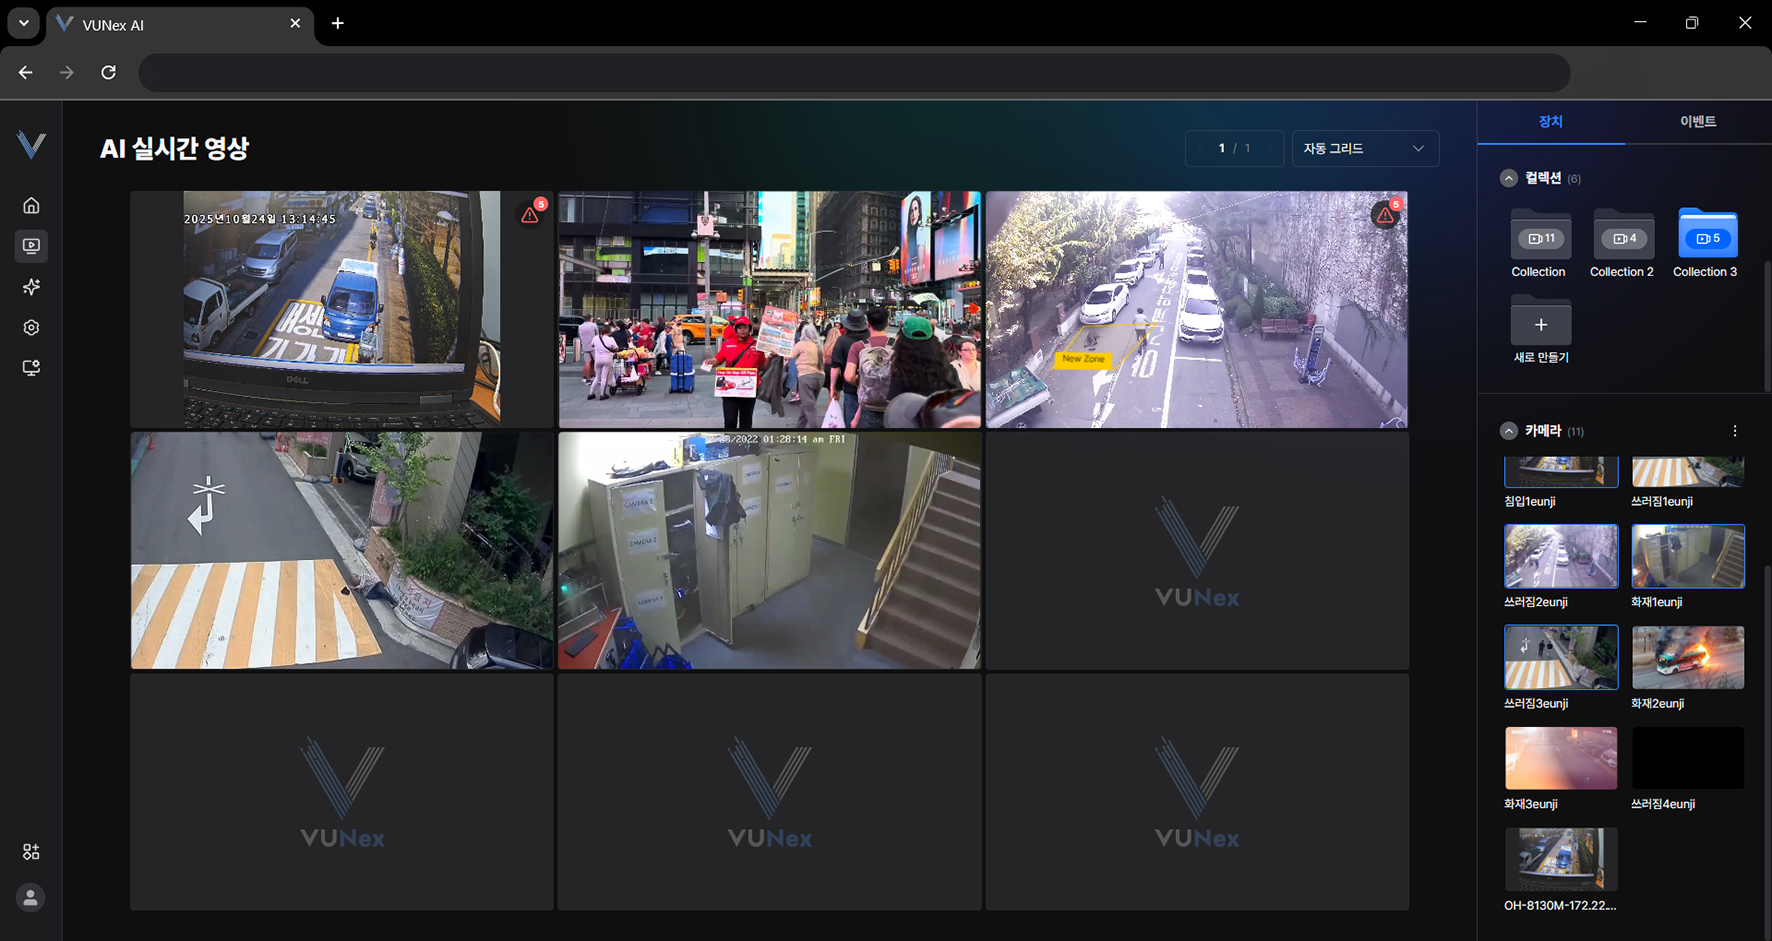 Figure 2-1. Live Video Screen
 - Select a video and double-click itThe video is maximized.
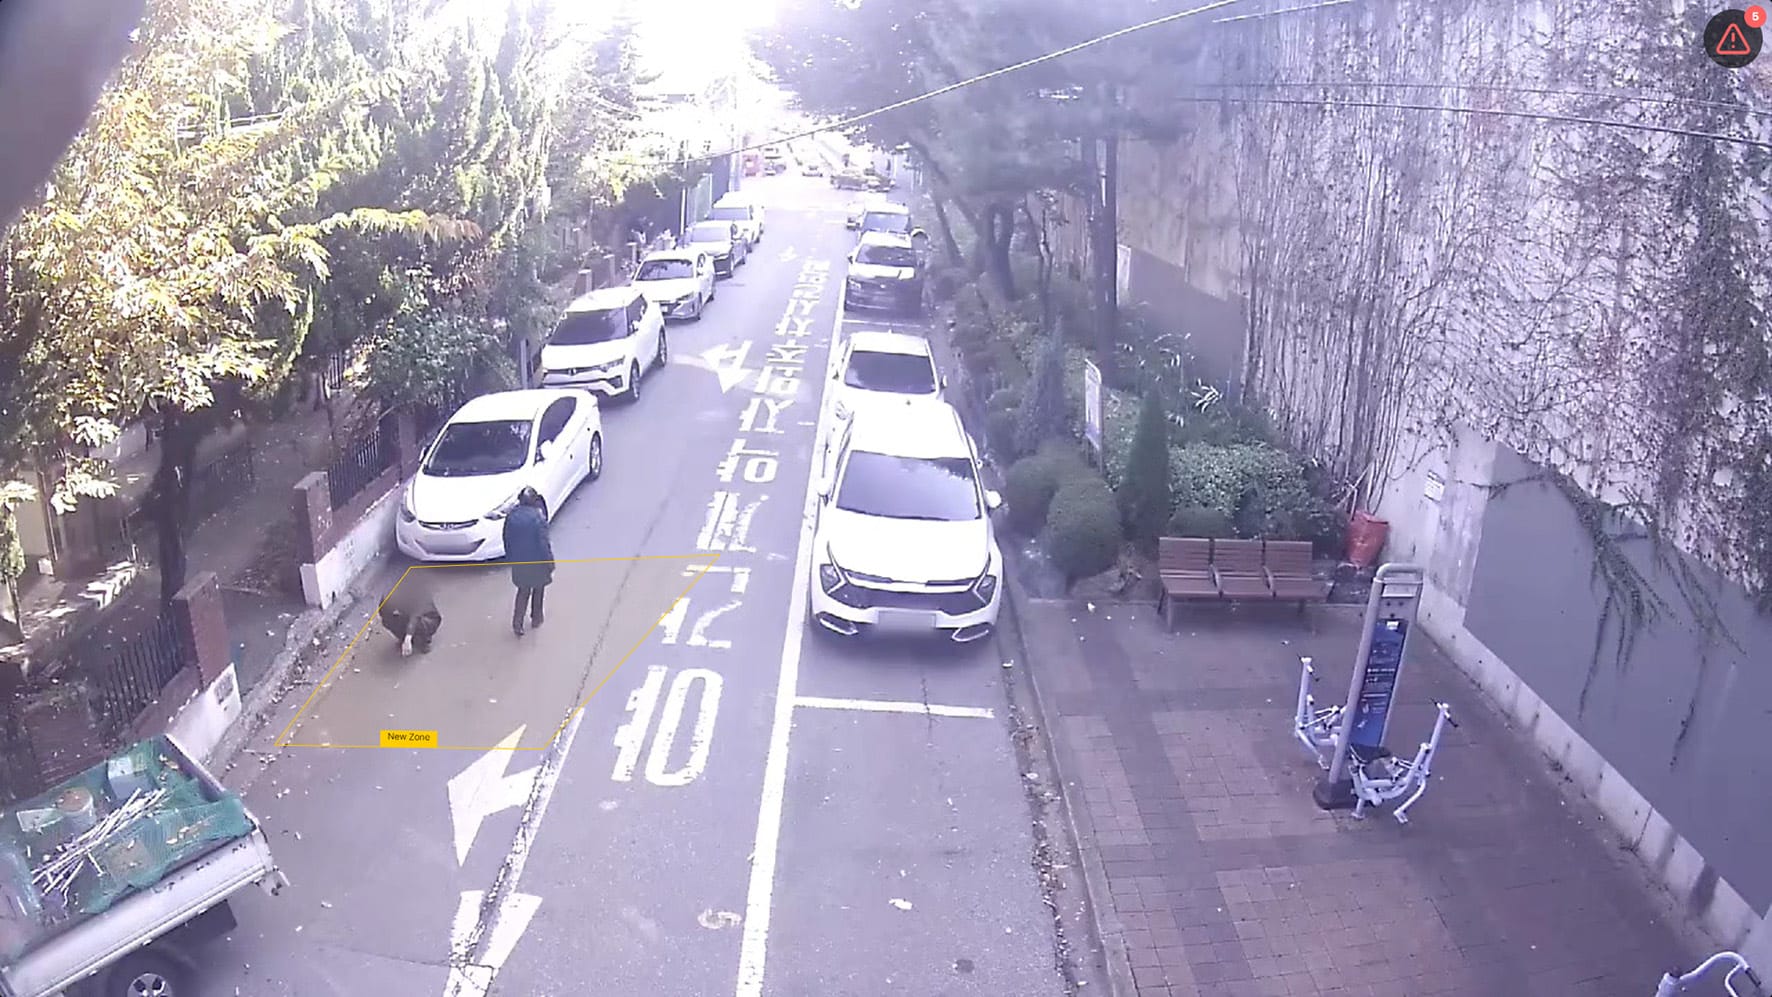 Figure 2-2. Maximizing the Video
 - Check the live video
Viewing Live Video Options
Check the live video options.
- In the main menu, click [] > [AI Live View]The live video screen appears.
- Select a video and double-click itThe video is maximized.
- Right-click on the videoThe pop-up menu appears.
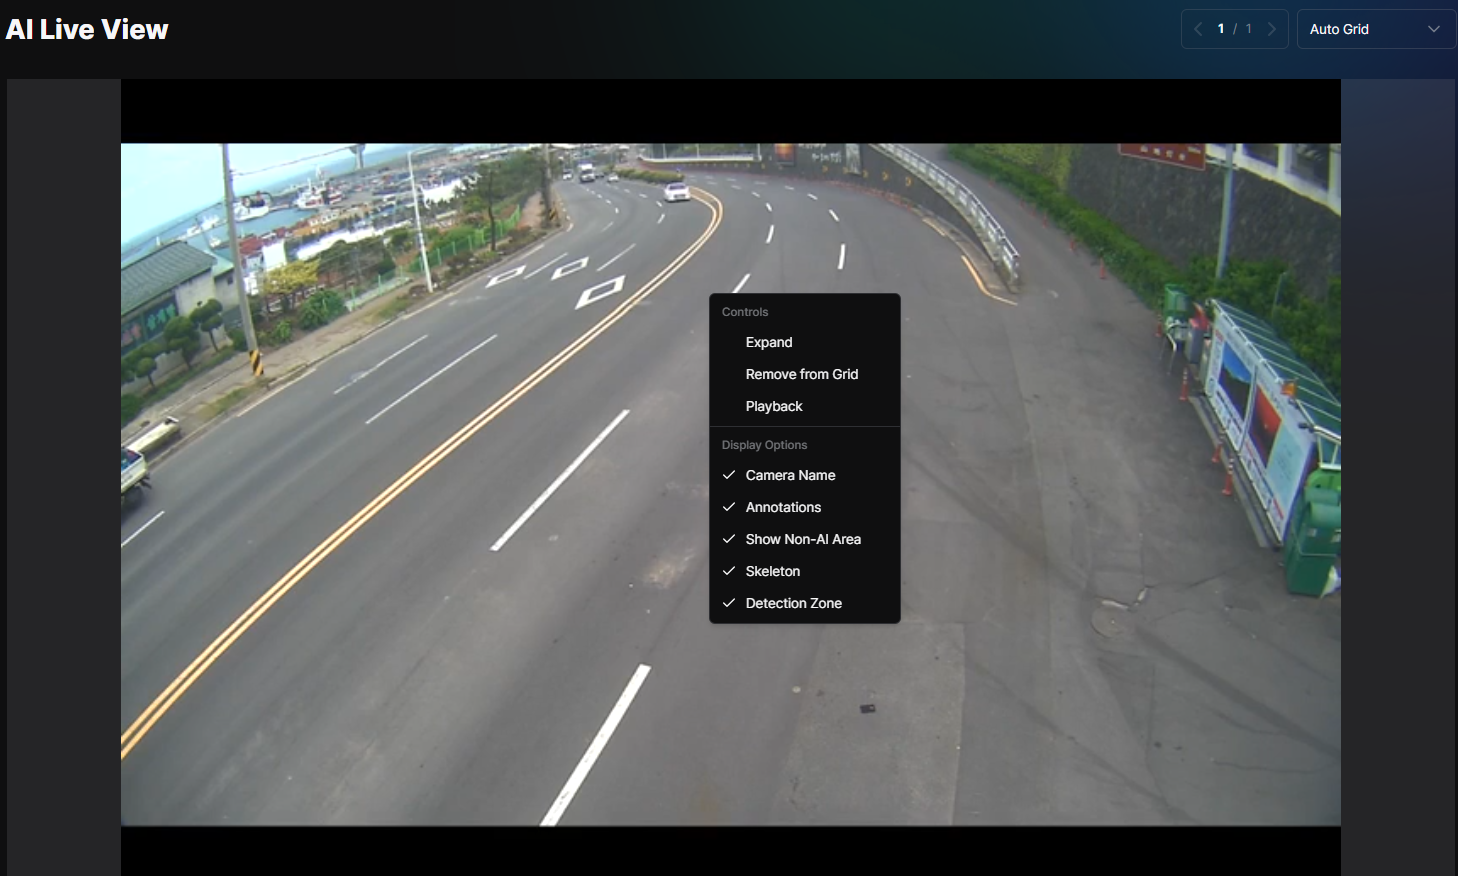 Figure 2-3. Live Video Pop-up Menu
 - Click the item you want
- [Maximize/Minimize]: Maximizes or minimizes the video.
- [Camera name]: shows the camera name on the video.
- [Show object box]: shows object boxes on the video.
- [Show Analysis Exclusion Area]: Displays the area excluded from analysis.
- [Skeleton]: shows skeletons on the video. (When the Pose model is applied)
- [Detection zone]: shows detection zones on the video.
Viewing the Latest Events in Live Video
While monitoring live video, check the latest events that occurred on that camera.
- In the main menu, click [] > [AI Live View]The live video screen appears.
- Select a video and double-click itThe video is maximized.
- Click []
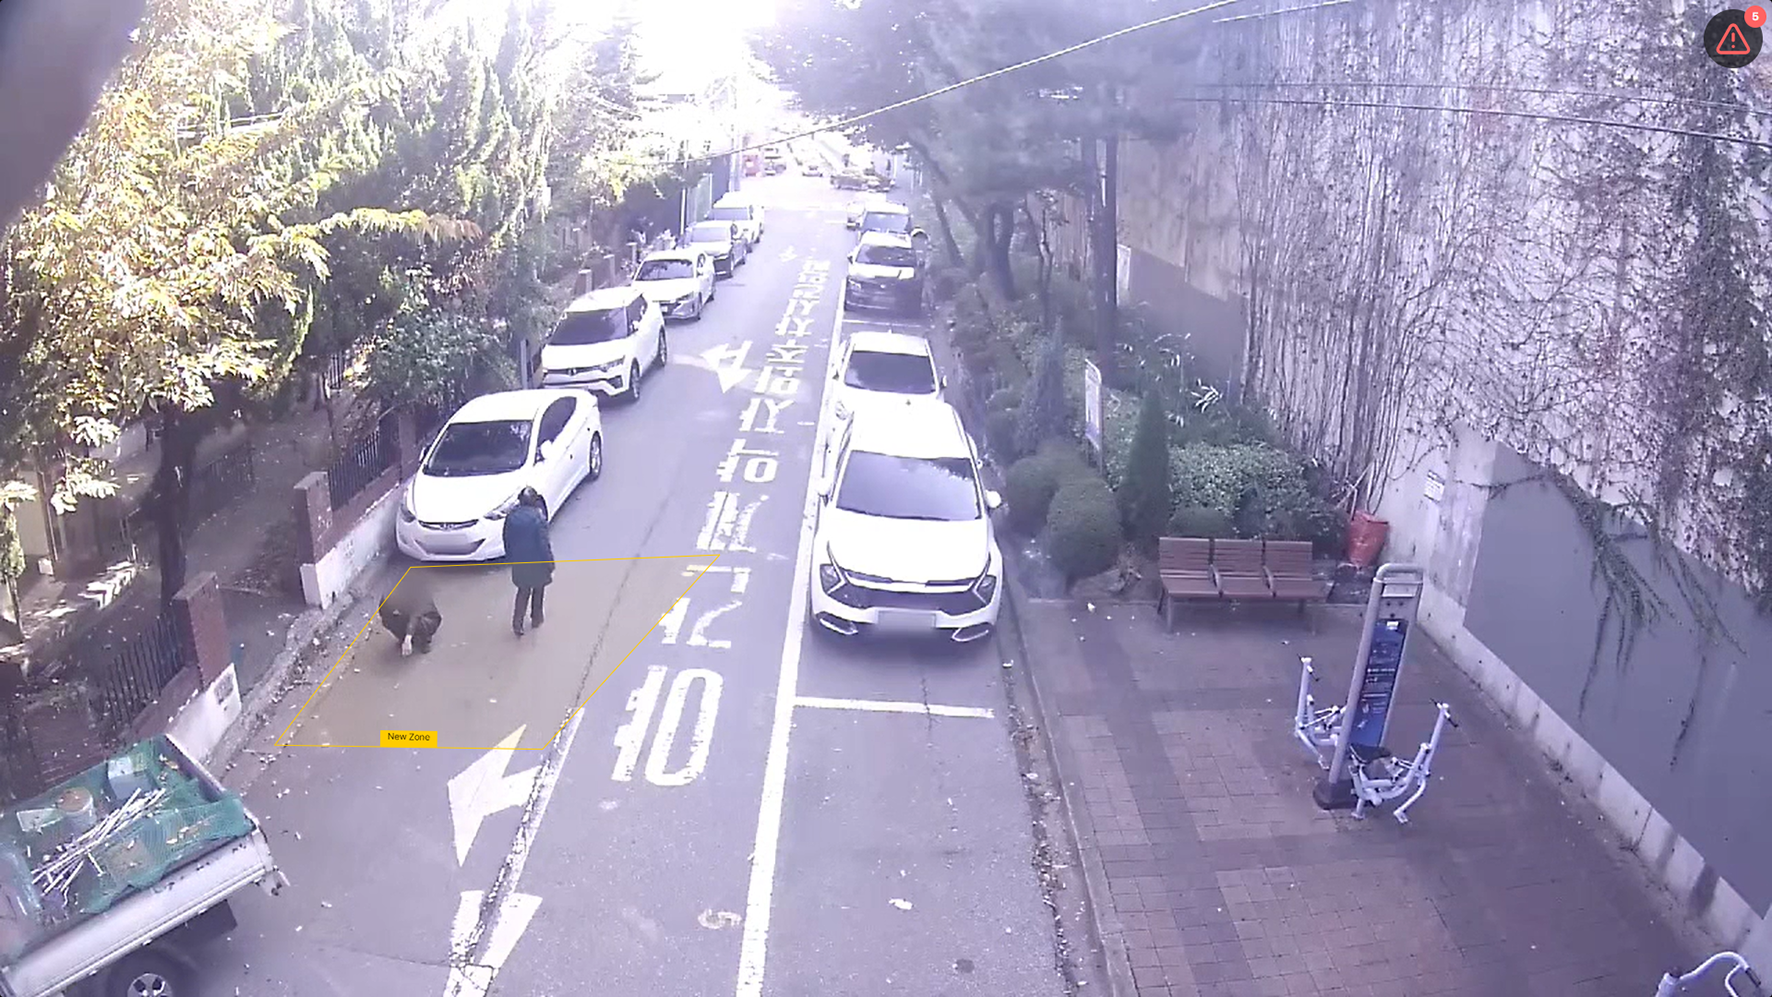 Figure 2-4. Latest Event List
 - Check the list of latest events that occurred on that camera
Viewing the Live Video Menu
The menu is shown.
- In the main menu, click [] > [AI Live View]The live video screen appears.
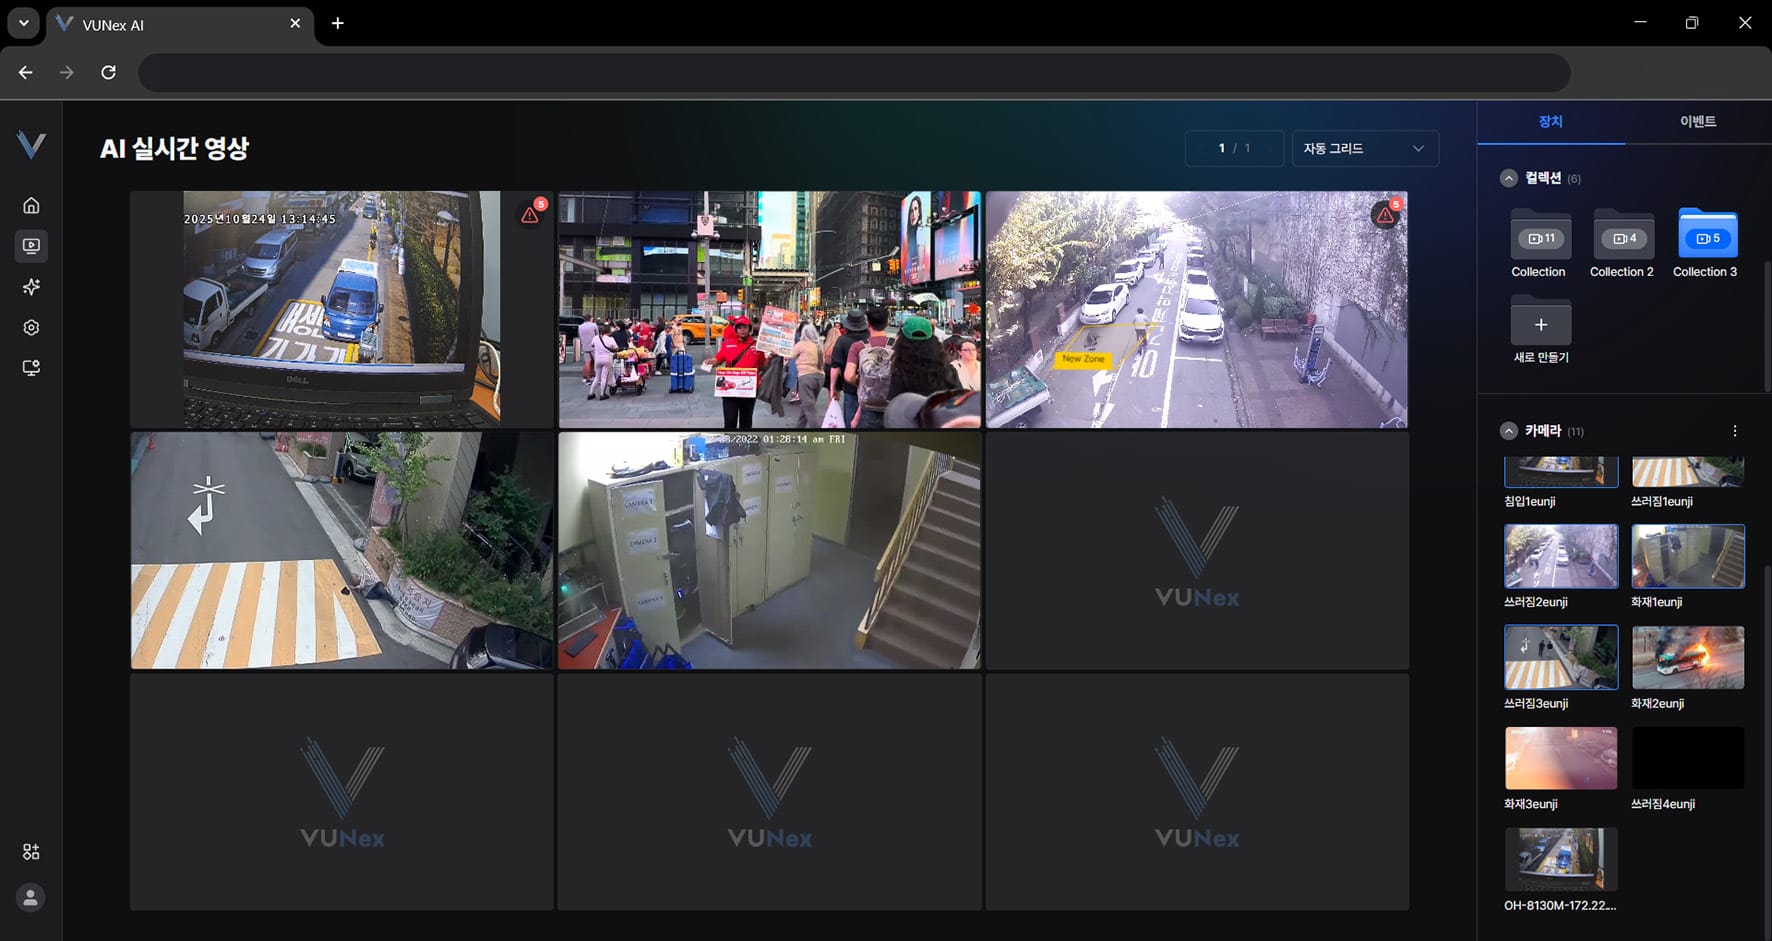 Figure 2-5. Live Video Menu
 - Click the item you want[Device]: check the registered cameras. [Event]: check the event list.
- Right-click on the videoThe pop-up menu appears.
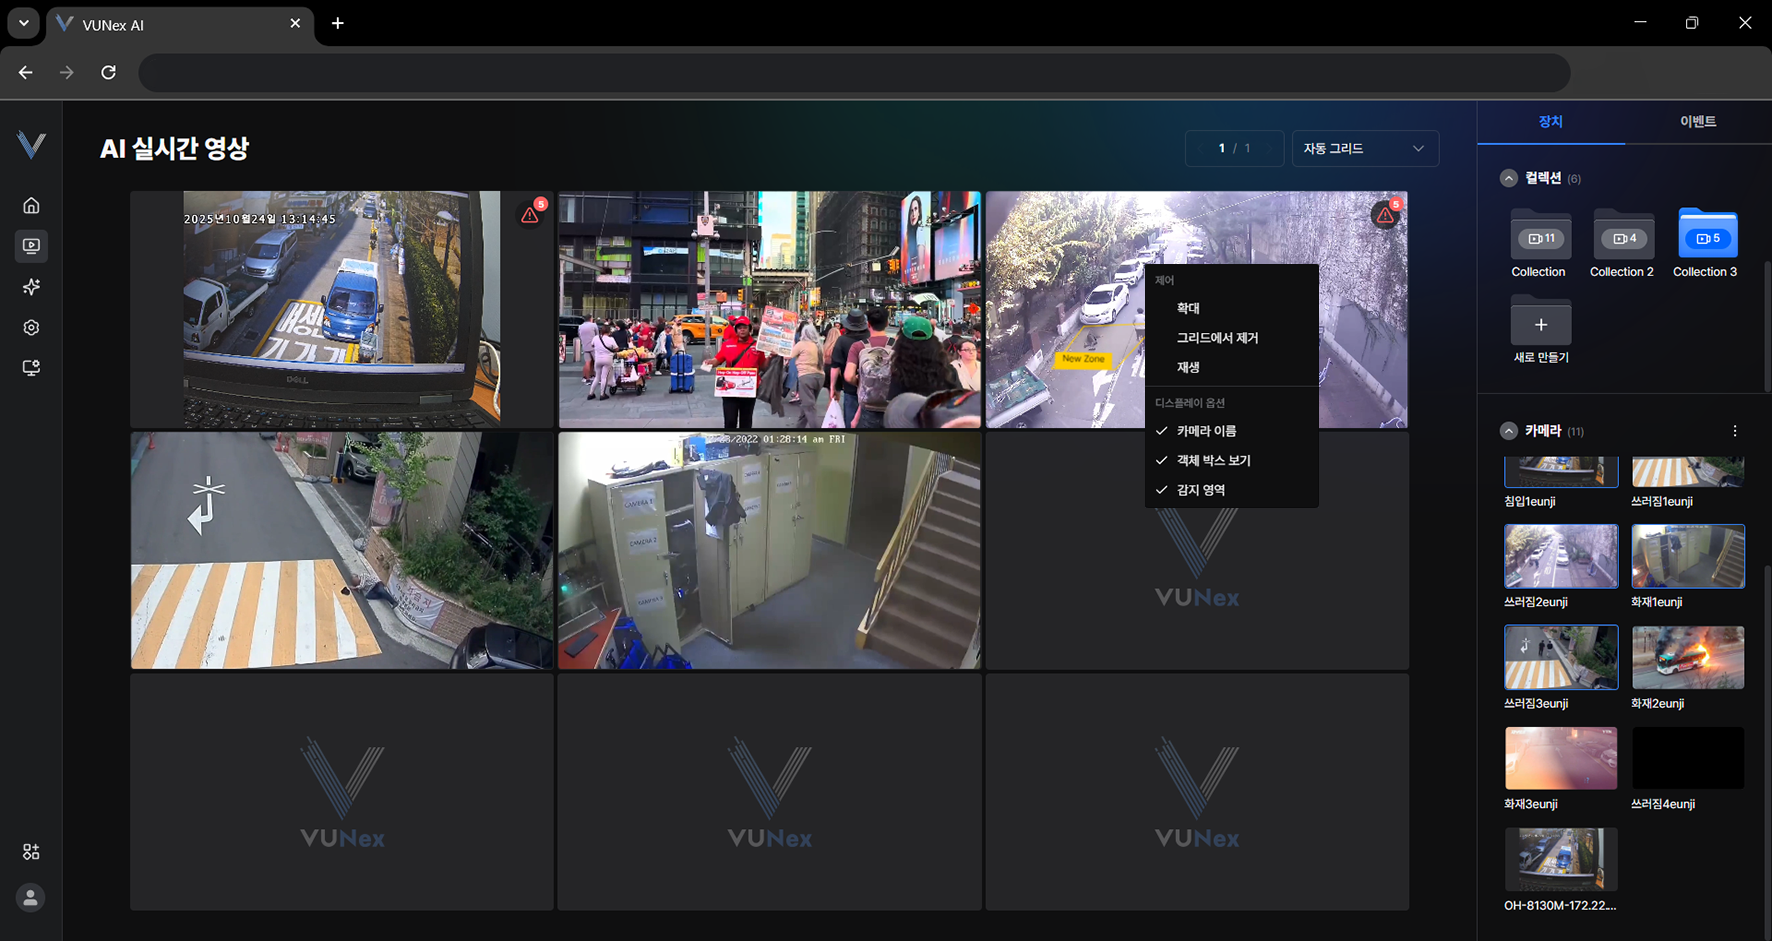 Figure 2-6. Video Cell Pop-up Menu
 - Click the item you want
- [Maximize/Minimize]: Maximizes or minimizes the video.
- [Remove from Grid]: Removes the video from the grid
- [Playback]: Starts playback.
- [Camera name]: shows the camera name on the video.
- [Show object box]: shows object boxes on the video.
- [Show Analysis Exclusion Area]: Displays the area excluded from analysis.
- [Skeleton]: shows skeletons on the video. (When the Pose model is applied)
- [Detection zone]: shows detection zones on the video.
Viewing the Camera List
Set how the camera list is shown.
- In the main menu, click [] > [AI Live View]The live video screen appears.
- Click [Device] > [Camera] > []
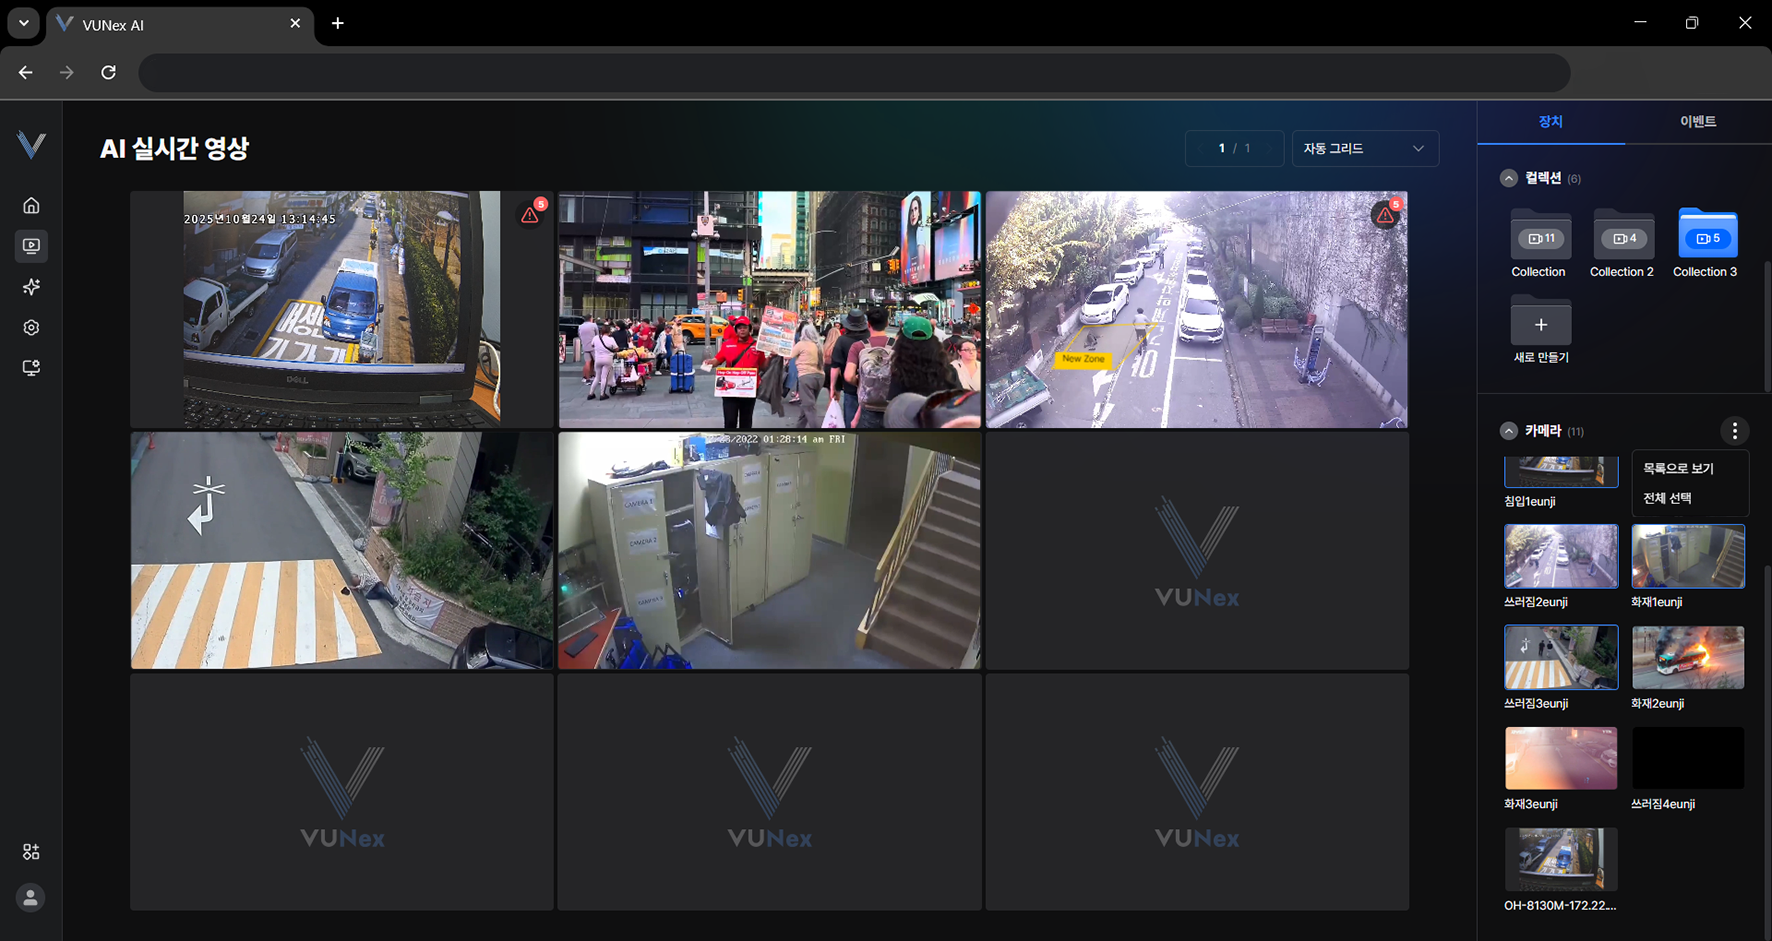 Figure 2-7. Camera List View
 - Click [View as list]
- Set how the camera list is shown
Note
Click [] > [View as thumbnail] to show the camera list as thumbnails.
Changing the Grid
Change the number of cells shown on the screen.
- In the main menu, click [] > [AI Live View]The live video screen appears.
- Click [Auto Grid].
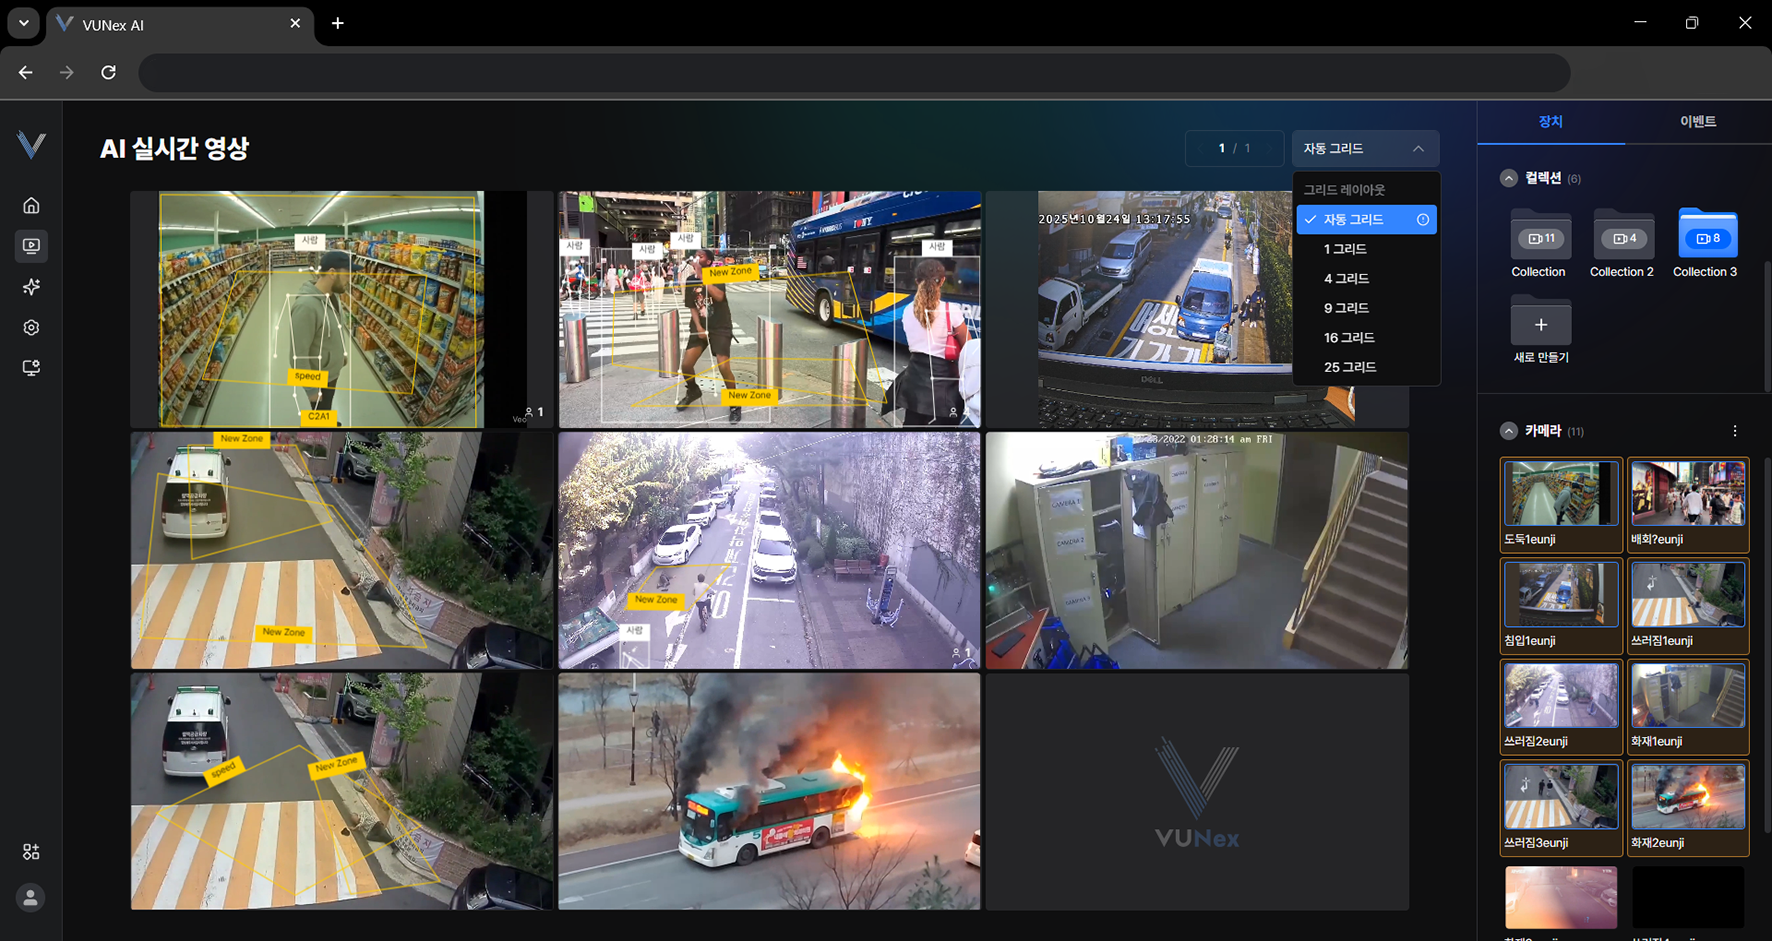 Figure 2-8. Changing the Grid
 - Select the item you wantYou can switch to Custom Mode, and the grid is selected based on the video aspect ratio.
- Change the number of cells shown on the screen
Note
[Auto grid] applies the optimal grid automatically based on the number of devices.
Assigning a Camera to the Video Area
Assign a camera to the video area.
- In the main menu, click [] > [AI Live View] > [Device]
- Select the collection or camera you want
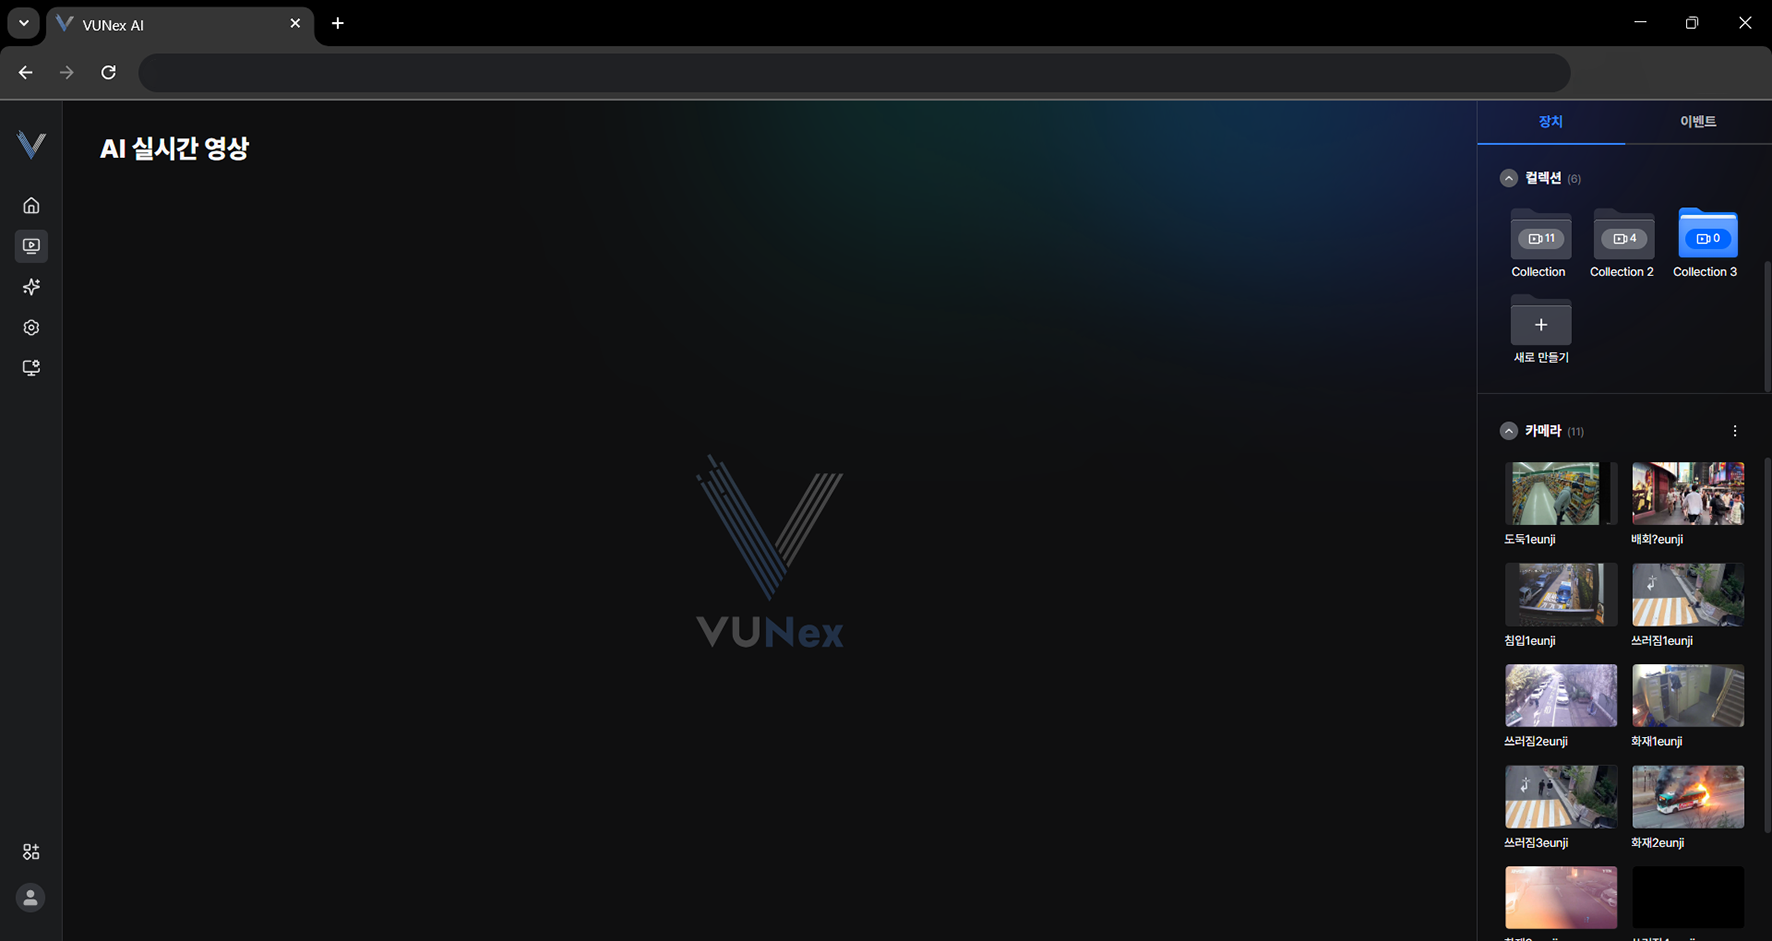 Figure 2-9. Assigning a Camera
 - Drag it to the video area or to a collection
- Assign a camera to the video area
Note
If you assign a camera directly to the video area, a new collection is created.
Checking the Non-AI Area
Show the area where AI analysis is not applied on top of the video.
- In the main menu, click [] > [AI Live View]
- Right-click on the video
- Click [Display options] > [Show non-AI area]
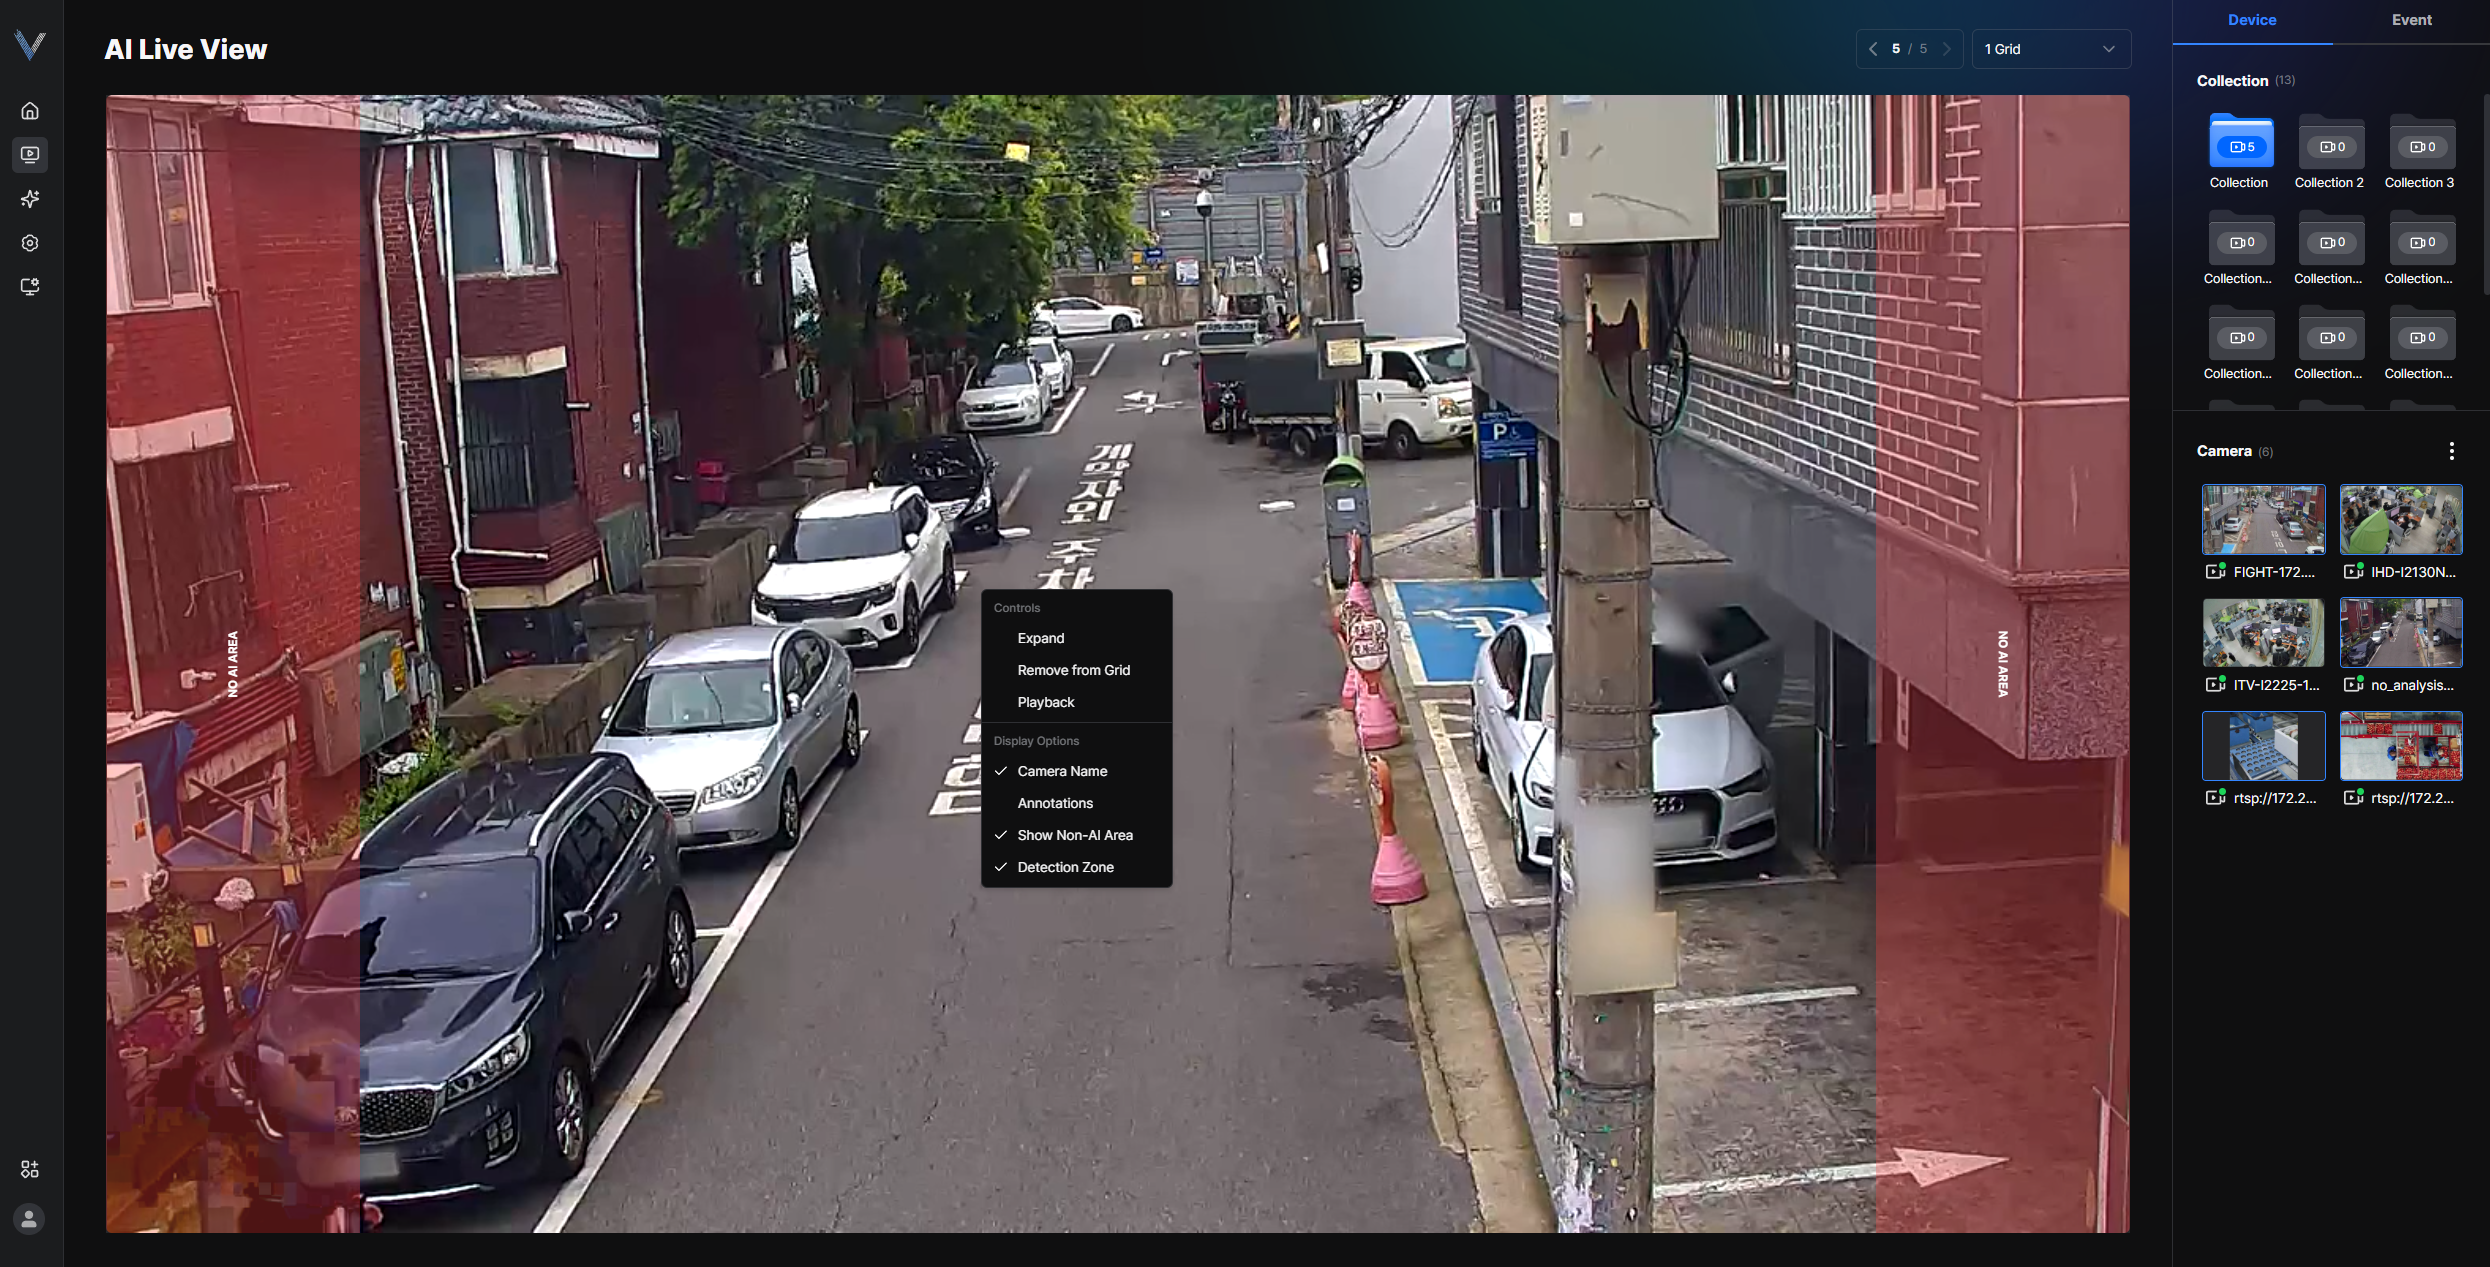 Figure 2-18. Showing the Non-AI Area
Note
Objects are not detected in the highlighted area because it is outside the AI analysis range.
In the same menu you can also toggle [Camera name], [Show object box], [Skeleton] and [Detection zone].
Creating a New Collection
Save cameras to a new collection.
- In the main menu, click [] > [AI Live View] > [Device]
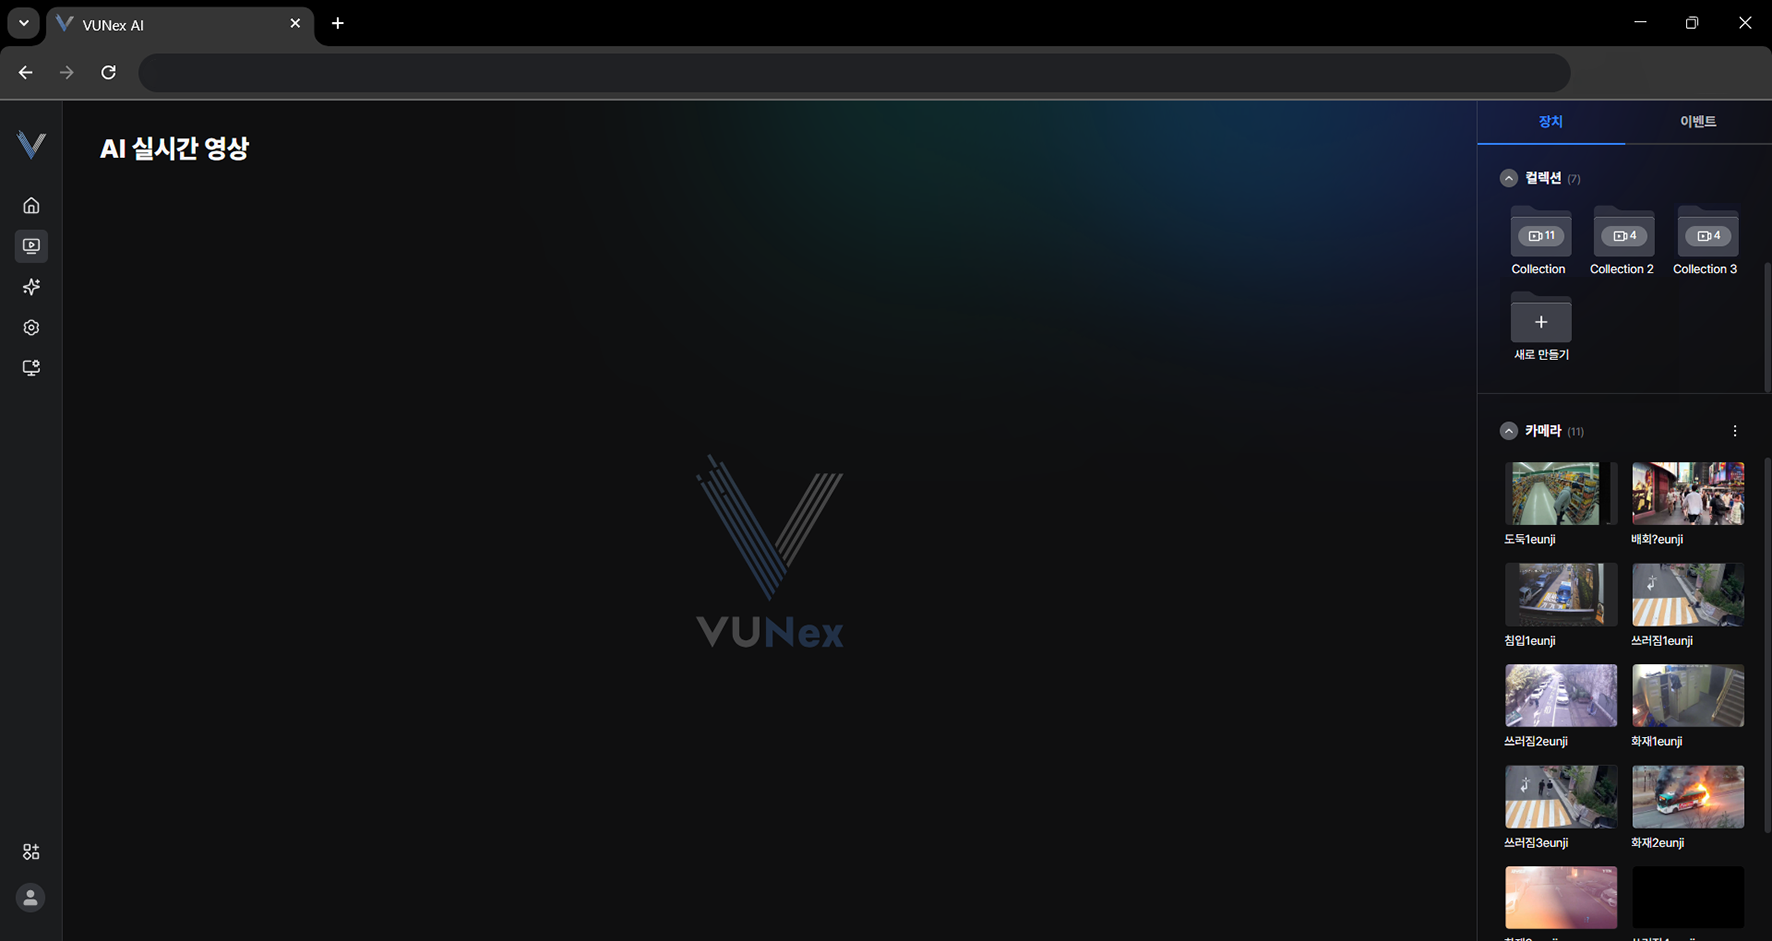 Figure 2-10. Creating a New Collection
 - Click [New]
- Enter a name
- Drag it to the video area or to a collection
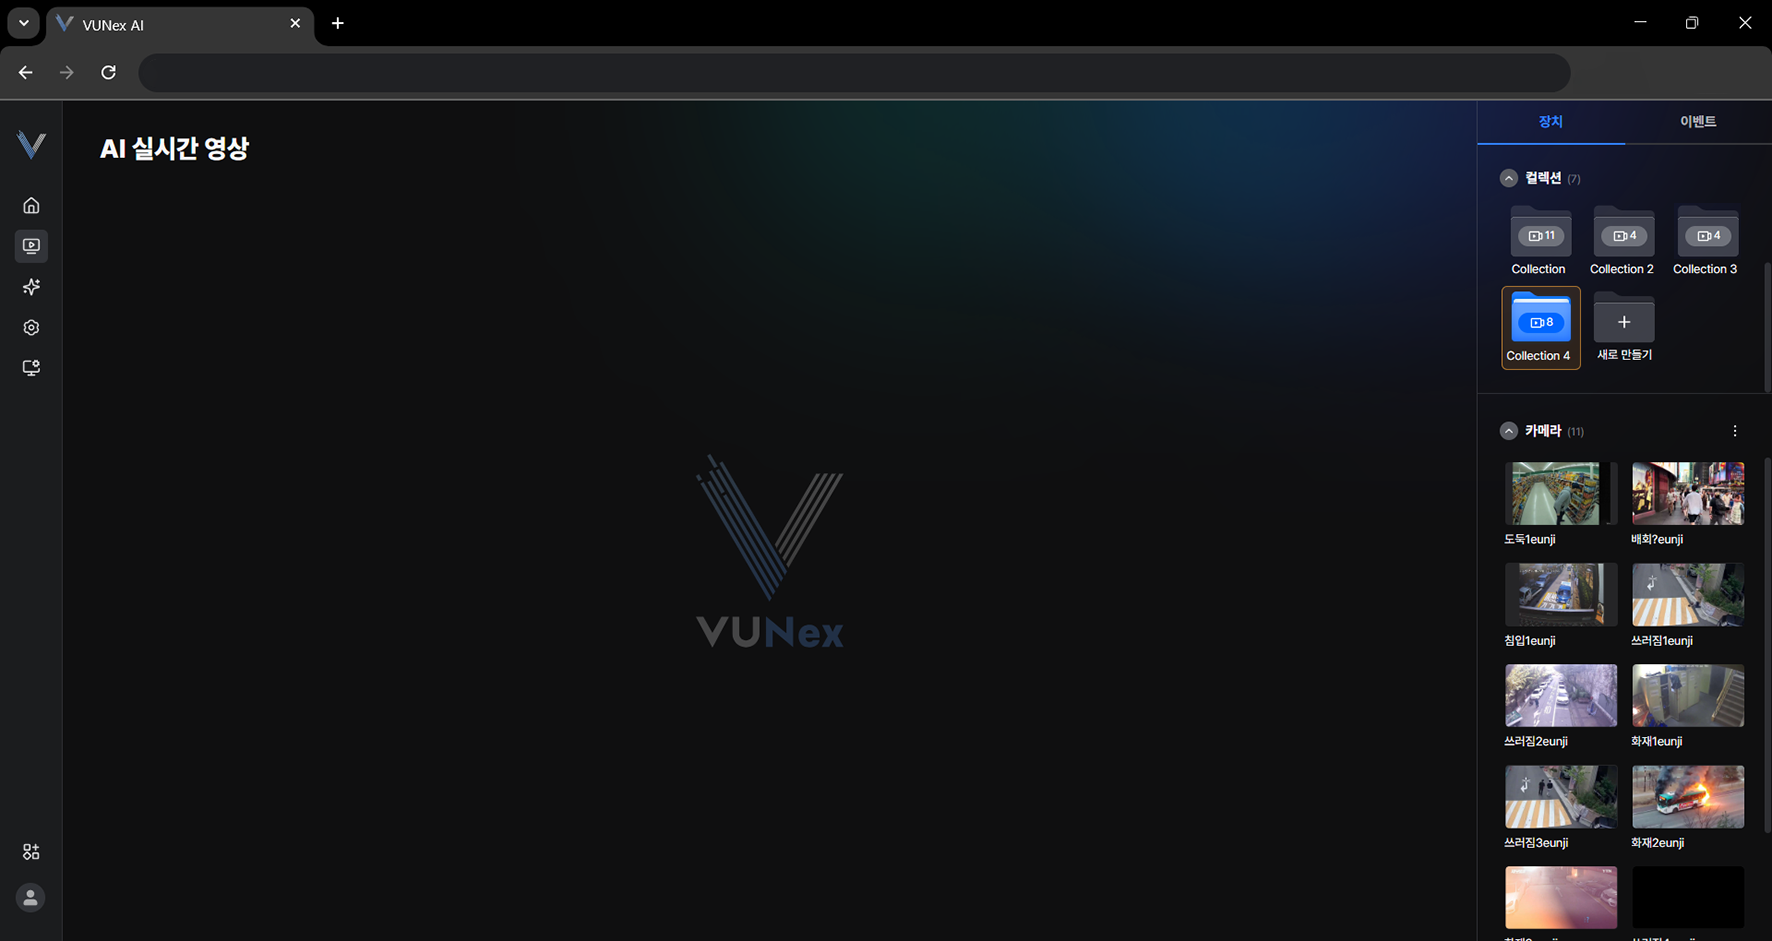 Figure 2-11. Saving Cameras to a Collection
 - Save cameras to the collection
Editing a Collection
Edit a collection.
- In the main menu, click [] > [AI Live View] > [Device]
- Select a collection and right-click itThe pop-up menu appears.
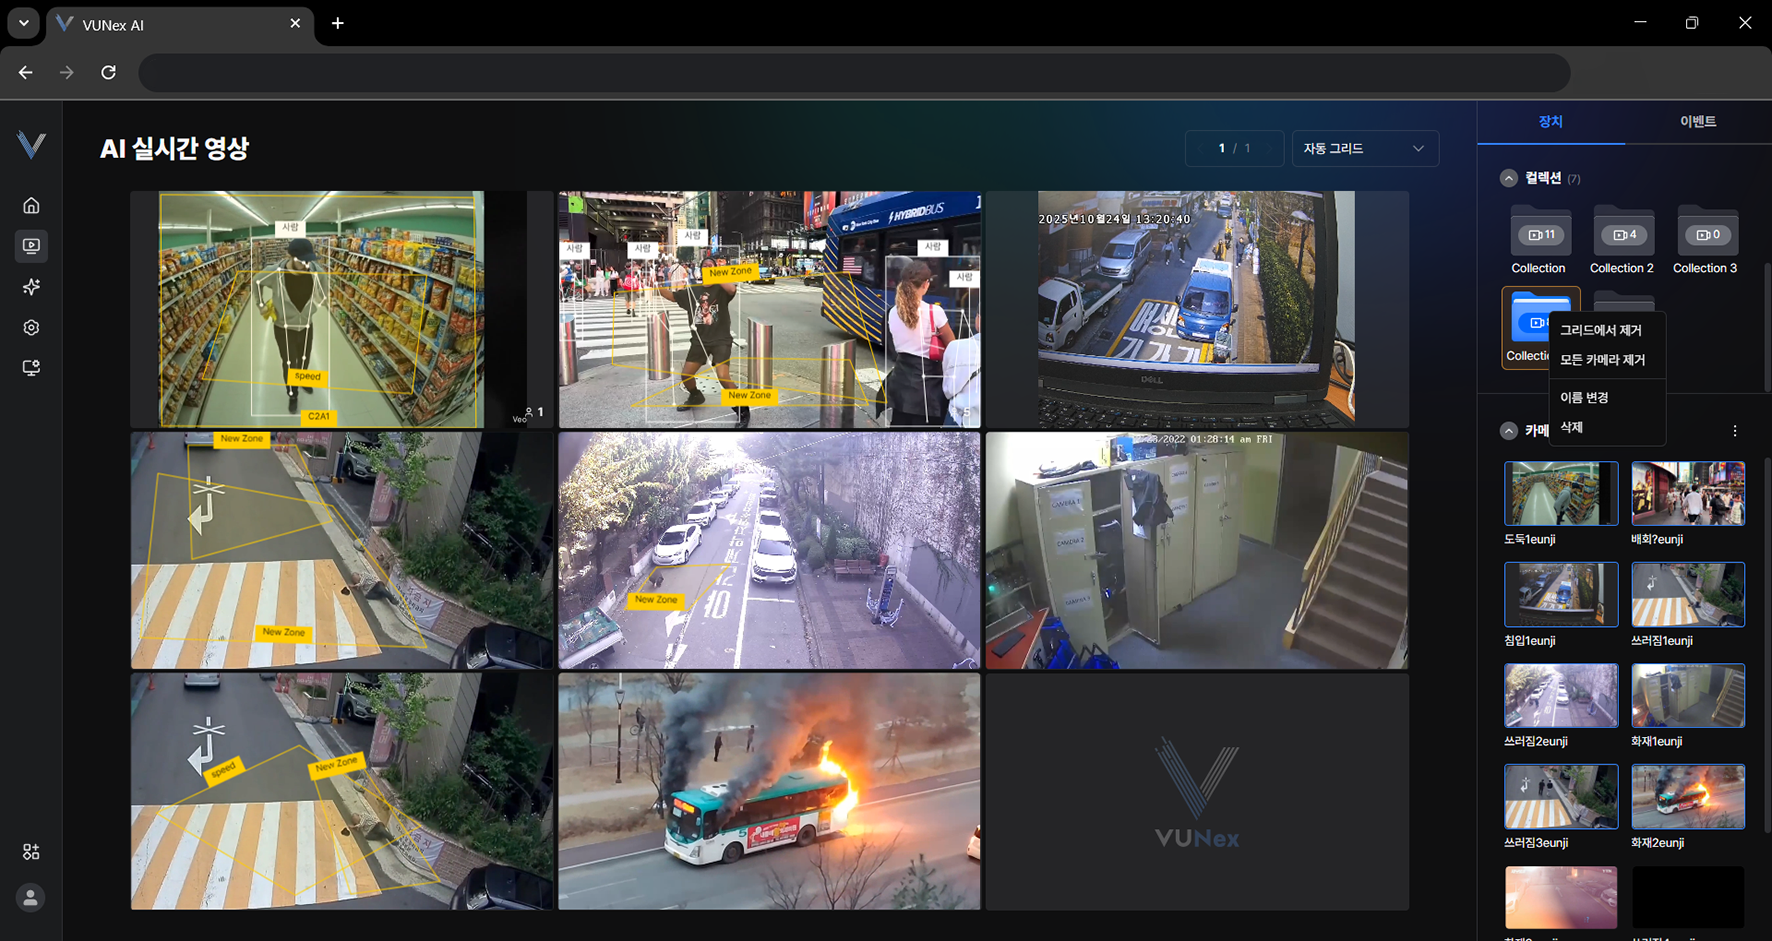 Figure 2-12. Collection Edit Menu
 - Click the item you want[Remove from grid]: unassigns the camera from the video area. [Remove all cameras]: removes every camera saved in the collection. [Rename]: changes the collection name. [Delete]: deletes the collection.
Note
Drag a collection to the position you want. You can change the collection order.
Deleting a Collection
The collection is deleted.
- In the main menu, click [] > [AI Live View] > [Device]
- Select a collection and right-click itThe pop-up menu appears.
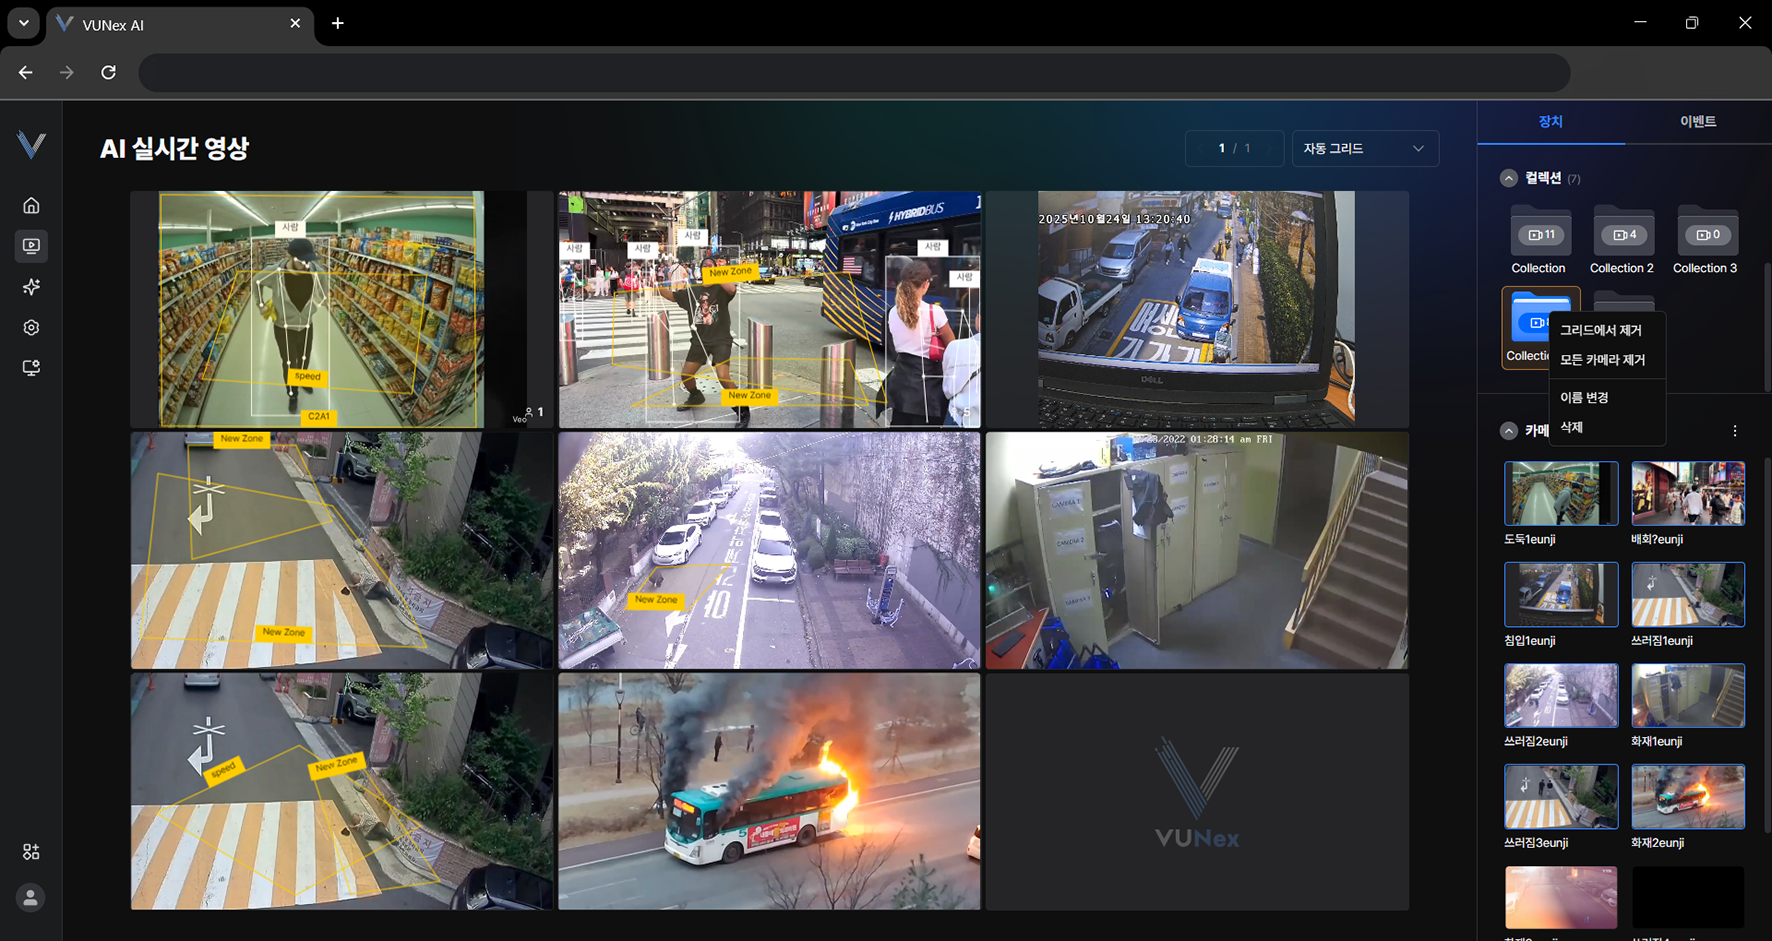 Figure 2-13. Deleting a Collection
 - Click [Delete]
- Click [OK]The collection is deleted.
Notes on Using Collections
This topic covers the limits and behaviors that apply when creating and managing collections.
Note
- Up to 20 collections can be created; the [New] button is disabled once the limit is reached.
- Two collections cannot have the same name.
- If you assign a camera that is already assigned, that camera is skipped and only the remaining cameras are assigned.
- Right-click a collection to use [Show on grid], [Remove from grid], [Remove all cameras], [Rename] and [Delete].
- When the collection list grows long, you can scroll within the list.
Viewing Event Cell Notifications
Check the event notification shown on the cell.
- In the main menu, click [] > [AI Live View]The live video screen appears.
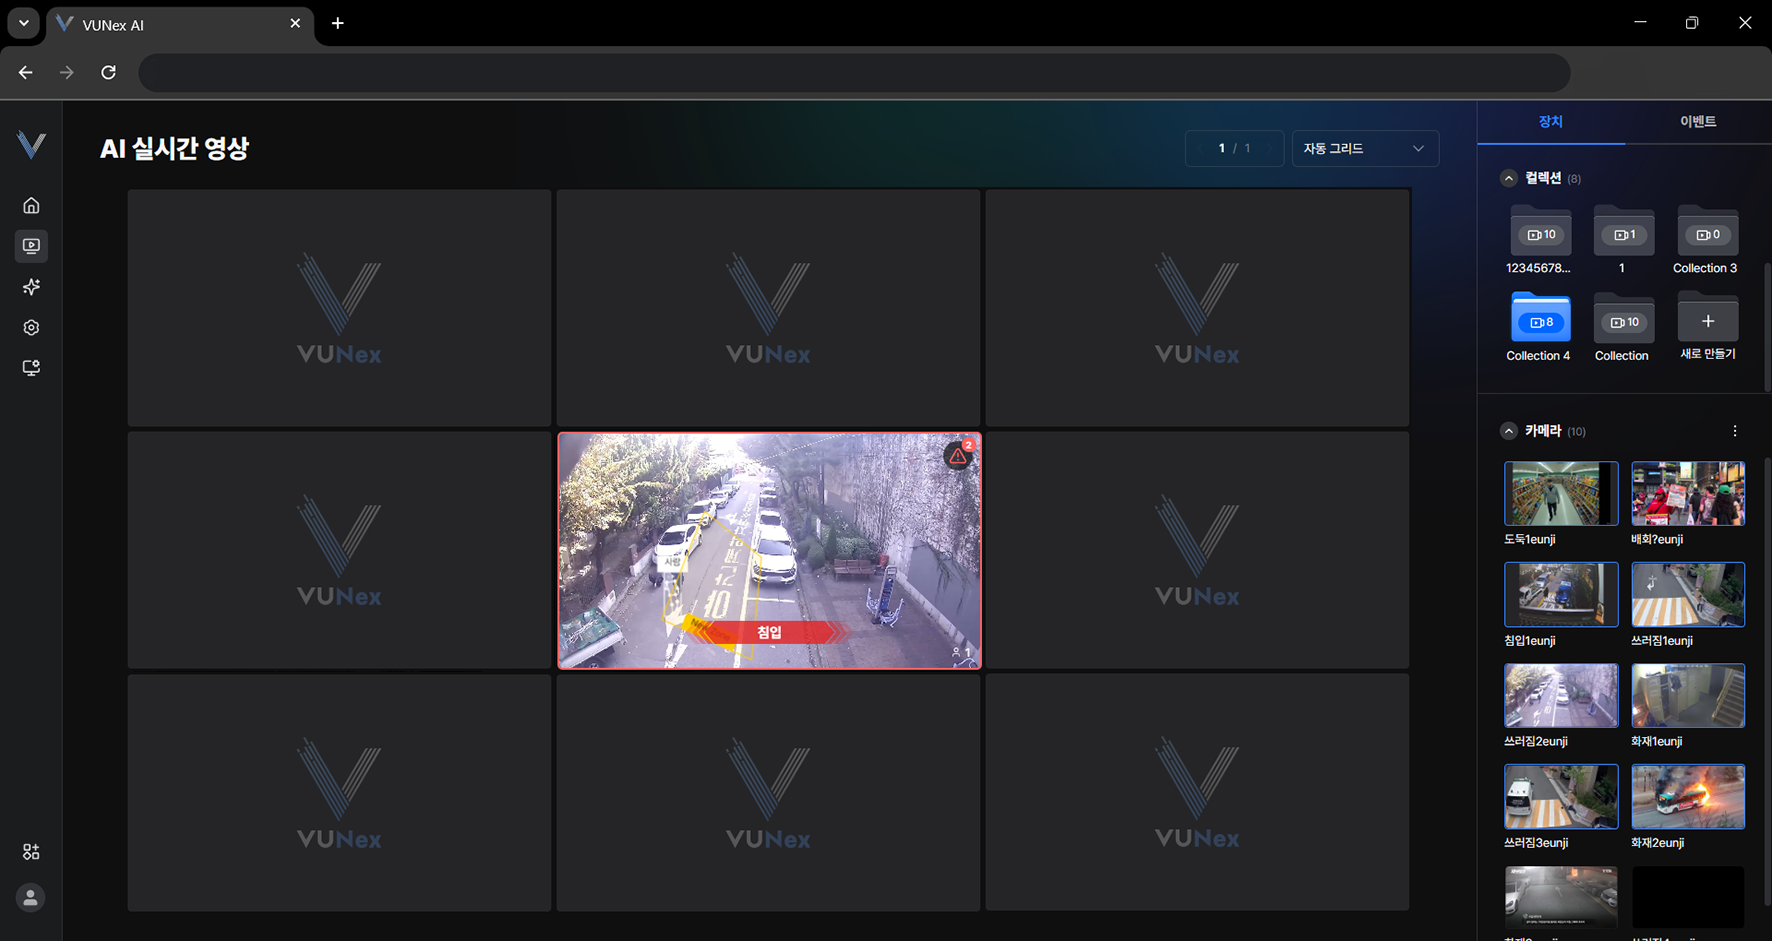 Figure 2-14. Event Cell Notification
 - Check the event notification shown on the cell
- Click []
- Click the item you want
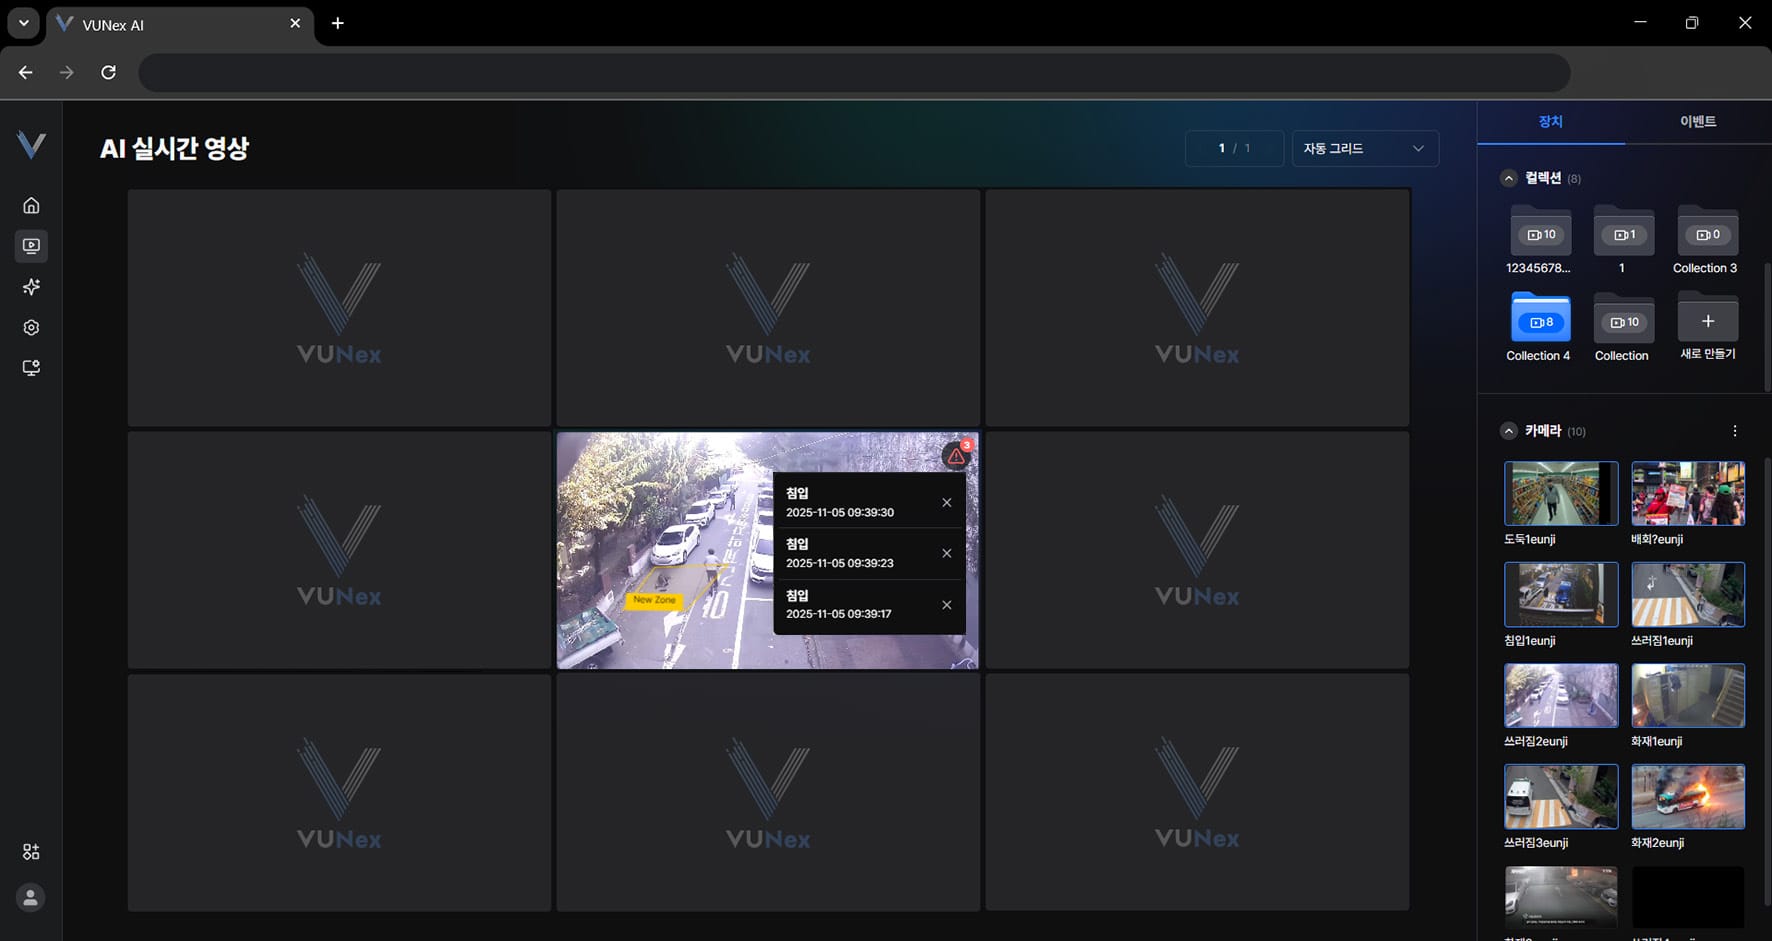 Figure 2-15. Event Details
 - Check the event details
Note
In the main menu, click [] > [AI Event] > [Action Trigger] > [Action type] > [Cell alarm] to make the cell of the event camera blink.
Viewing the Event Notification List
Check the event notification list.
- In the main menu, click [] > [AI Live View] > [Event]
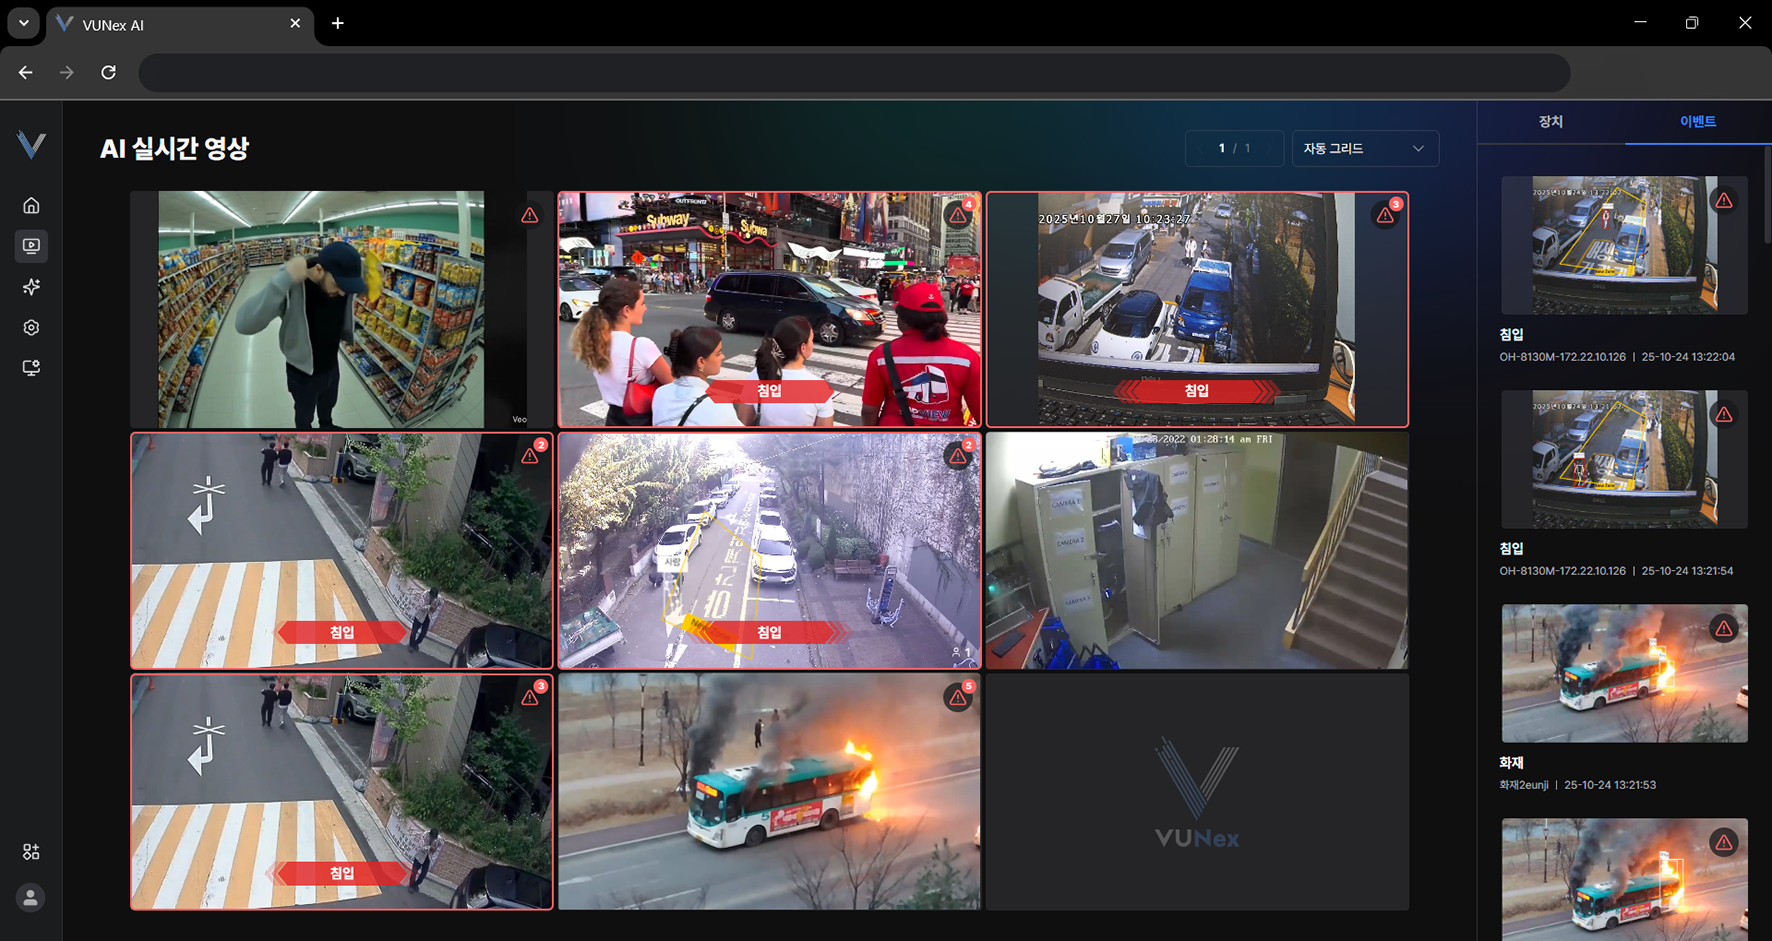 Figure 2-16. Event Notification List
 - Check the event notification list
- Click the item you want
- Check the event details
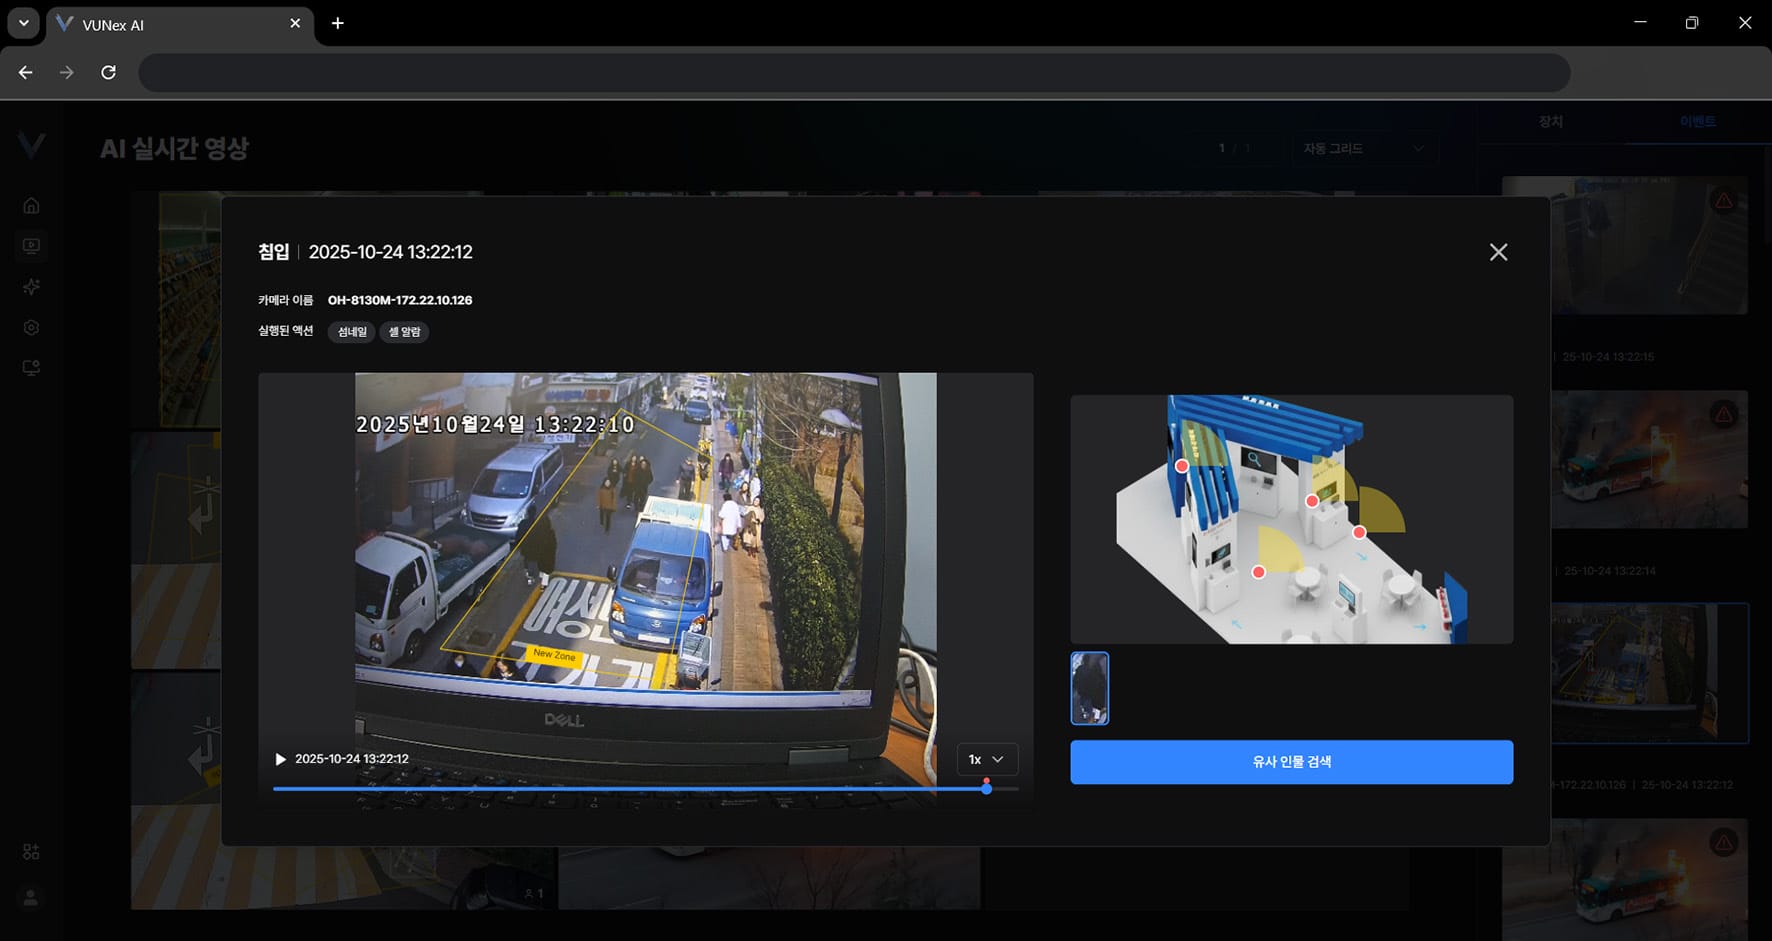 Figure 2-17. Event Details and Similar Person Search
Note
[Similar Person Search] requires the [Similar Person Search] setting.
In the main menu, click [] > [AI Service] > [Search] > [Similar Person Search] to configure the similar person search mode.
In the main menu, click [] > [AI Event] > [Action Trigger] > [Action type] > [Thumbnail] to show thumbnails in the live video event notification list.