07
Smart eMap Settings
Configuring Smart eMap
Configuring Smart eMap
The screens shown in this guide may differ from the actual product.
- On the main screen, select [] > [Smart eMap]. The smart eMap settings screen appears.
![On the main screen, select [{{icon:cog-frame}}] > [Smart eMap]. The smart eMap settings screen appears.](/manual/vurix-admin/images/page143_img1.jpg)
- Select the item you want.
Note
- [Smart eMap] settings require the [E-Map] permission.
- On the user settings screen, select a user and select [Permission group] > [Feature options] > [E-Map].
Smart eMap Preferences
Set the Smart eMap environment, including server connection and proxy settings.
Configure Smart eMap Server
Configures the server.
- On the main screen, select [] > [Smart eMap] > [Basic Settings].
![On the main screen, select [{{icon:cog-frame}}] > [Smart eMap] > [Basic Settings].](/manual/vurix-admin/images/page144_img1.jpg)
- Select the item you want.
- [E-Map]: Set the server.
- [Proxy]: Set the server. Provides indirect access via another network.
- [Offline]: Set offline mode. Uses saved images.
- [Map API Key]: Set the map API key.
- Click [OK].
- Restart the program to finish applying the settings.
Configure Smart eMap Event Monitoring
Configure focused event monitoring.
- On the main screen, select [] > [Smart eMap] > [Basic Settings].
- Click [Focused Event Monitoring].
![Click [Focused Event Monitoring].](/manual/vurix-admin/images/page145_img1.jpg)
- Select the item you want.
- [Move directly to event location]: Moves to the device location where the event occurred on the map.
- [Video pop-up window position]: Set the pop-up window position.
- [Video pop-up window size]: Set the pop-up window size.
- [Video pop-up close condition]: Set the pop-up close condition.
- [Video pop-up playback mode]: Set the pop-up playback mode.
- Click [OK].
- Restart the program to finish applying the settings.
Smart eMap Management
Manage the Smart eMap, such as adding, modifying, or deleting maps.
Search Smart eMap
Search maps.
- On the main screen, select [] > [Smart eMap] > [eMap Management].
- Set the conditions, then click [Search].
![Set the conditions, then click [Search].](/manual/vurix-admin/images/page146_img1.jpg)
- Check the results.
Note
- Click []. Refreshes the screen.
- Click []. Edits the item.
- Click []. Adds an item.
- Click []. Deletes the item.
Add Smart eMap
Add a map.
- On the main screen, select [] > [Smart eMap] > [eMap Management].
- Click [+ New Map].
![Click [+ New Map].](/manual/vurix-admin/images/page147_img1.jpg)
- Enter the information.
- Select [Background].
- [Image]: Select an image.
- [Geographic]: Select a map.
- Click [OK].
Edit Smart eMap
Edit the map.
- On the main screen, select [] > [Smart eMap] > [eMap Management].
![On the main screen, select [{{icon:cog-frame}}] > [Smart eMap] > [eMap Management].](/manual/vurix-admin/images/page148_img1.jpg)
- Click the map.
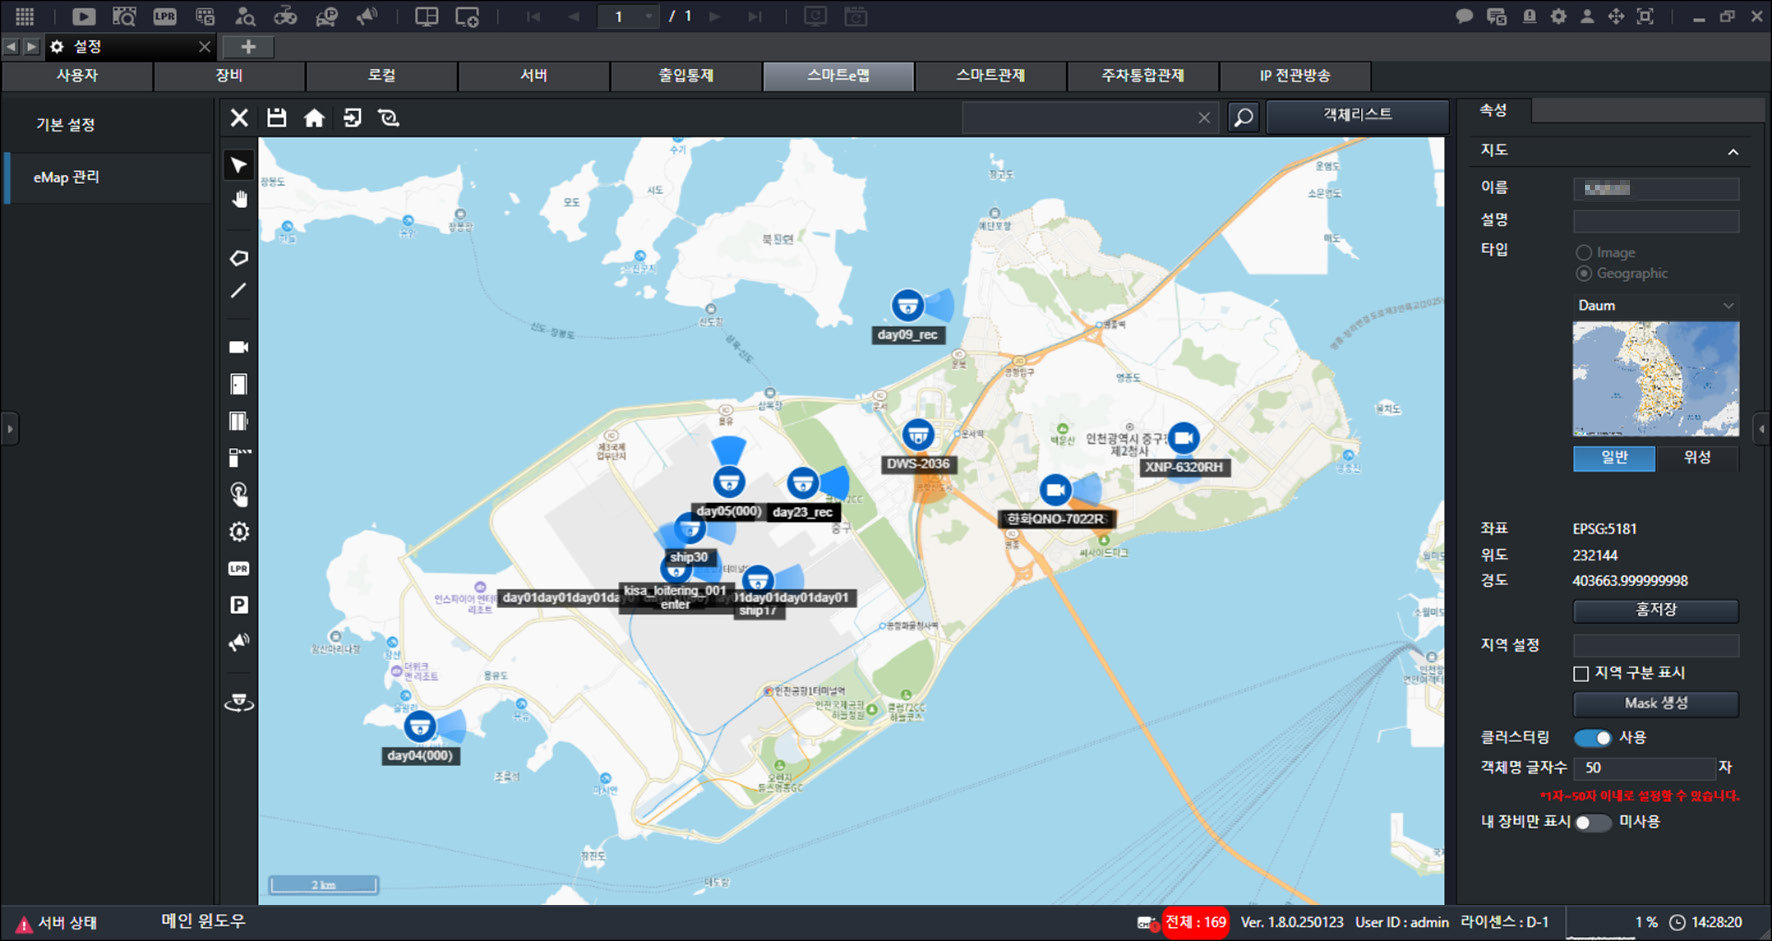
- Select the item you want.
- []: Close the map.
- []: Save the settings.
- []: Move to the home location on the map.
- []: Import devices.
- []: Update device location information.
- []: Search for an address.
- [Object List]: Display the list of devices registered on the map.
- Edit the map.
- []: Select an item.
- []: Move the map.
- []: Draw a polygon
- []: Draw a line.
- []: Add a camera.
- []: Add an access door.
- []: Add an elevator.
- []: Add a barrier.
- []: Add an emergency bell.
- []: Add another object.
- [LPR]: Add LPR.
- [P]: Add a parking lot.
- []: Add a speaker.
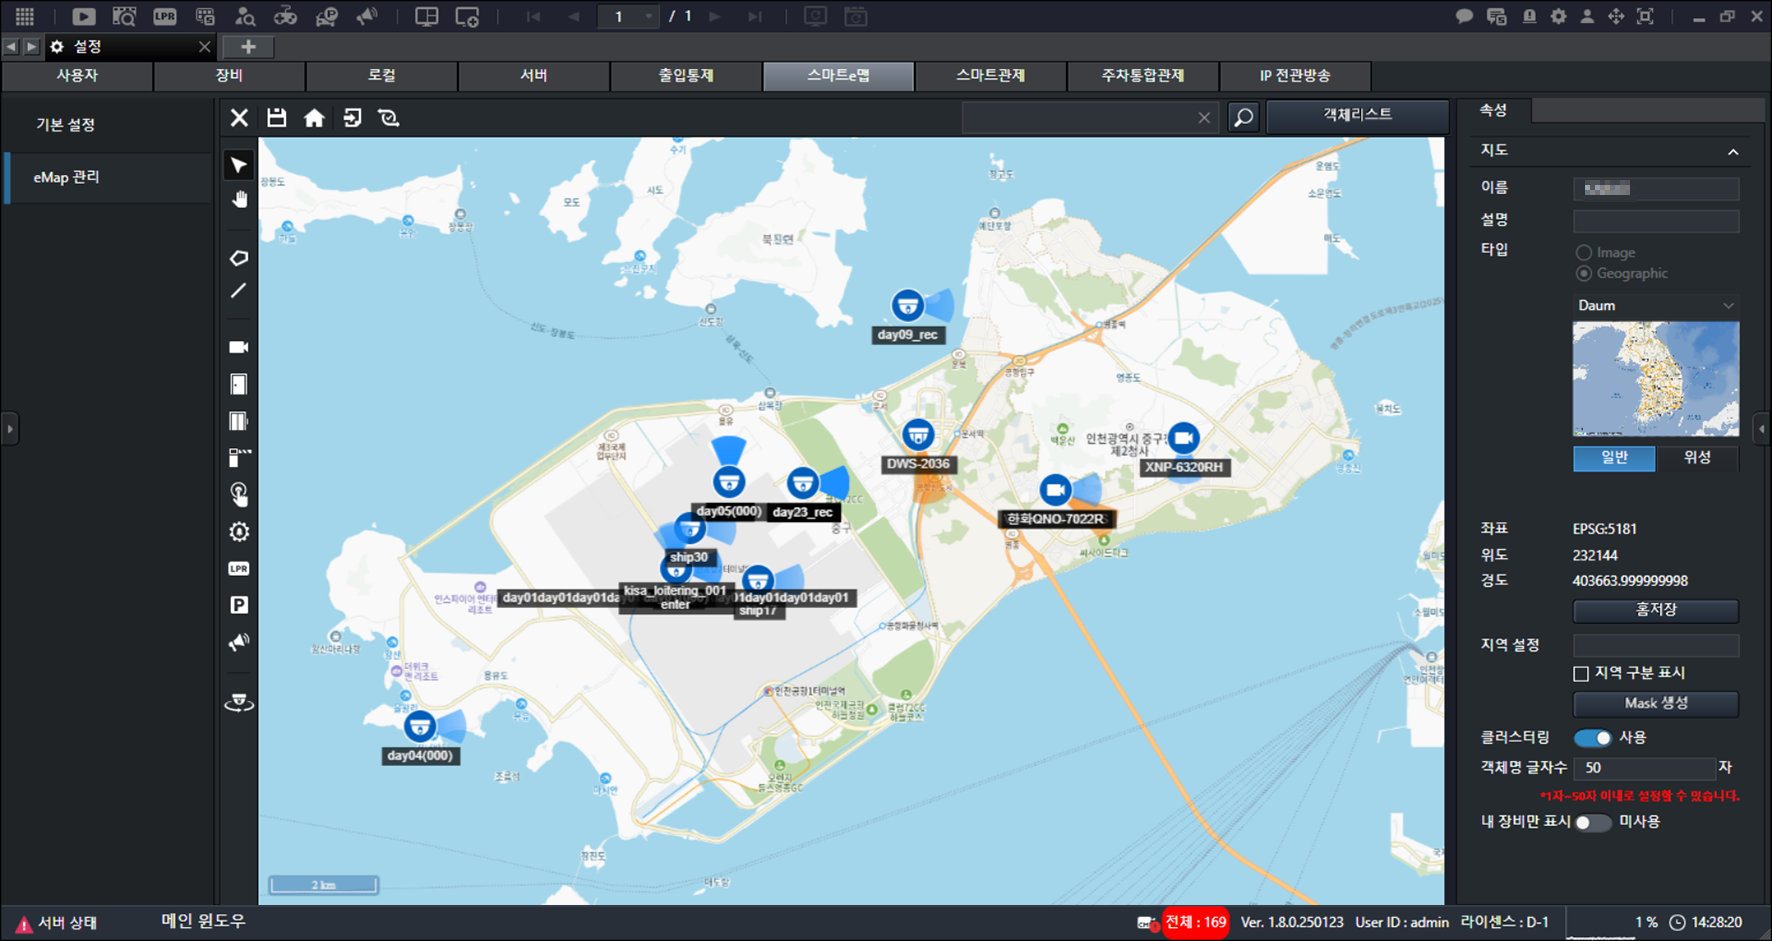
- Set [Properties].
- [Name]: Enter the name.
- [Description]: Enter the description.
- [Type]: Select the map type.
- [Coordinates] / [Latitude] / [Longitude]: Display the home coordinates, latitude, and longitude.
- [Region settings]: Select the region.
- [Clustering]: Set whether to use clustering.
- [Object name character count]: Set the character count. (1 to 50 characters)
- [Show my devices only]: Set to display only your devices.
- Click [].
Note
Click []. Configure camera properties.