Device Settings
Configuring Devices
Configuring Devices
The screens shown in this guide may differ from the actual product.
- On the main screen, select [] > [Device]. The device settings screen appears.
![On the main screen, select [{{icon:cog-frame}}] > [Device]. The device settings screen appears.](/manual/vurix-admin/images/page61_img1.jpg)
- Select the item you want.
- [Device] settings require the [Device management] permission.
- On the user settings screen, select a user and select [Permission group] > [Management] > [Device management].
Device Management
Manage devices, including adding, deleting, and copying devices.
Add Device
Adds a device.
- On the main screen, select [] > [Devices] > [Device Management].
![On the main screen, select [{{icon:cog-frame}}] > [Devices] > [Device Management].](/manual/vurix-admin/images/page62_img1.jpg)
- Click [Add Device].
- Set the conditions, then click [Search].
![Set the conditions, then click [Search].](/manual/vurix-admin/images/page62_img2.jpg)
- Select the item you want.
- Click [OK].
- [Recording media]: Set the recording media.
- [Add media]: Add media.
- [Recording schedule]: Set the recording schedule.
- [PTZ control schedule]: Set the PTZ control schedule.
- [Fisheye lens settings]: Set the fisheye lens.
- [Linked devices]: Set linked devices.
![Click [OK].](/manual/vurix-admin/images/page63_img1.jpg)
- Click [OK].
- After entering the [IP], verify the [ID] and [Password].
- Selected values in [Fisheye Lens Settings] such as [Change X-Axis Radius], [Change Y-Axis Radius], and [Show Rotation Control]
Delete Device
Deletes the device.
- On the main screen, select [] > [Devices] > [Device Management].
- Select a device.
- Click [Delete].
![Click [Delete].](/manual/vurix-admin/images/page64_img1.jpg)
- Click [Yes] > [OK].
Copy Device
Copy a device.
- On the main screen, select [] > [Devices] > [Device Management].
- Select a device.
- Click [Copy Device].
![Click [Copy Device].](/manual/vurix-admin/images/page65_img1.jpg)
- Click [OK].
Add Devices Automatically
Add devices automatically.
Click [Auto Add Device] to add ONVIF devices.
- On the main screen, select [] > [Devices] > [Device Management].
- Click [Auto Add Device].
![Click [Auto Add Device].](/manual/vurix-admin/images/page66_img1.jpg)
- Select a server.
- Click [Next].
![Click [Next].](/manual/vurix-admin/images/page66_img2.jpg)
- Enter the [ID] and [Password].
- Click [Next].
- Select the item you want.
- Click [Next] > [OK].
- On the local settings screen, select [ONVIF search type] > [Wizard UI].
- On the device settings screen, change the UI button name from [ONVIF] to [Auto add device].
Configure Remote Control Process and Devices
Register a process that manages and controls digital input and digital output.
After registering the process, remotely control the devices.
- On the main screen, select [] > [Devices] > [Device Management].
- Click [Add Device].
![Click [Add Device].](/manual/vurix-admin/images/page68_img1.jpg)
- Click [OK].
![Click [OK].](/manual/vurix-admin/images/page68_img2.jpg)
- Set [Other Channels].
- Select a device.
- Click [Linked Device].
![Click [Linked Device].](/manual/vurix-admin/images/page69_img1.jpg)
- Click [OK].
![Click [OK].](/manual/vurix-admin/images/page69_img2.jpg)
- Configure [Other channel] remote control items for your site.
- Set remote control for power control devices.
- Set remote control for the barrier gate.
- On the main screen, select []. Check devices linked with the remote control process.
Configure Event Devices
Configure devices to receive events correctly.
- On the main screen, select [] > [Devices] > [Device Management].
- Select a device.
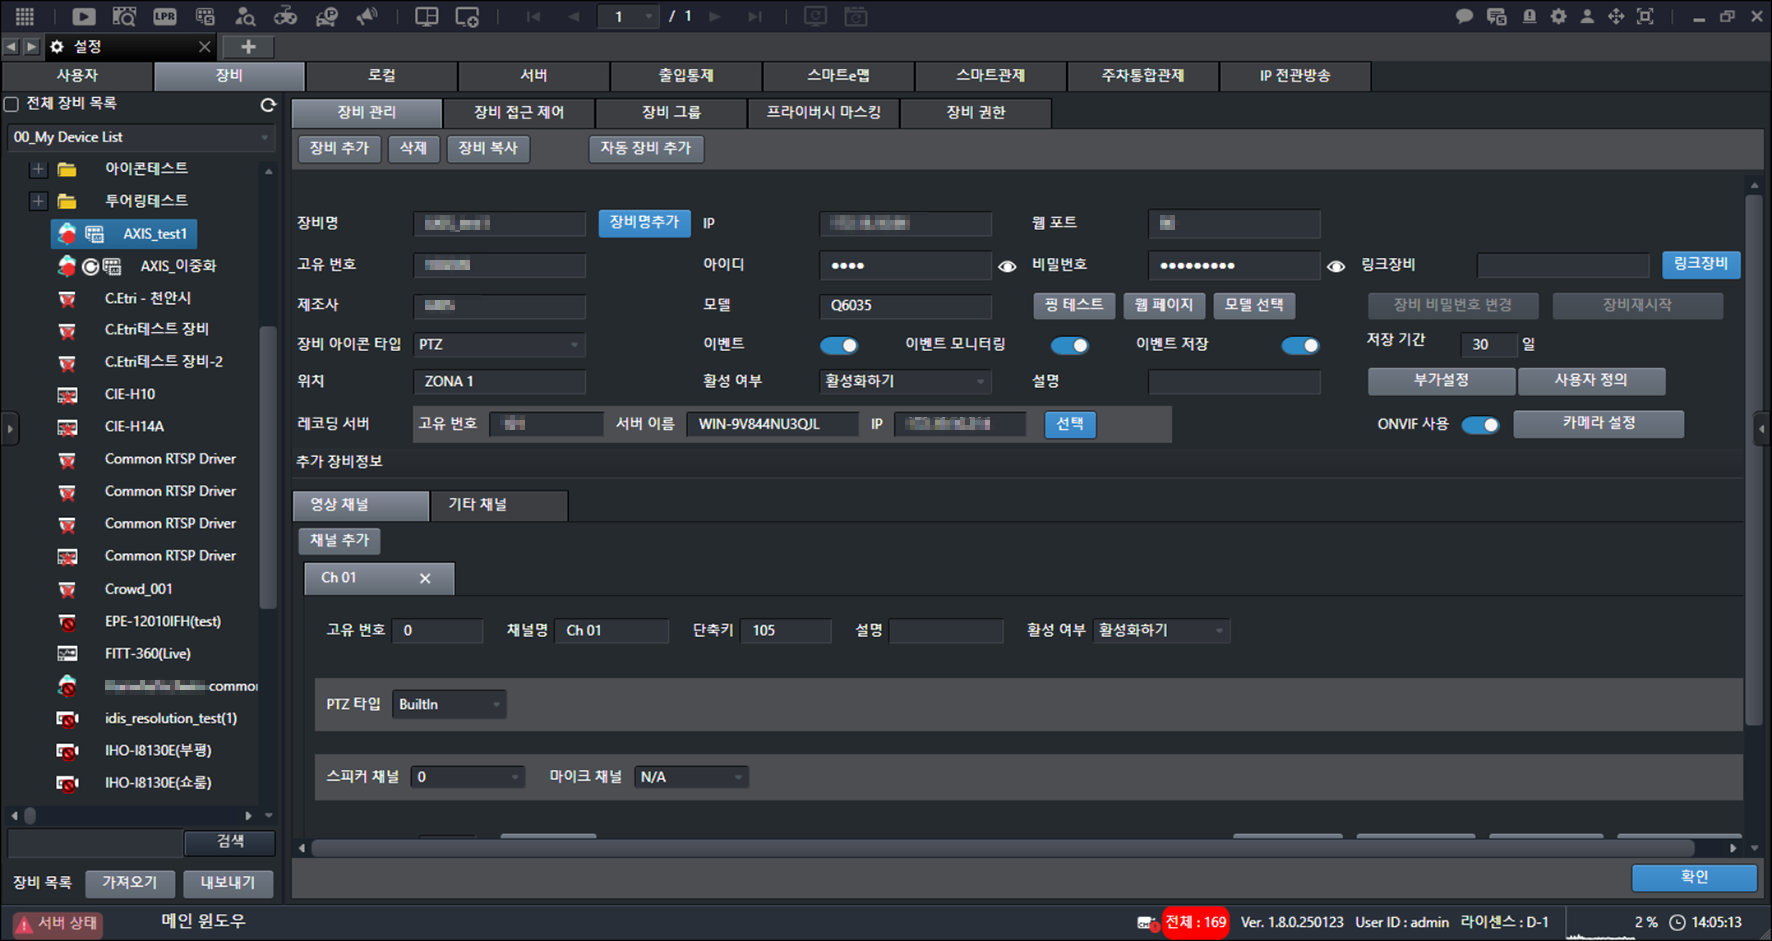
- Select the item you want.
- [Event]: Set whether to use events.
- [Event monitoring]: When event and metadata are received, display the metadata on the screen.
- [Event save]: Set whether to save events.
- [Retention period]: Set the event retention period.
- [Use ONVIF]: Set whether to use ONVIF.
- Click [OK].
Device Access Control
Assign devices to a user account or remove them.
Assign Devices to a User Account
Assigns a device.
- On the main screen, select [] > [Devices] > [Device Access Control].
![On the main screen, select [{{icon:cog-frame}}] > [Devices] > [Device Access Control].](/manual/vurix-admin/images/page72_img1.jpg)
- Select a user account.
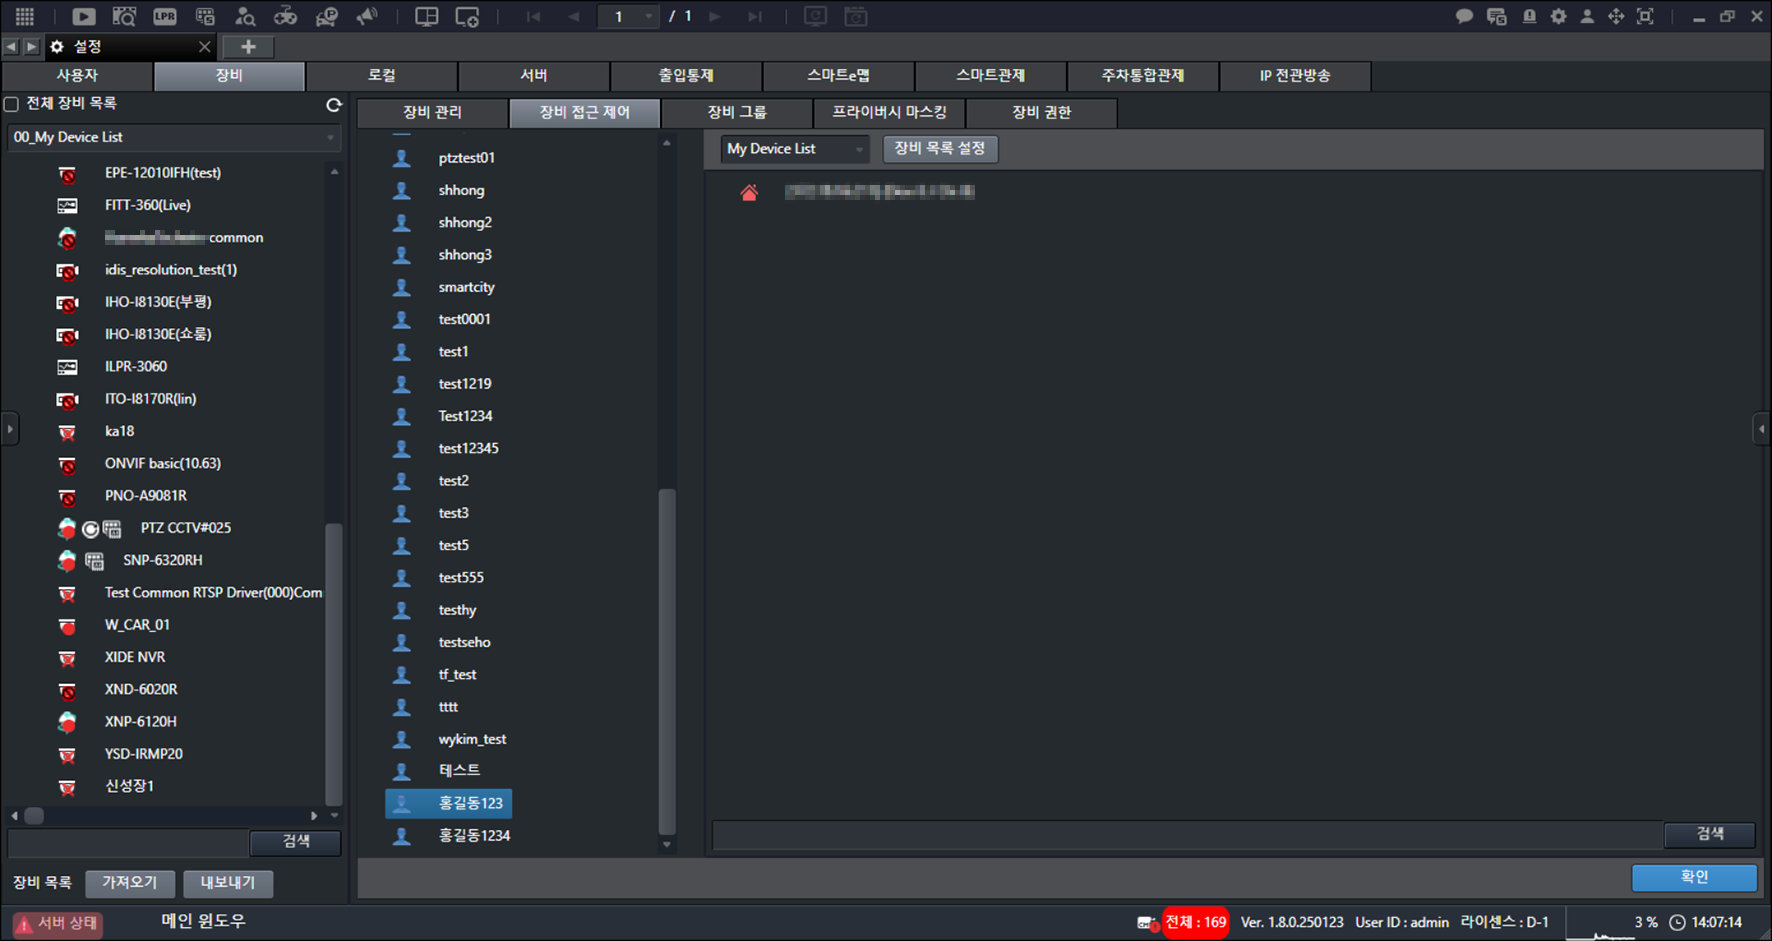
- Drag to the right while holding the mouse button.
- Click [OK].
Remove Devices from a User Account
Deletes the device.
- On the main screen, select [] > [Devices] > [Device Access Control].
- Select a user account.
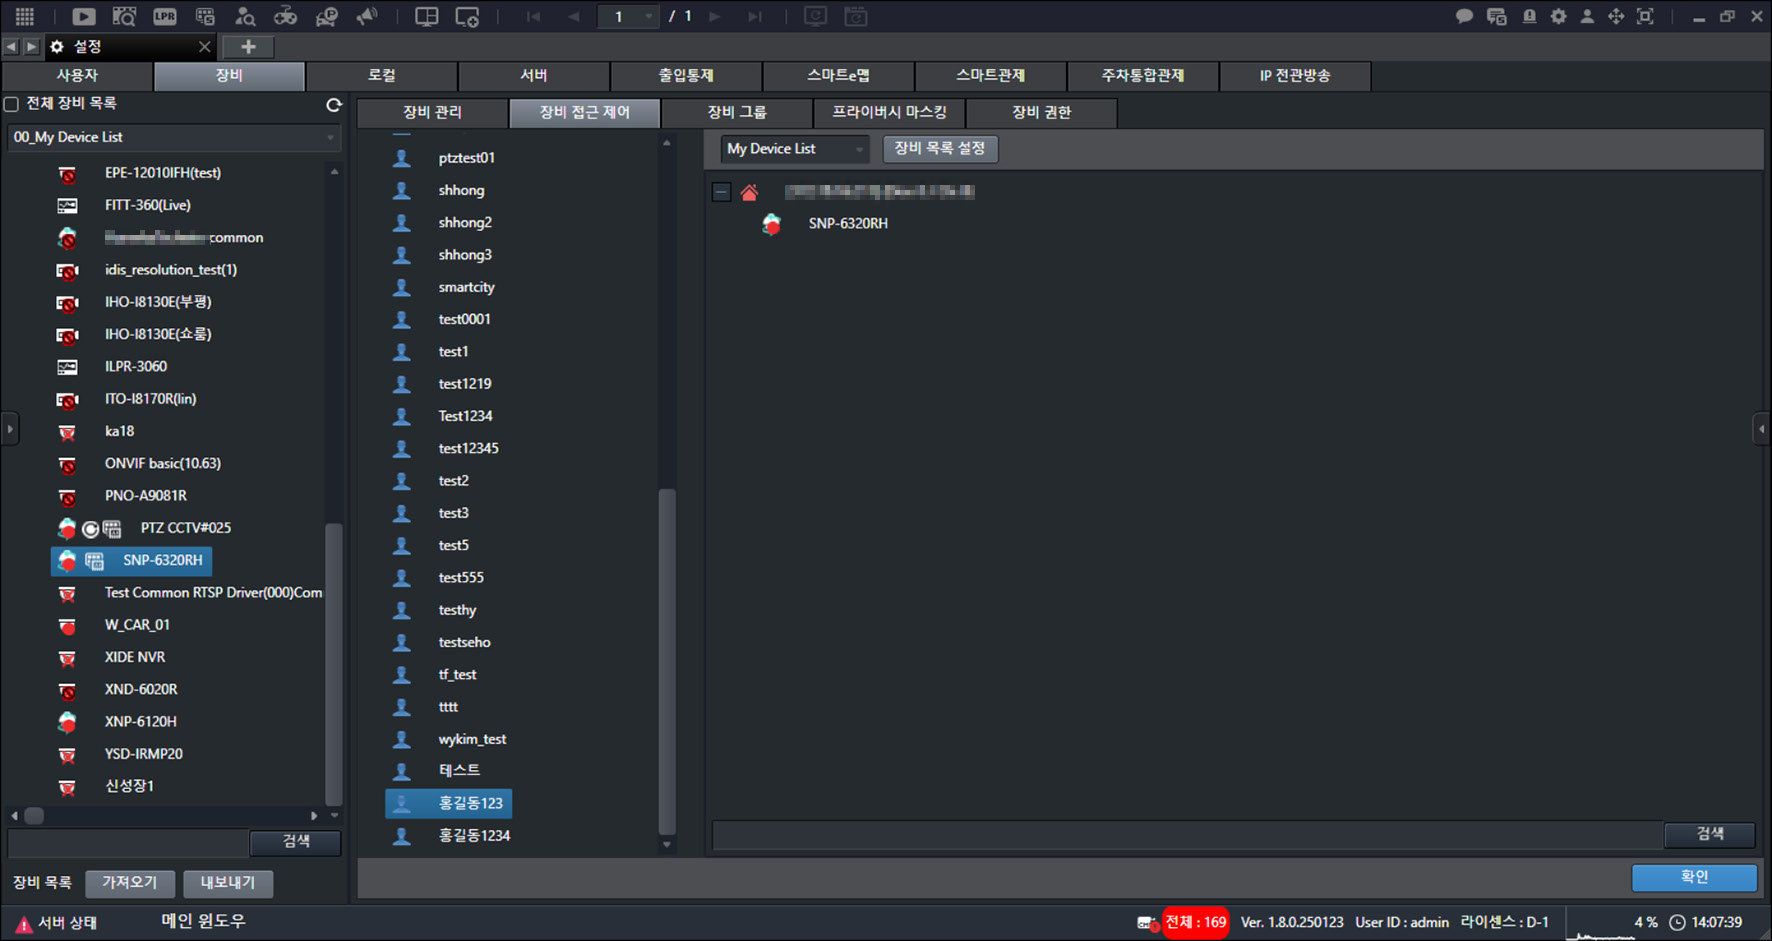
- Select a device.
- Right-click to open the context menu.
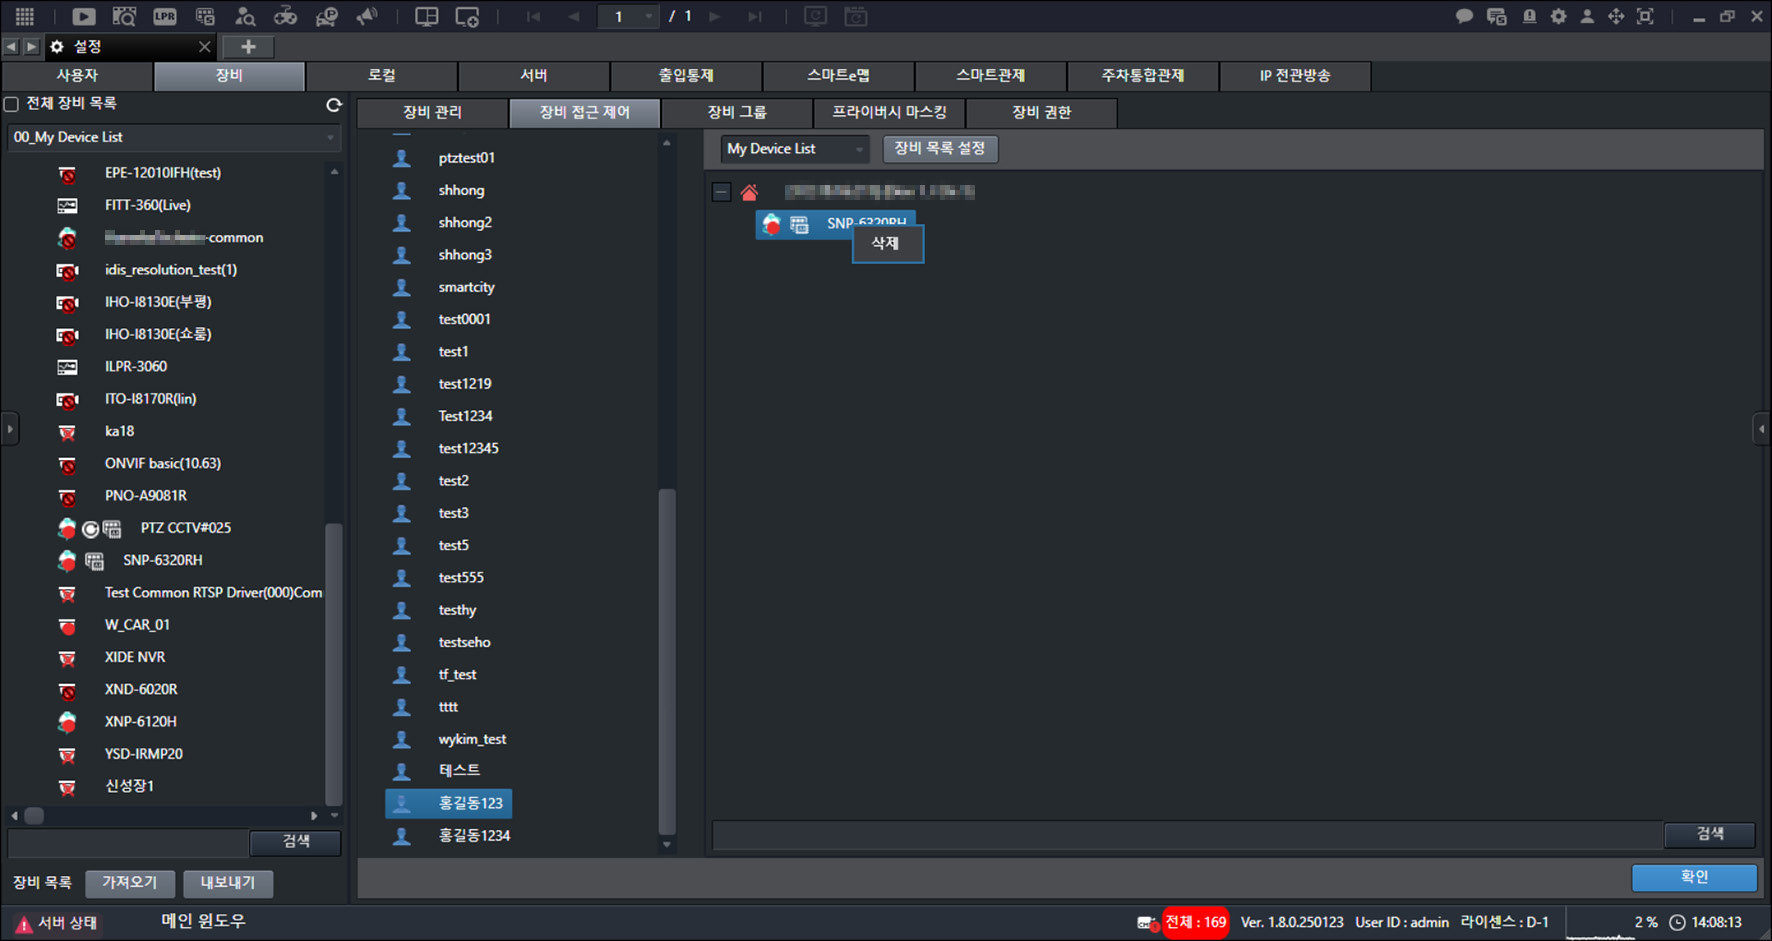
- Click [Delete].
![Click [Delete].](/manual/vurix-admin/images/page74_img1.jpg)
- Click [Yes].
![Click [Yes].](/manual/vurix-admin/images/page74_img2.jpg)
- Click [Yes] > [OK].
Assigning devices to multiple user accounts
Assigns a device.
- On the main screen, select [] > [Devices] > [Device Access Control].
![On the main screen, select [{{icon:cog-frame}}] > [Devices] > [Device Access Control].](/manual/vurix-admin/images/page75_img1.jpg)
- Select a user account.
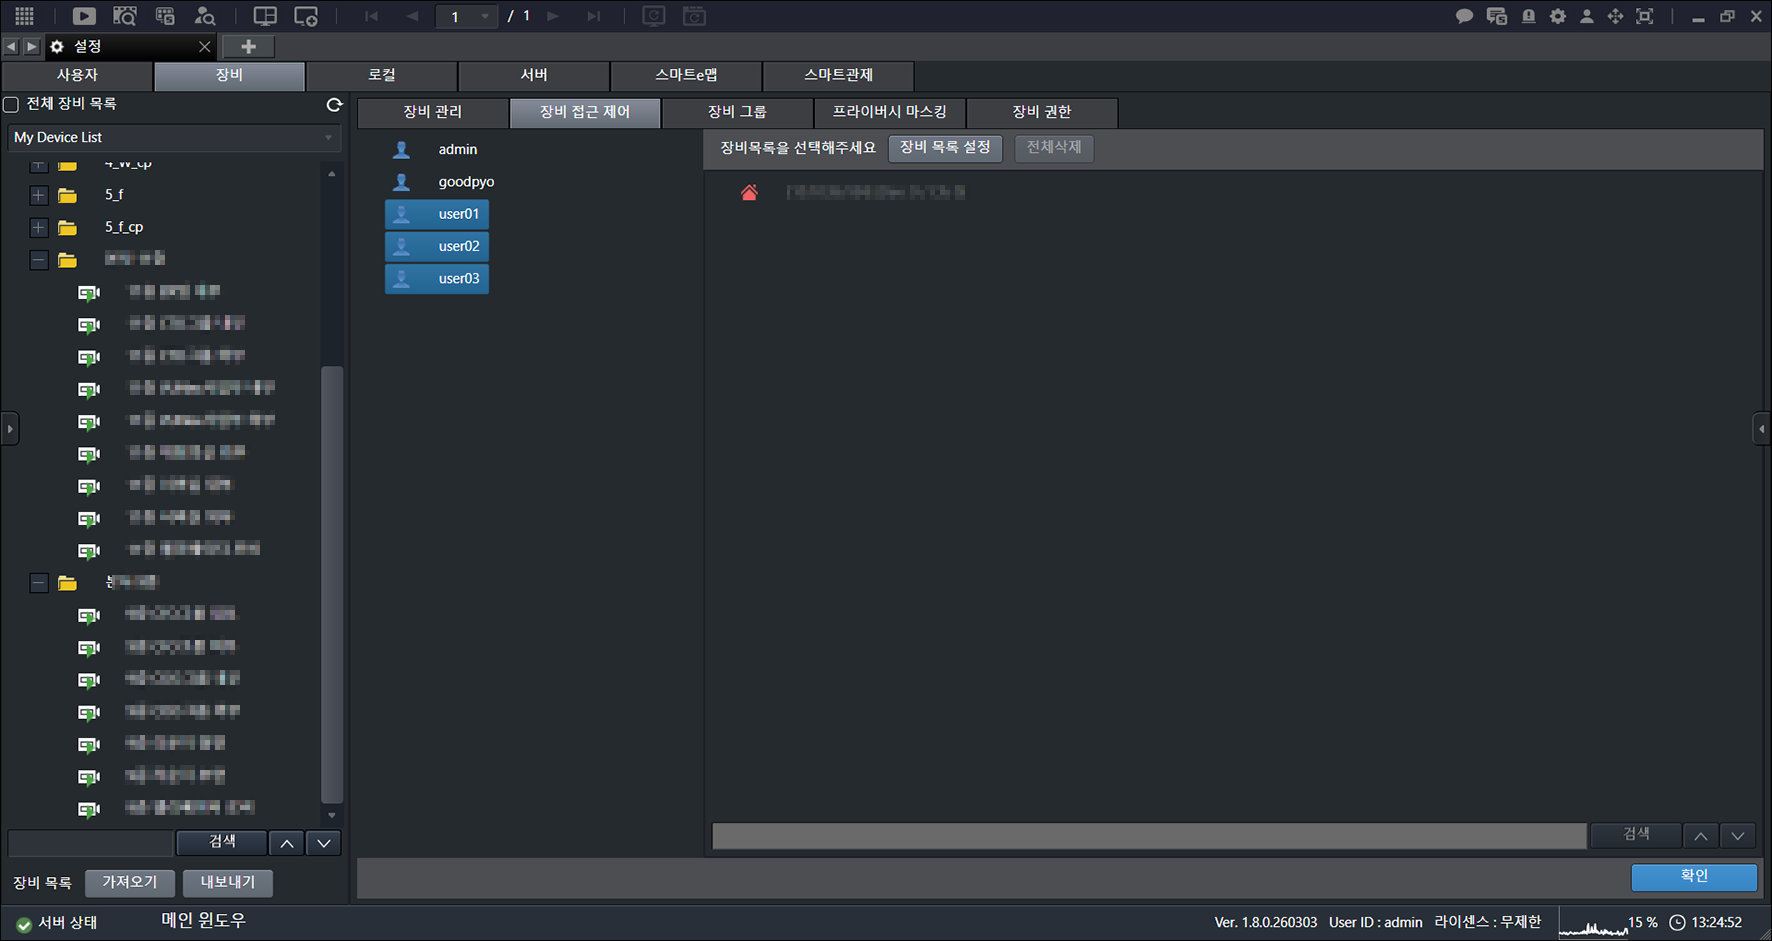
- Click [Device List Settings].
![Click [Device List Settings].](/manual/vurix-admin/images/page76_img1.jpg)
- Click [OK].
- Select a device.
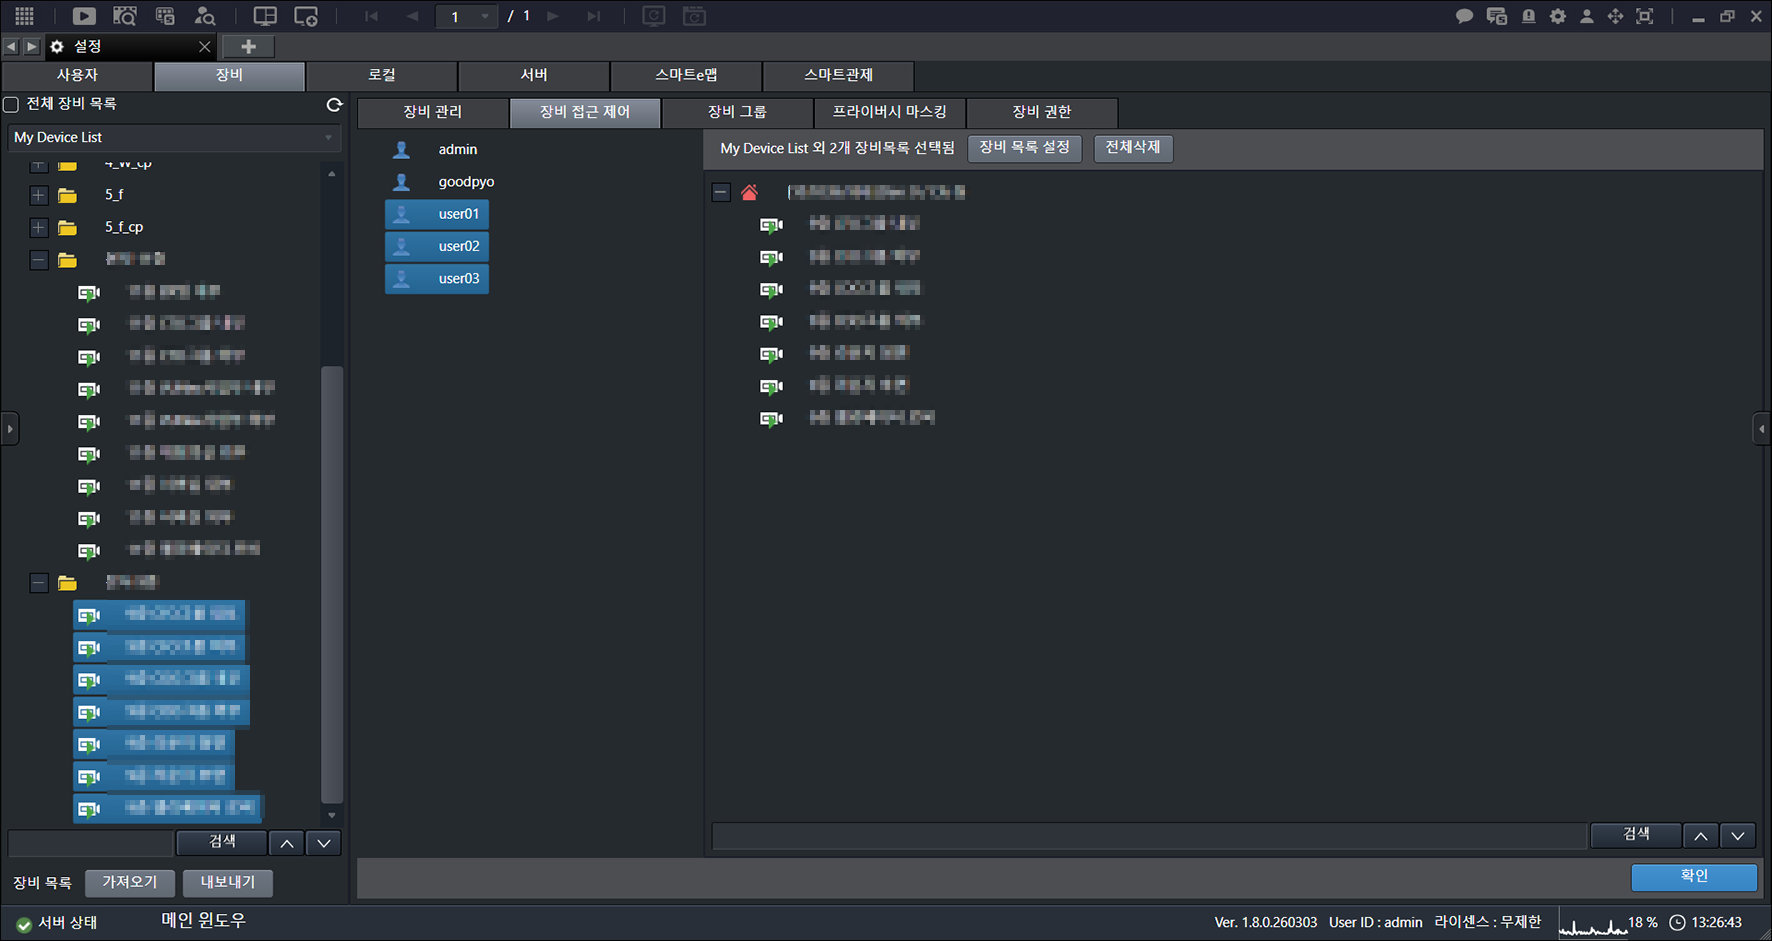
- Drag to the right while holding the mouse button.
- Click [OK].
![Click [OK].](/manual/vurix-admin/images/page77_img1.jpg)
- Click [OK].
![Click [OK].](/manual/vurix-admin/images/page77_img2.jpg)
Deleting all devices from multiple user accounts
Deletes the device.
- On the main screen, select [] > [Devices] > [Device Access Control].
- Select a user account.
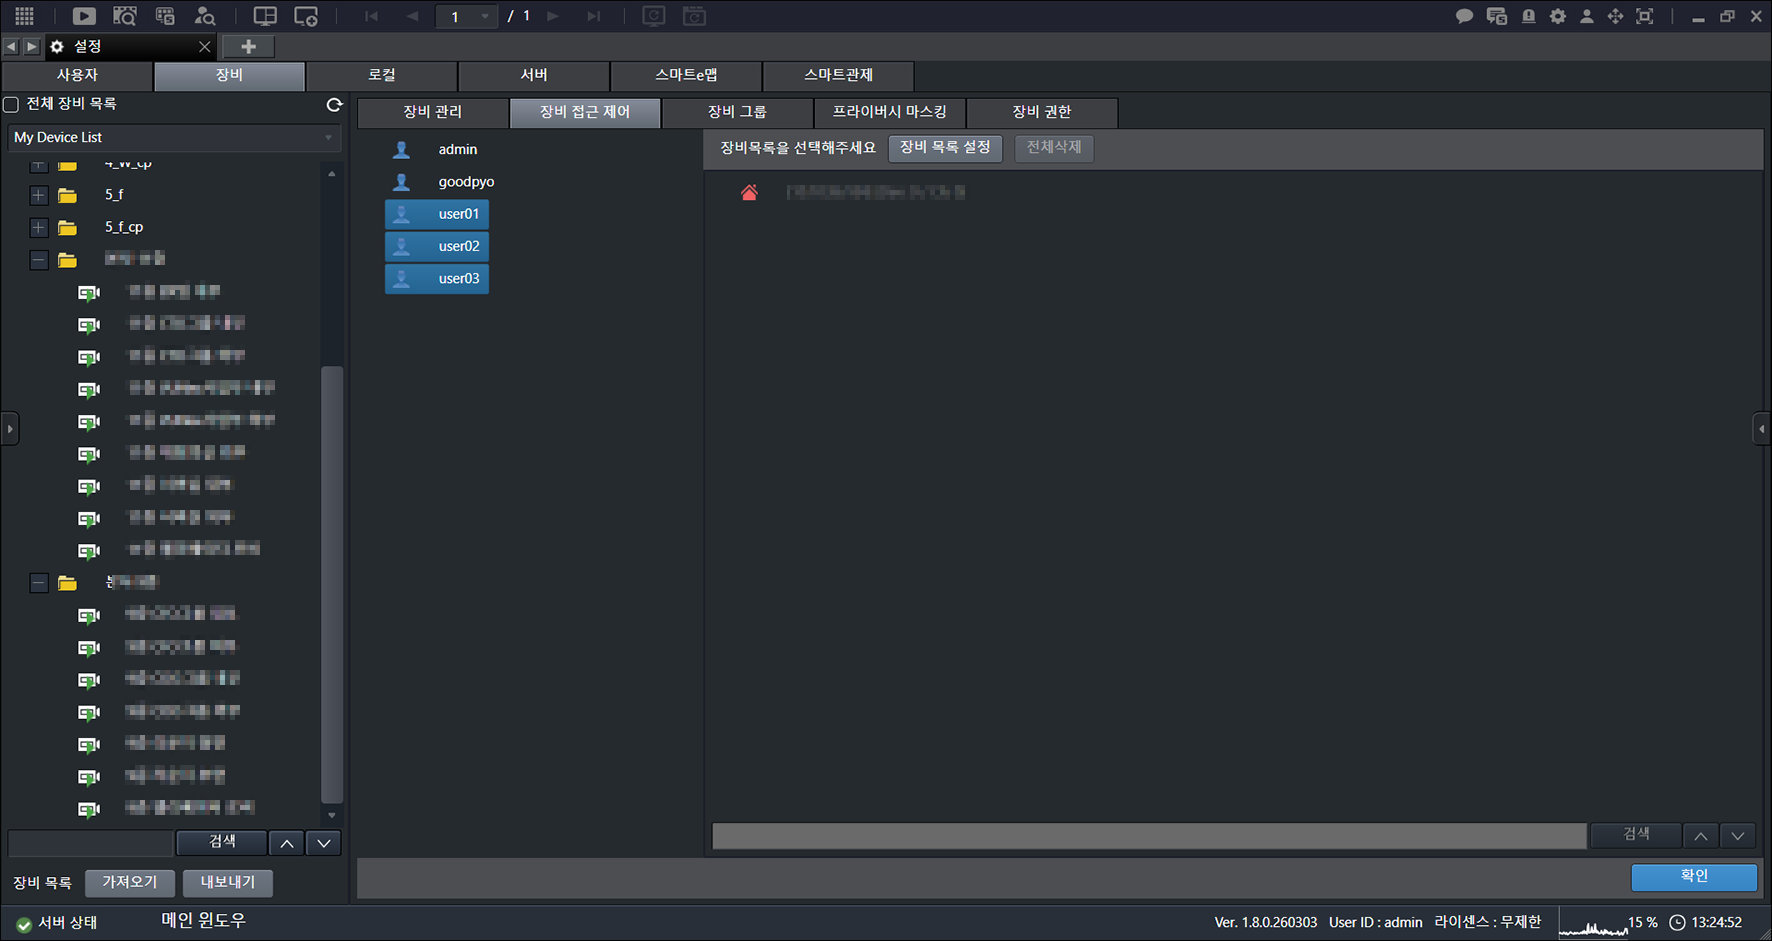
- Click [Device List Settings].
![Click [Device List Settings].](/manual/vurix-admin/images/page78_img2.jpg)
- Click [OK].
![Click [OK].](/manual/vurix-admin/images/page79_img1.jpg)
- Click [Delete All].
![Click [Delete All].](/manual/vurix-admin/images/page79_img2.jpg)
- Click [OK].
Device Group
Only administrator accounts can set [Device Groups].
Add Device Group
Adds a group.
- On the main screen, select [] > [Devices] > [Device Groups].
![On the main screen, select [{{icon:cog-frame}}] > [Devices] > [Device Groups].](/manual/vurix-admin/images/page80_img1.jpg)
- Click [Add].
![Click [Add].](/manual/vurix-admin/images/page80_img2.jpg)
- Enter a name.
- Click [OK].
- Select a group.
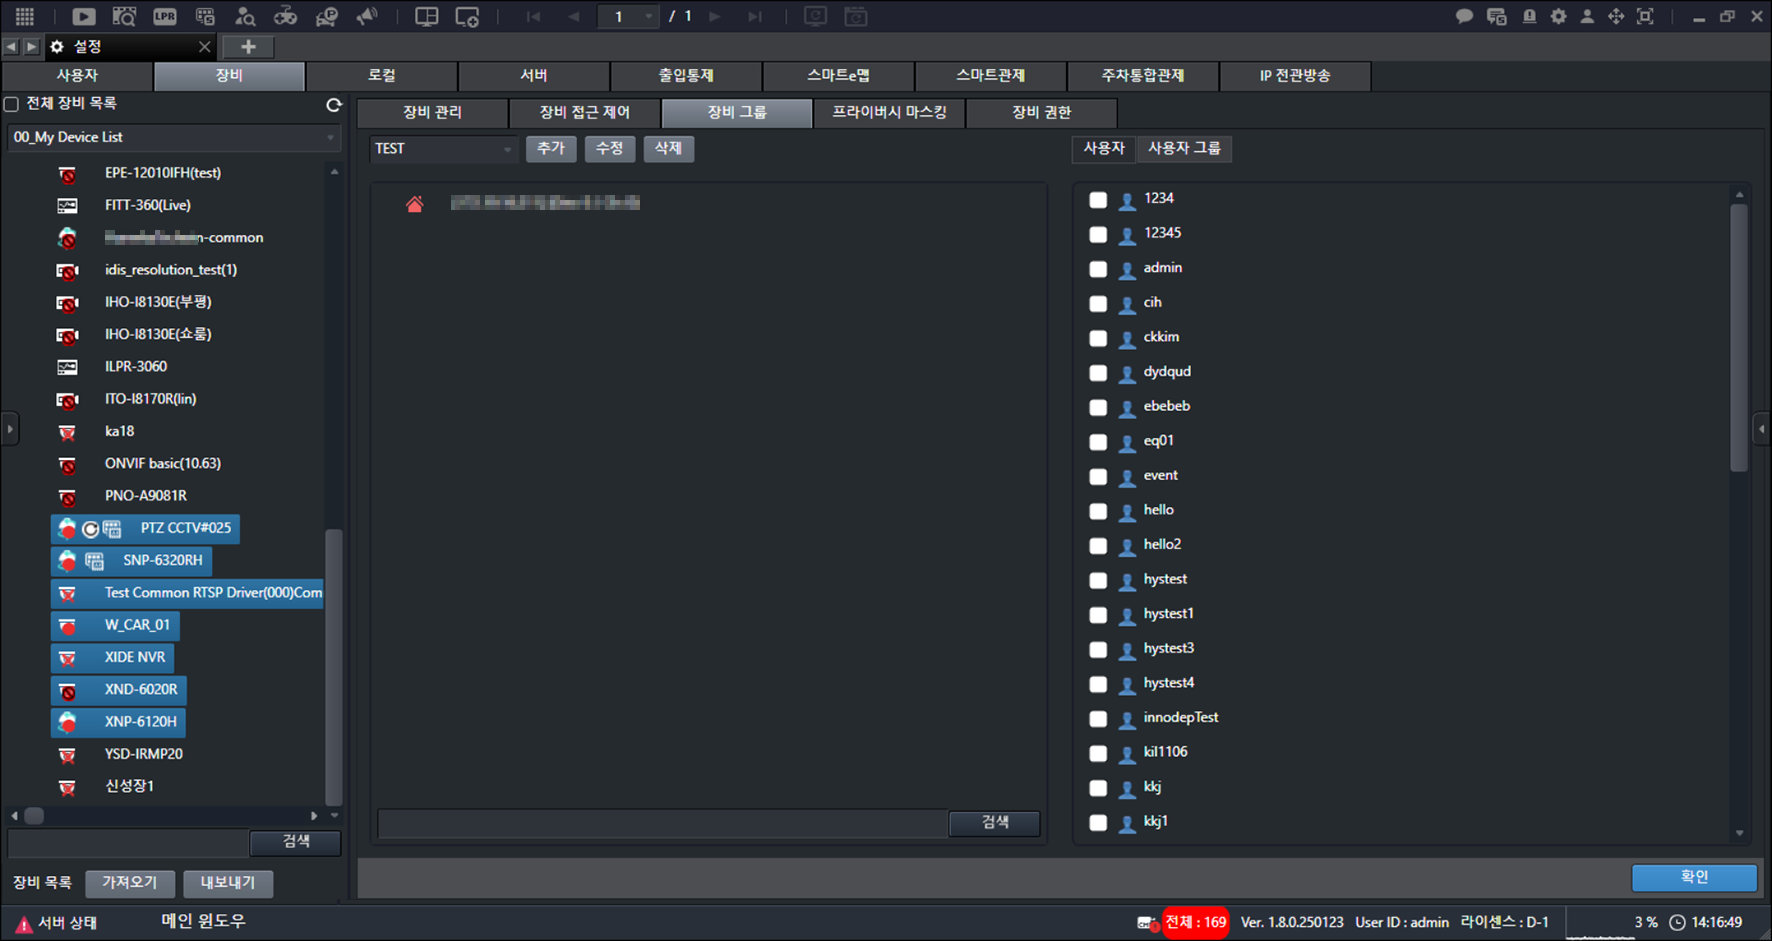
- Drag to the right while holding the mouse button.
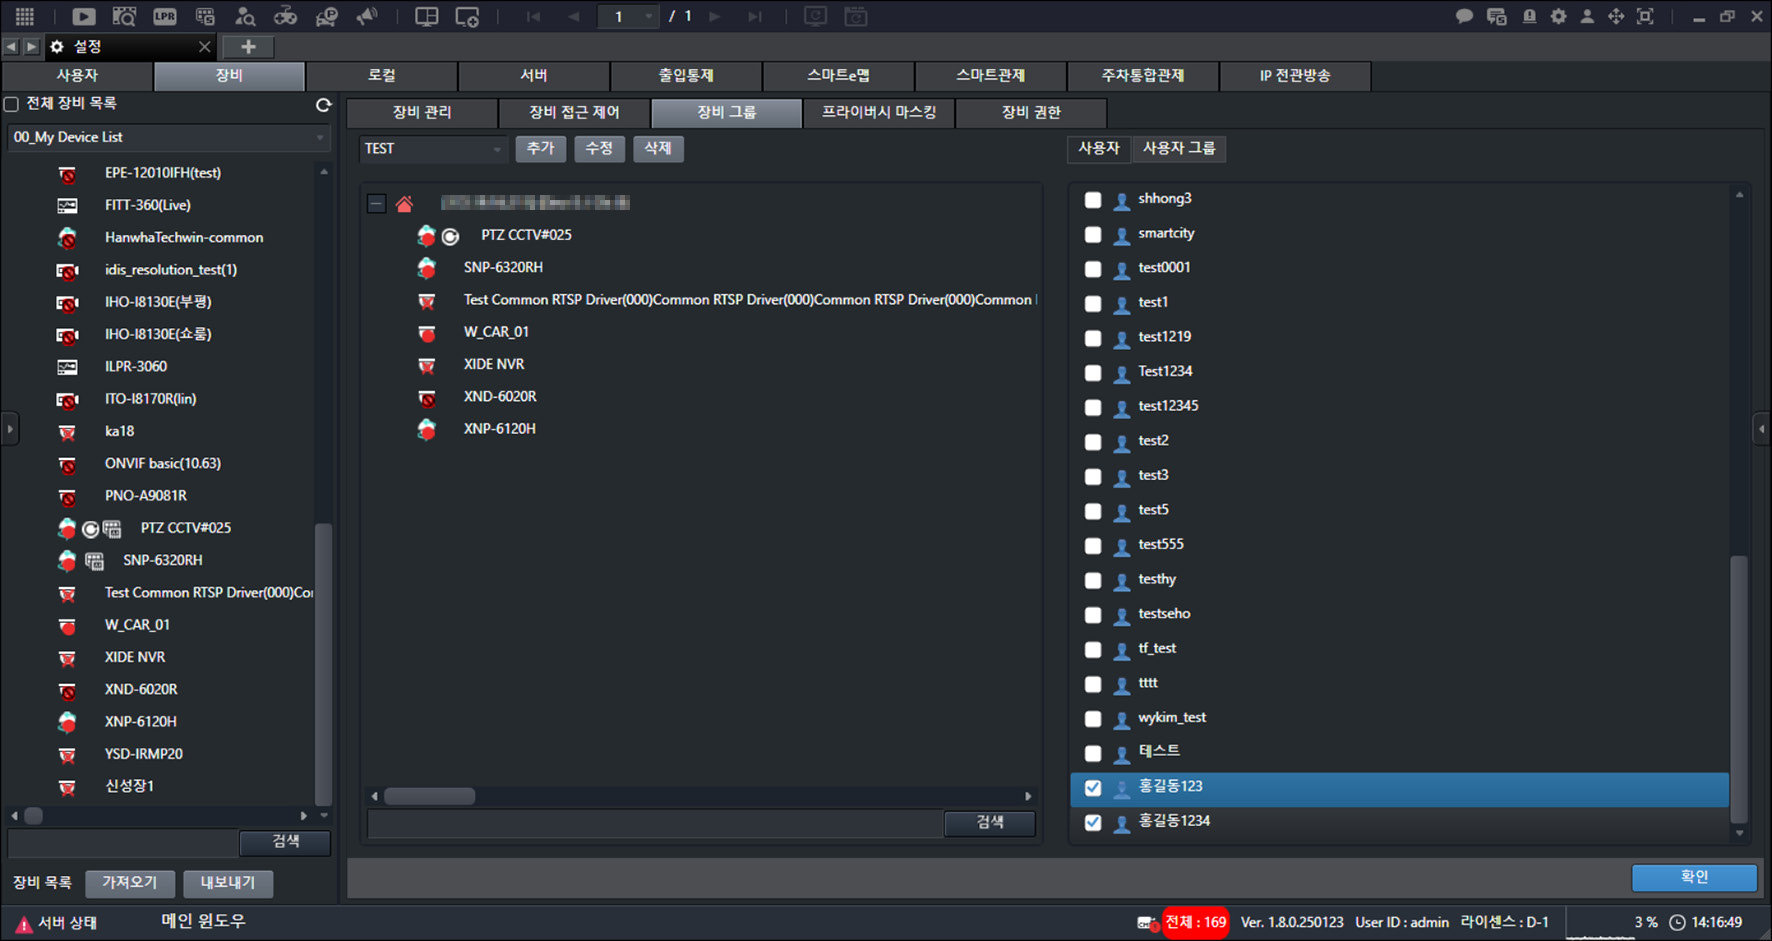
- Select a user account.
- Click [OK].
Delete Device Group
Deletes the group.
- On the main screen, select [] > [Devices] > [Device Groups].
- Select a group.
- Click [Delete].
![Click [Delete].](/manual/vurix-admin/images/page82_img1.jpg)
- Click [Yes] > [OK].
Privacy Masking
Set privacy masking areas depending on the device.
- On the main screen, select [] > [Device] > [Privacy masking].
- Select a device.
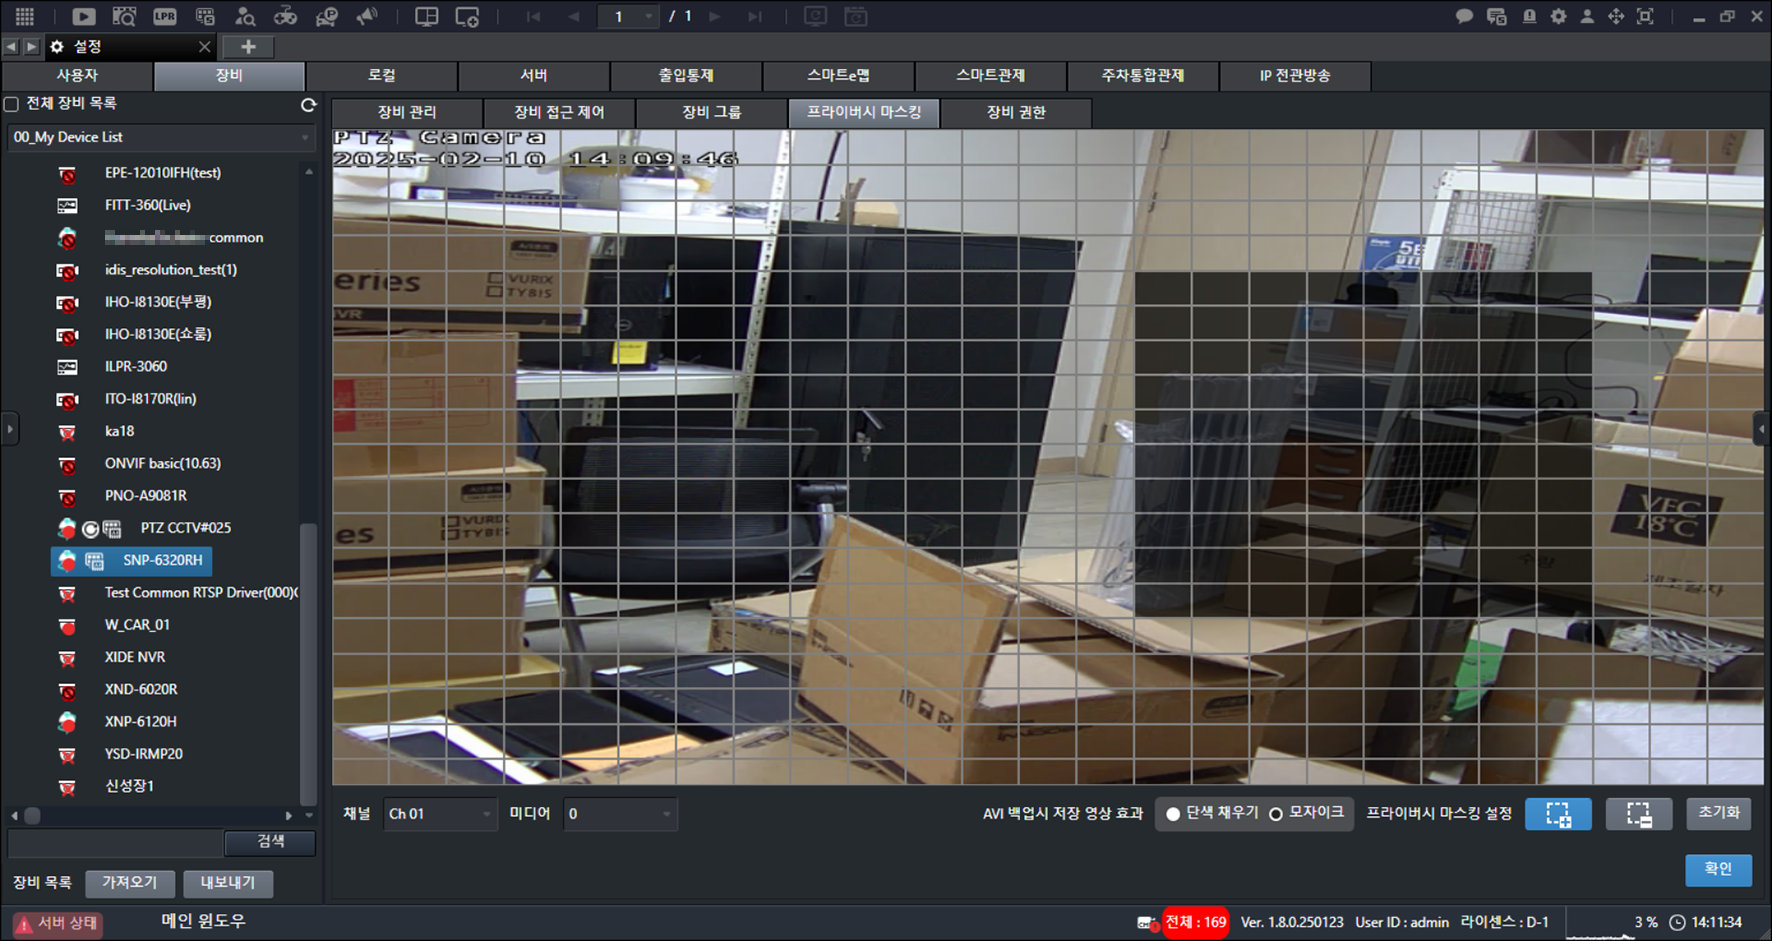
- Hold down the mouse button and move in the direction you want.
- Select the item you want.
- [Saved Video Effect for AVI Backup]: Set options such as [Solid Fill] and [Mosaic].
- [Privacy Masking Settings]: Set the privacy masking area.
- [Reset]: Reset the settings.
- Click [OK].
![Click [OK].](/manual/vurix-admin/images/page84_img1.jpg)
Device Permissions
Only administrator accounts can set [Device Permissions].
Setting PTZ Device Control Permissions
Set device permissions.
- On the main screen, select [] > [Device] > [Device permissions].
- Select a user account.
- Click [Use Per-Device Permissions].
- Select a device.
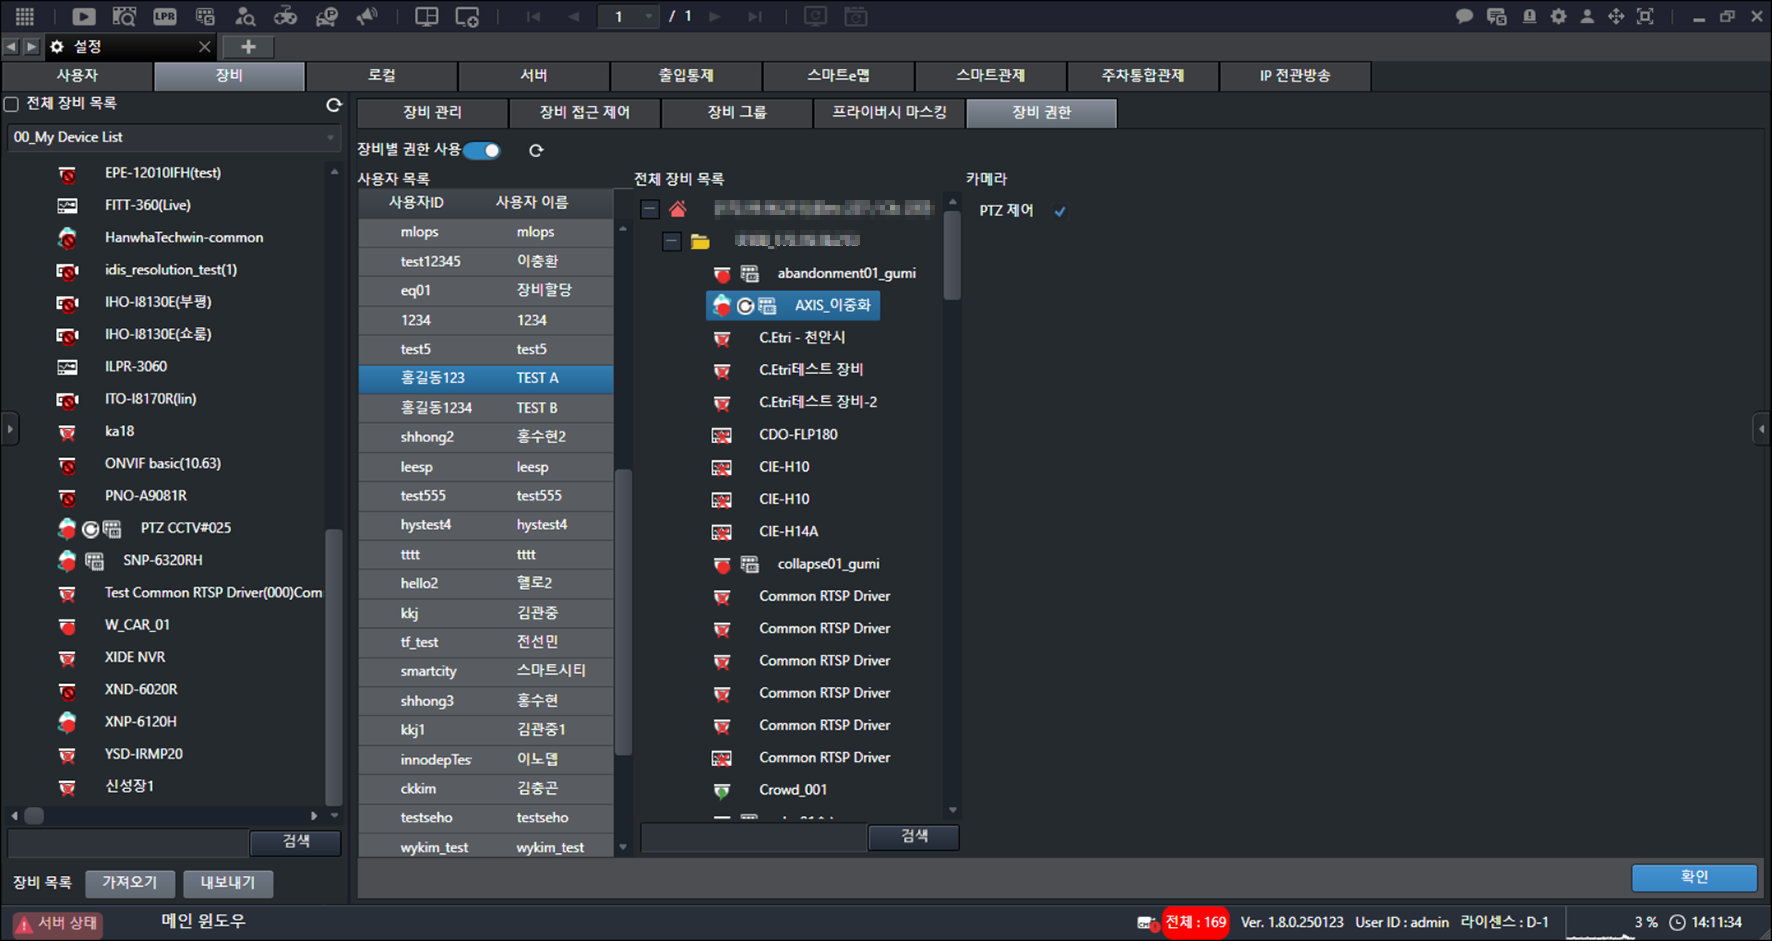
- Click [Camera] > [PTZ Control].
- Click [OK].
- Restart the program to finish applying the settings.
Export or Import Devices
Export the equipment list saved in the program, or import it into the program.
- On the main screen, select [] > [Devices] > [Device Management].
- Click [Export].
- Click [Device Tree Page] > [].
![Click [Device Tree Page] > [{{icon:cog-frame}}].](/manual/vurix-admin/images/page86_img1.jpg)
- Select the item you want.
- Click [Load].
![Click [Load].](/manual/vurix-admin/images/page86_img2.jpg)
- Click [Export] > [OK].