9
IP PA Settings
Configuring IP PA
Configuring IP PA
The screens shown in this guide may differ from the actual product.
- On the main screen, select [] > [IP public address system]. The IP public address system settings screen appears.
![On the main screen, select [{{icon:cog-frame}}] > [IP public address system]. The IP public address system settings screen appears.](/manual/vurix-admin/images/page186_img1.jpg)
- Select the item you want.
Note
[IP PA] requires server integration and a license.
IP PA Device Management
Manage devices such as speakers and microphones.
Adding an IP PA Device
Adds a device.
- On the main screen, select [] > [IP PA] > [Device Management].
![On the main screen, select [{{icon:cog-frame}}] > [IP PA] > [Device Management].](/manual/vurix-admin/images/page187_img1.jpg)
- Select [Speaker] or [Microphone].
![Select [Speaker] or [Microphone].](/manual/vurix-admin/images/page187_img2.jpg)
- Click [+].
- Enter the information.
- [Device name]: Enter the device name.
- [IP]: Enter the IP.
- [Web port]: Enter the port.
- [ID]: Enter the ID.
- [Password]: Enter the password.
- [Speaker type]: Select the speaker type.
- [Camera link]: Select the camera.
- [Model]: Select the model.
- [Manufacturer]: Select the manufacturer.
- [Latitude] / [Longitude]: Enter the latitude and longitude.
- Click [Add].
Note
You must enter all required values to add equipment.
Synchronizing IP PA Devices
Synchronize audio sources with devices.
- On the main screen, select [] > [IP PA] > [Device Management].
![On the main screen, select [{{icon:cog-frame}}] > [IP PA] > [Device Management].](/manual/vurix-admin/images/page189_img1.jpg)
- Select the item you want.
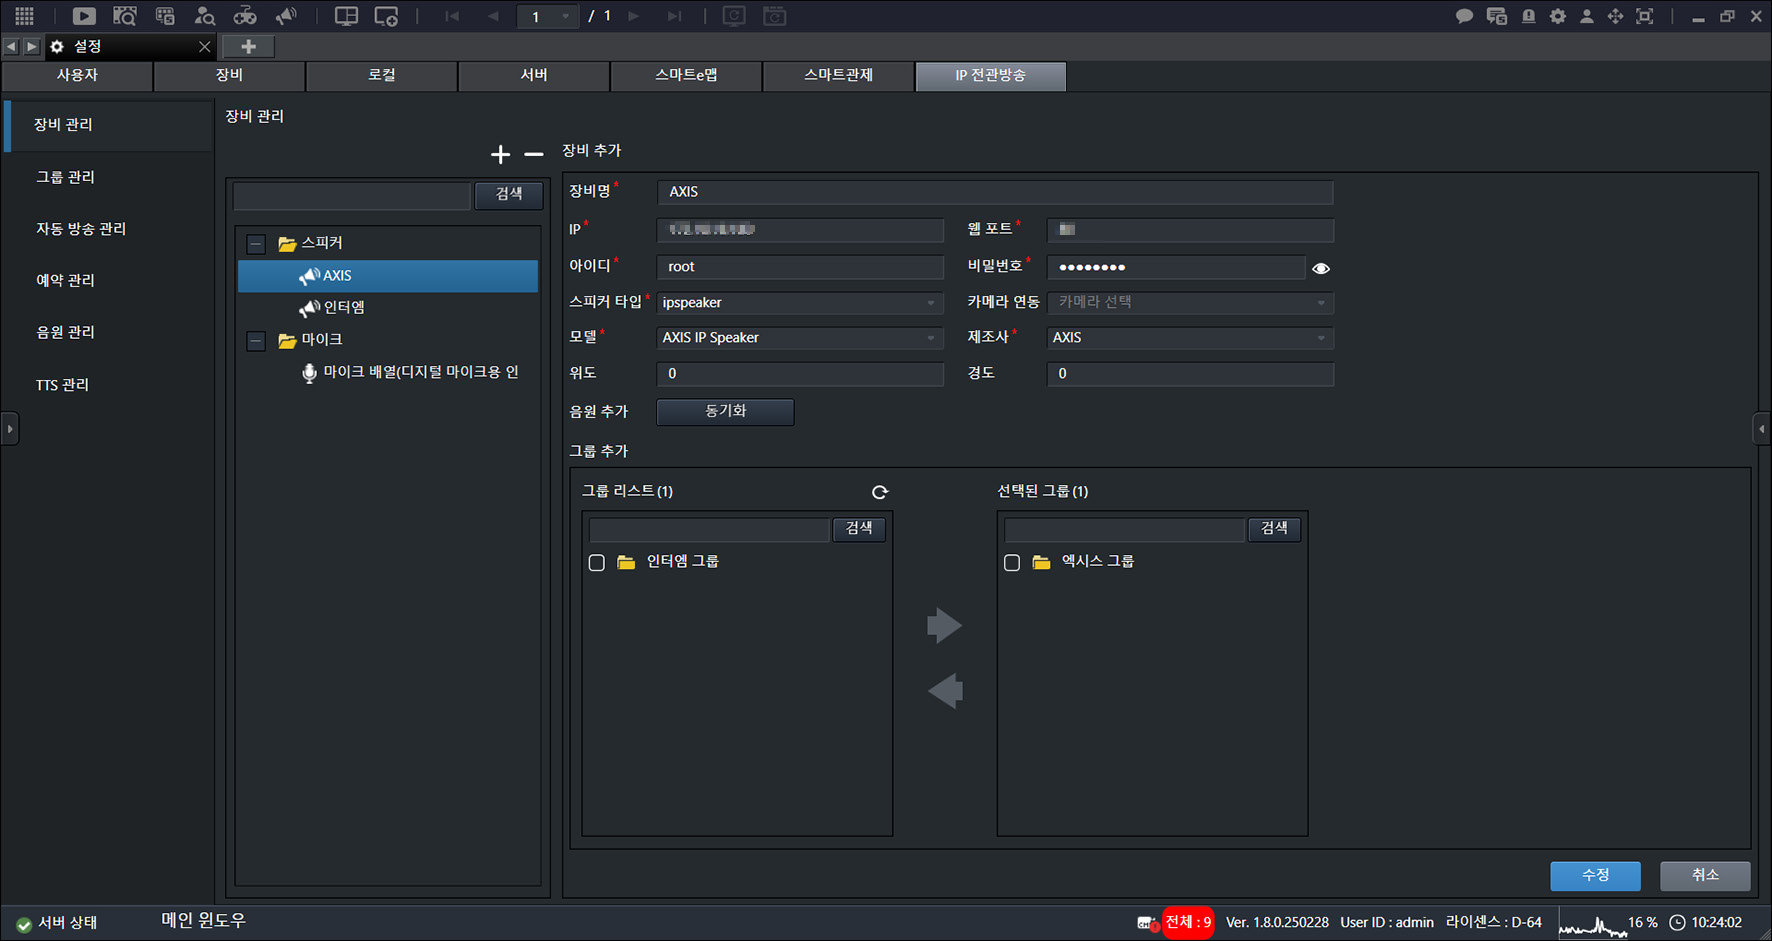
- Click [Sync].
Note
- When adding another AXIS device while an AXIS device is already added, audio registered on the existing AXIS device can be synchronized.
- Inter-M devices do not support [Sync].
- If only Inter-M devices are registered, or if no AXIS device is connected, [Preview] is not supported.
- TTS audio supports [Preview] regardless of the device.
Deleting an IP PA Device
Deletes the device.
- On the main screen, select [] > [IP PA] > [Device Management].
![On the main screen, select [{{icon:cog-frame}}] > [IP PA] > [Device Management].](/manual/vurix-admin/images/page191_img1.jpg)
- Select the item you want.
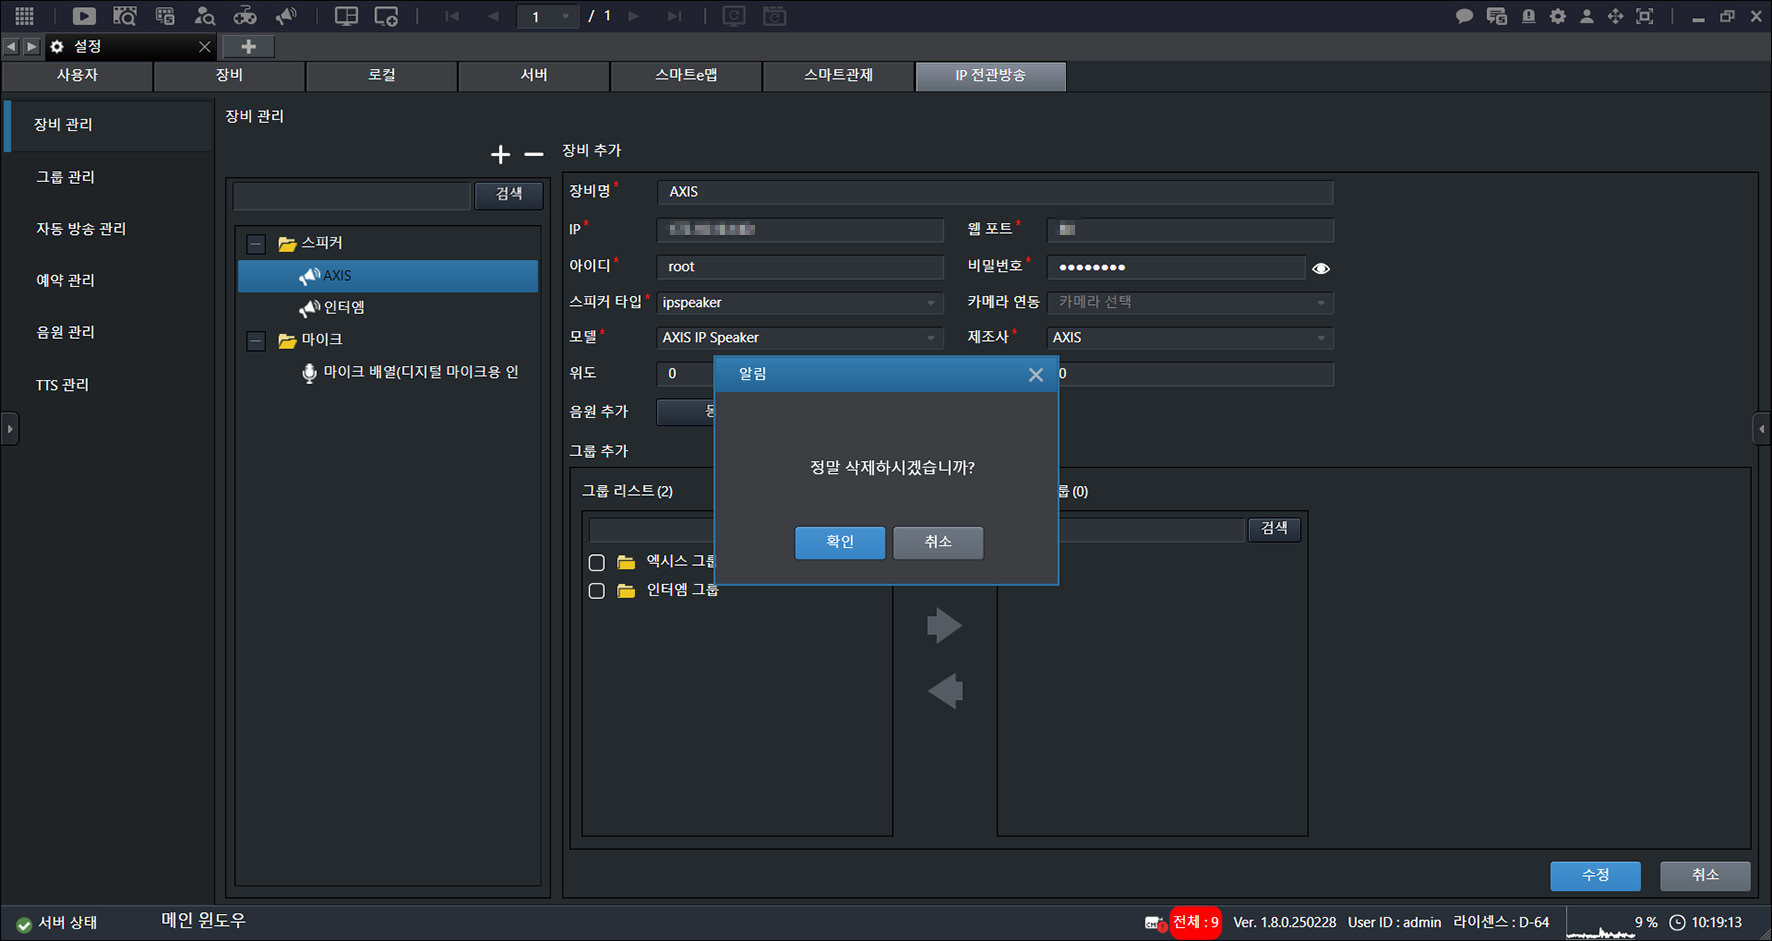
- Click [-] > [OK].
IP PA Group Management
Manage IP PA groups.
Adding an IP PA Group
Adds a group.
- On the main screen, select [] > [IP PA] > [Group Management].
![On the main screen, select [{{icon:cog-frame}}] > [IP PA] > [Group Management].](/manual/vurix-admin/images/page192_img1.jpg)
- Click [+].
![Click [+].](/manual/vurix-admin/images/page192_img2.jpg)
- Enter the [Group Name].
- Click [Add].
Deleting an IP PA Group
Deletes the group.
- On the main screen, select [] > [IP PA] > [Group Management].
![On the main screen, select [{{icon:cog-frame}}] > [IP PA] > [Group Management].](/manual/vurix-admin/images/page193_img1.jpg)
- Select the item you want.
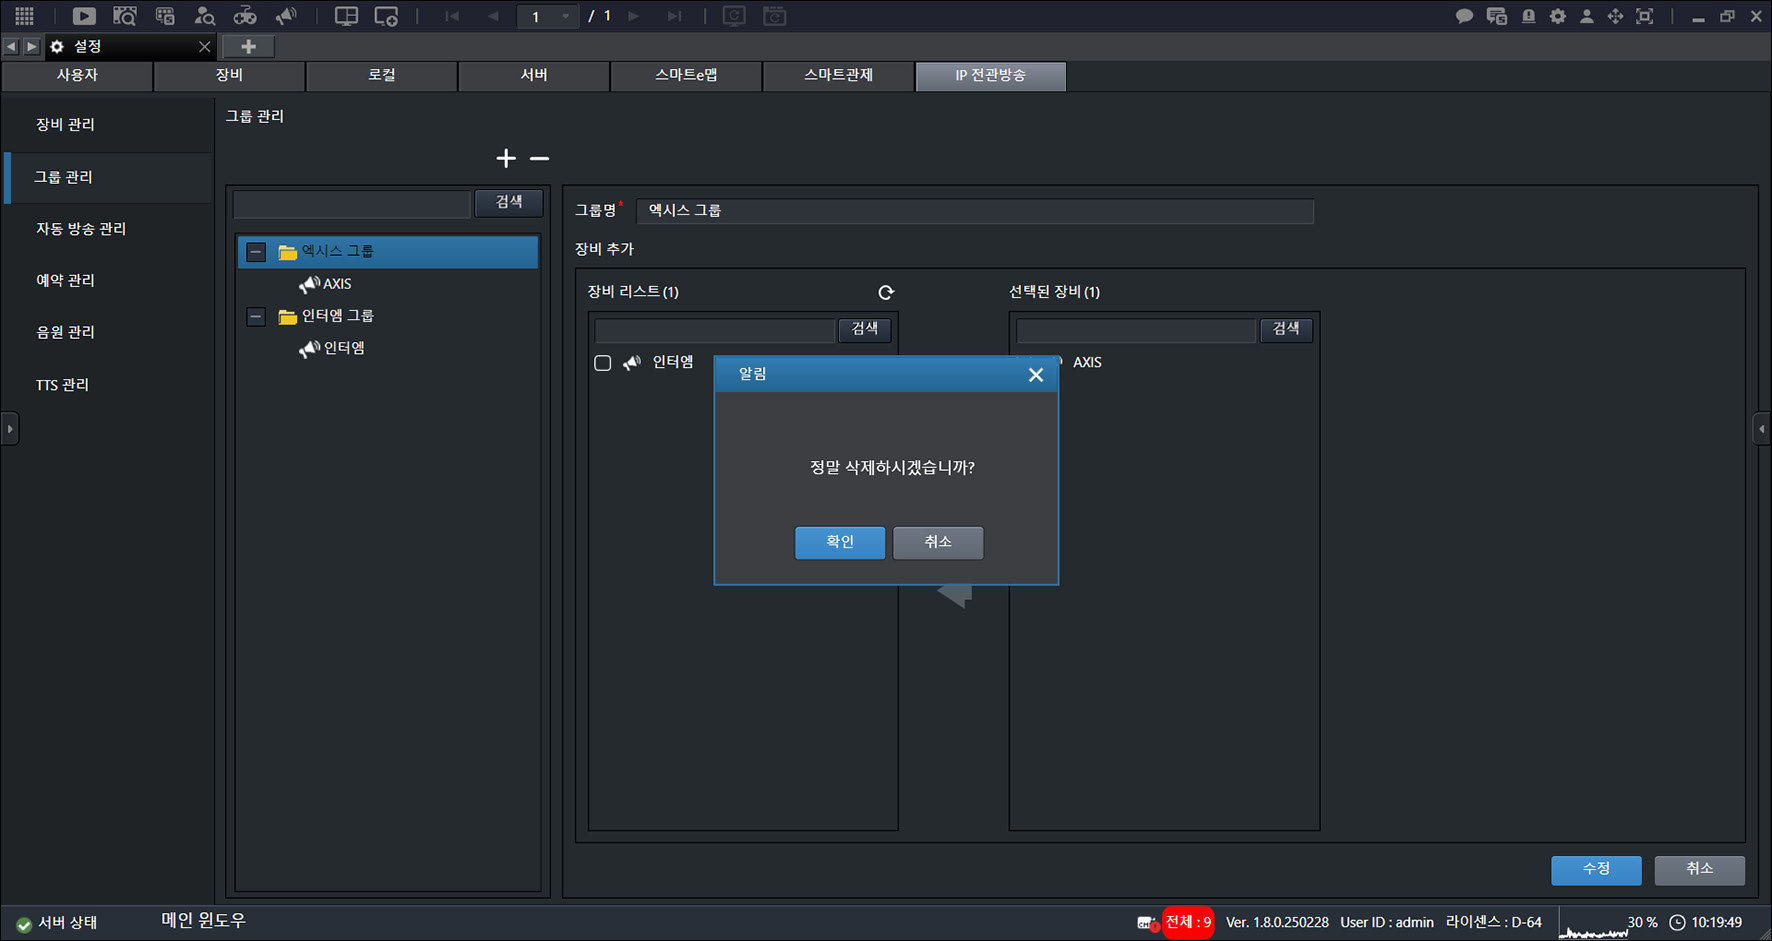
- Click [-] > [OK].
Auto Broadcast Management
Manage auto broadcasts.
Add Auto Broadcast
Add an auto broadcast.
- On the main screen, select [] > [IP PA] > [Auto Broadcast Management].
![On the main screen, select [{{icon:cog-frame}}] > [IP PA] > [Auto Broadcast Management].](/manual/vurix-admin/images/page194_img1.jpg)
- Select the item you want.
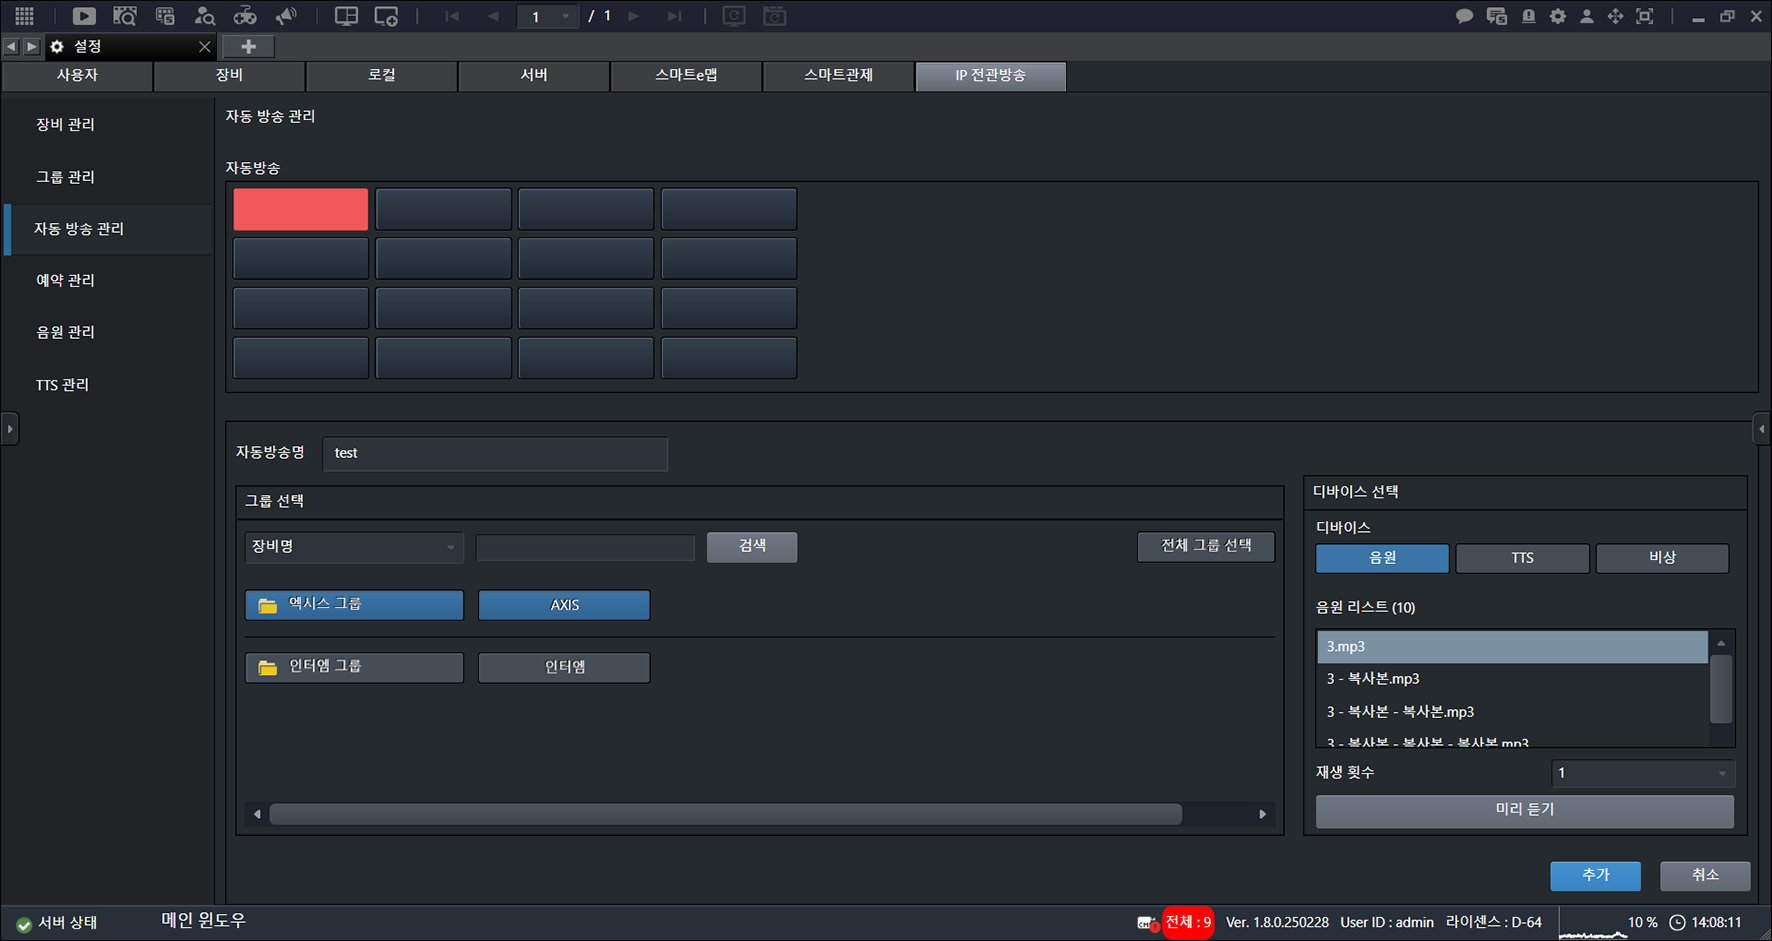
- Enter the [Auto Broadcast Name].
- Click [Add].
Delete Auto Broadcast
Delete an auto broadcast.
- On the main screen, select [] > [IP PA] > [Auto Broadcast Management].
![On the main screen, select [{{icon:cog-frame}}] > [IP PA] > [Auto Broadcast Management].](/manual/vurix-admin/images/page195_img1.jpg)
- Select the item you want.
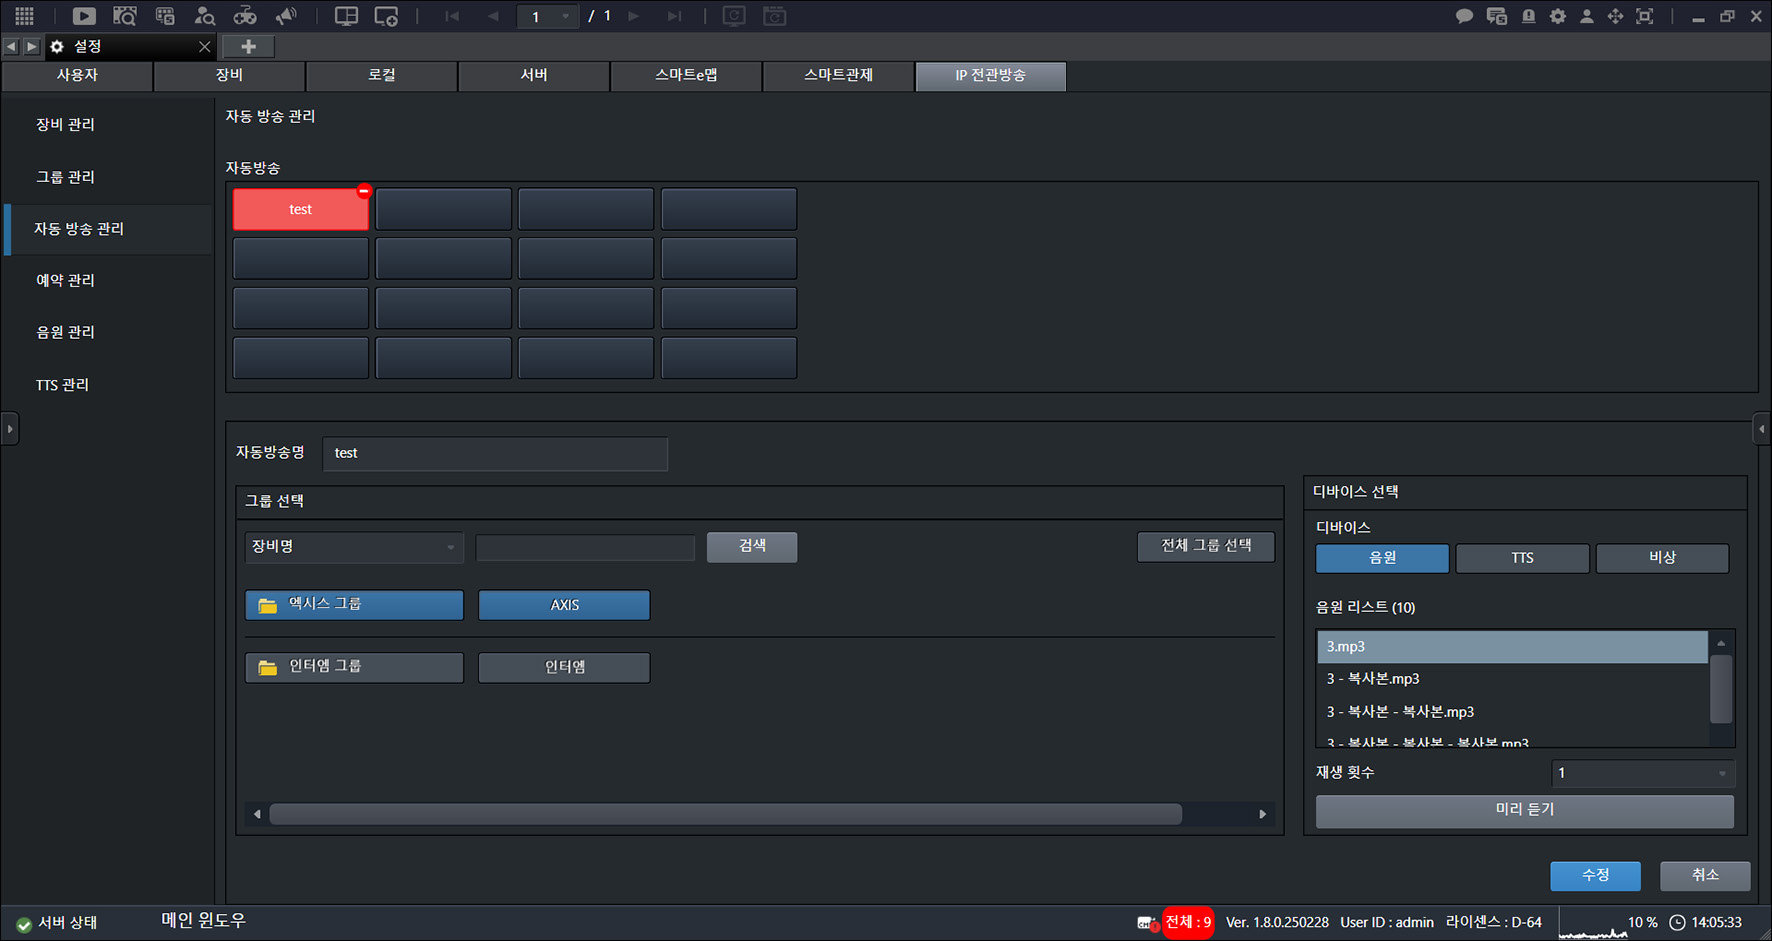
- Click [-].
IP PA Schedule Management
Manage IP PA schedules.
Adding an IP PA Schedule
Adds a schedule.
- On the main screen, select [] > [IP PA] > [Schedule Management].
![On the main screen, select [{{icon:cog-frame}}] > [IP PA] > [Schedule Management].](/manual/vurix-admin/images/page196_img1.jpg)
- Click [Add].
![Click [Add].](/manual/vurix-admin/images/page196_img2.jpg)
- Set the [Scheduled Start Time] and [Scheduled Date].
- Click [Add].
Editing an IP PA Schedule
Edit a schedule.
- On the main screen, select [] > [IP PA] > [Schedule Management].
![On the main screen, select [{{icon:cog-frame}}] > [IP PA] > [Schedule Management].](/manual/vurix-admin/images/page197_img1.jpg)
- Select the item you want.
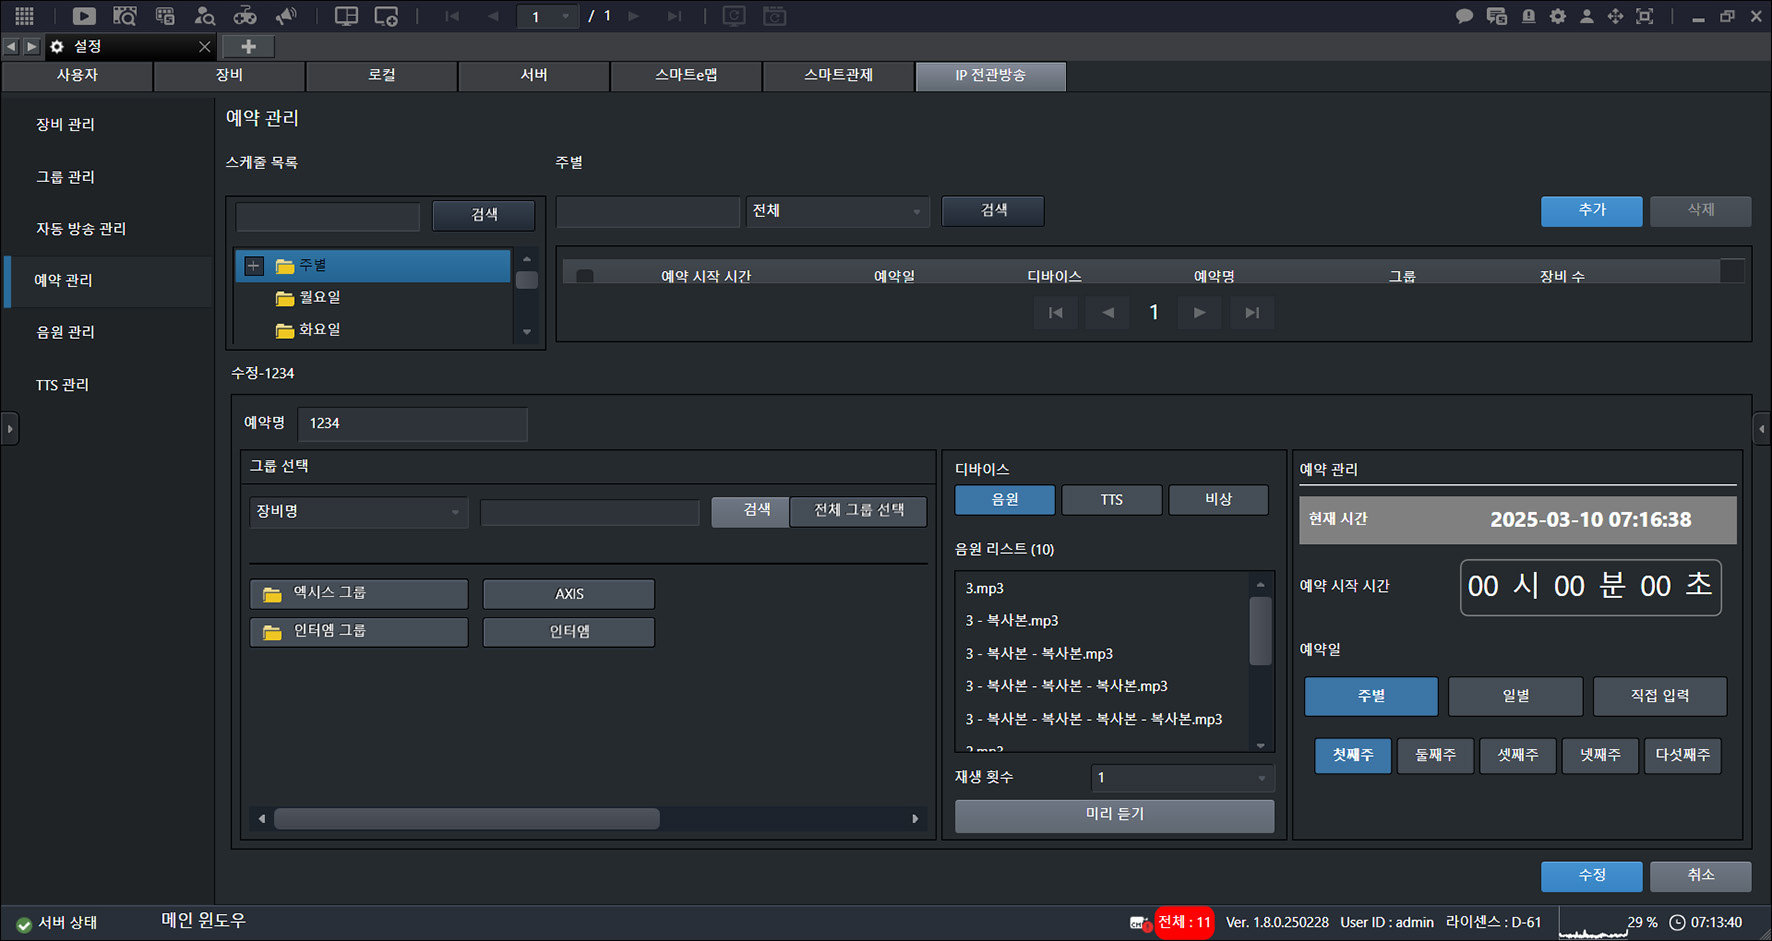
- Click [Edit].
Deleting an IP PA Schedule
Delete a schedule.
- On the main screen, select [] > [IP PA] > [Schedule Management].
![On the main screen, select [{{icon:cog-frame}}] > [IP PA] > [Schedule Management].](/manual/vurix-admin/images/page198_img1.jpg)
- Select the item you want.
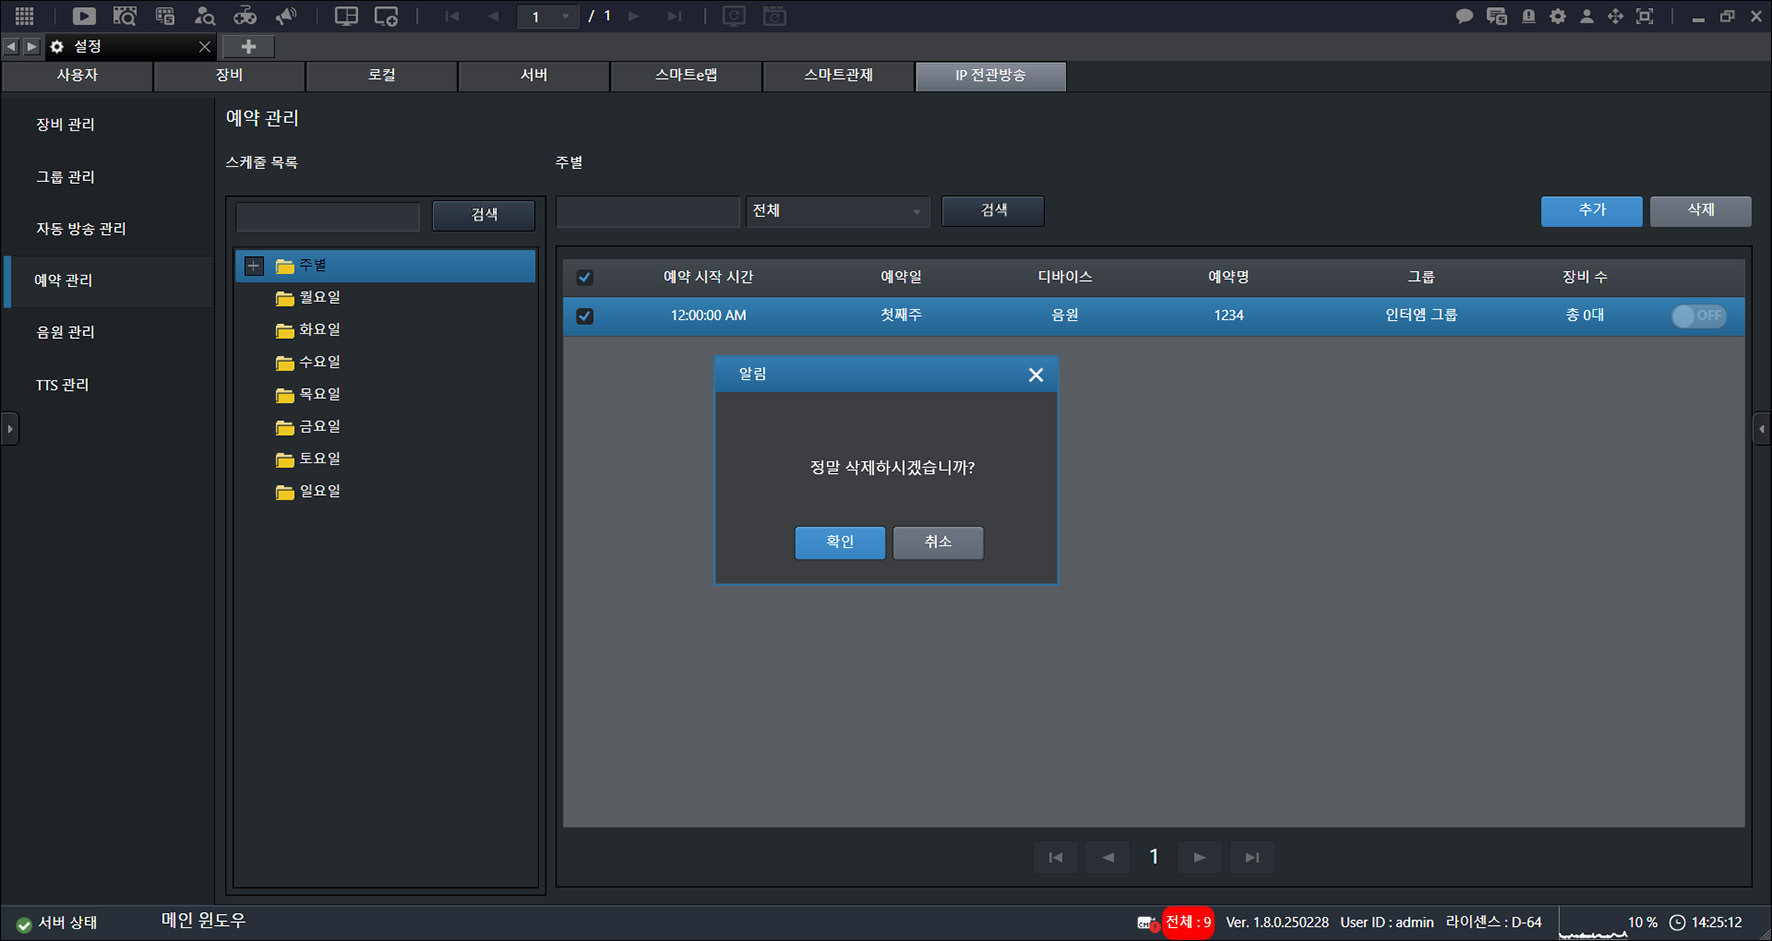
- Click [Delete] > [OK].
IP PA Audio File Management
Manage IP PA audio files.
Adding an IP PA Audio File
Add an audio source.
- On the main screen, select [] > [IP PA] > [Audio File Management].
![On the main screen, select [{{icon:cog-frame}}] > [IP PA] > [Audio File Management].](/manual/vurix-admin/images/page199_img1.jpg)
- Click [Add].
![Click [Add].](/manual/vurix-admin/images/page199_img2.jpg)
- Click [Select File].
![Click [Select File].](/manual/vurix-admin/images/page200_img1.jpg)
- Click [Add].
Editing an IP PA Audio File
Edit an audio source.
- On the main screen, select [] > [IP PA] > [Audio File Management].
![On the main screen, select [{{icon:cog-frame}}] > [IP PA] > [Audio File Management].](/manual/vurix-admin/images/page201_img1.jpg)
- Select the item you want.
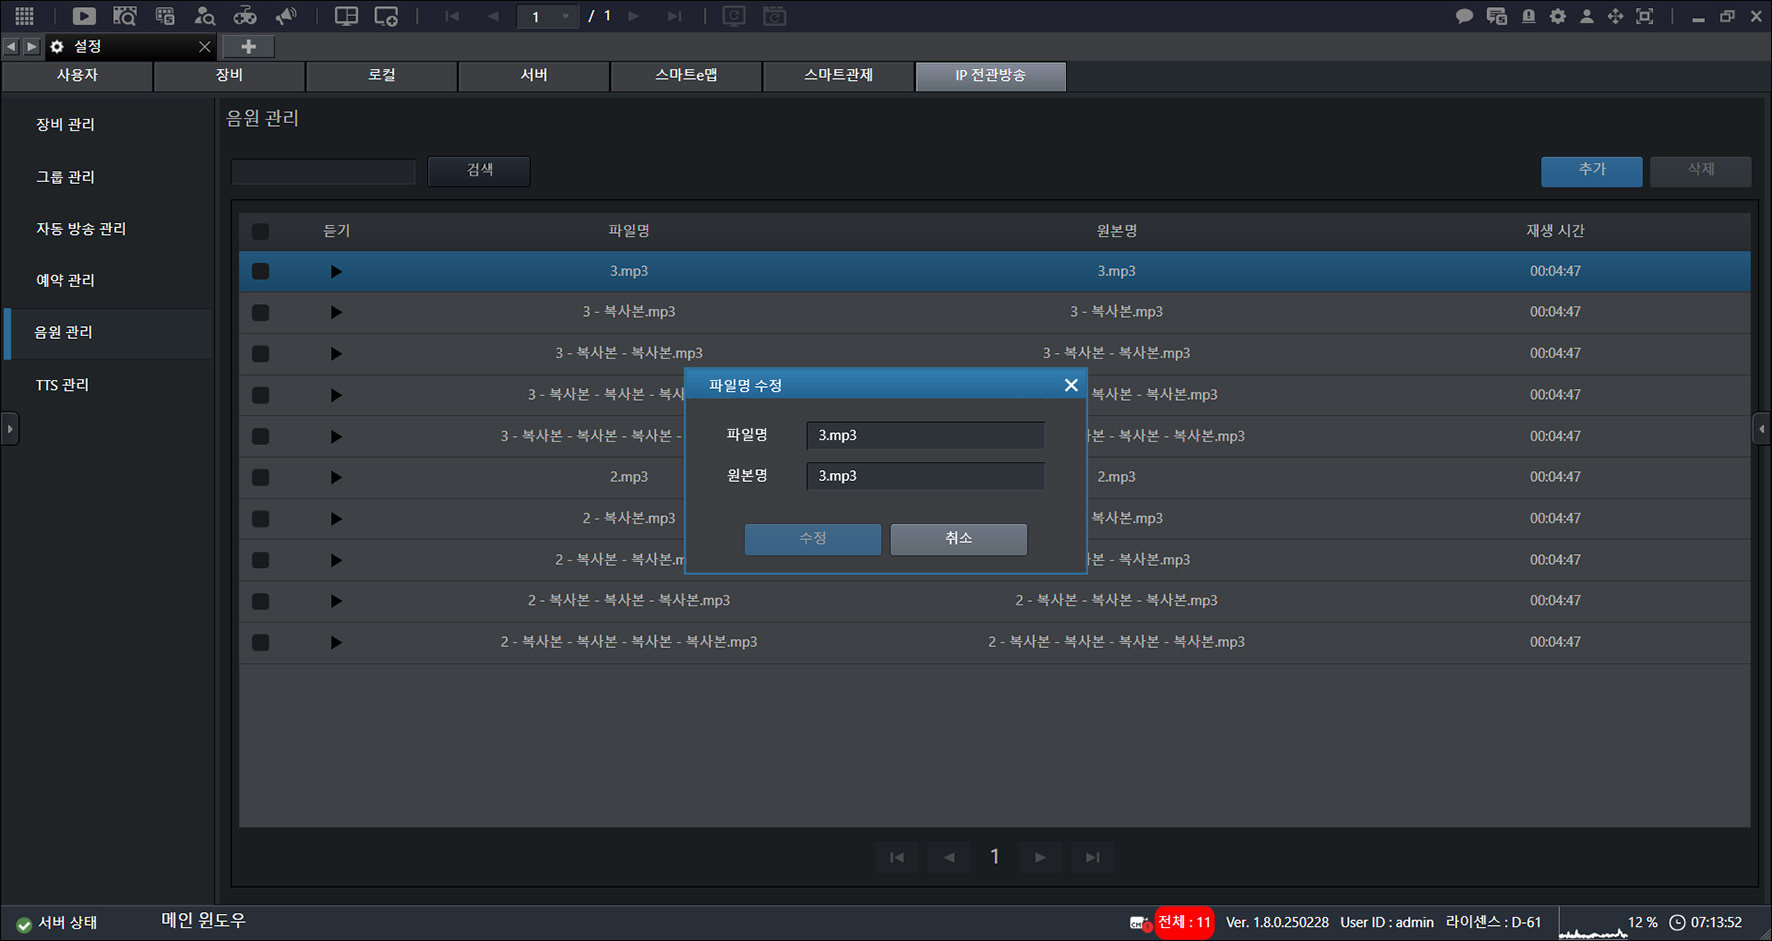
- Click [Edit].
Deleting an IP PA Audio File
Delete an audio source.
- On the main screen, select [] > [IP PA] > [Audio File Management].
![On the main screen, select [{{icon:cog-frame}}] > [IP PA] > [Audio File Management].](/manual/vurix-admin/images/page202_img1.jpg)
- Select the item you want.
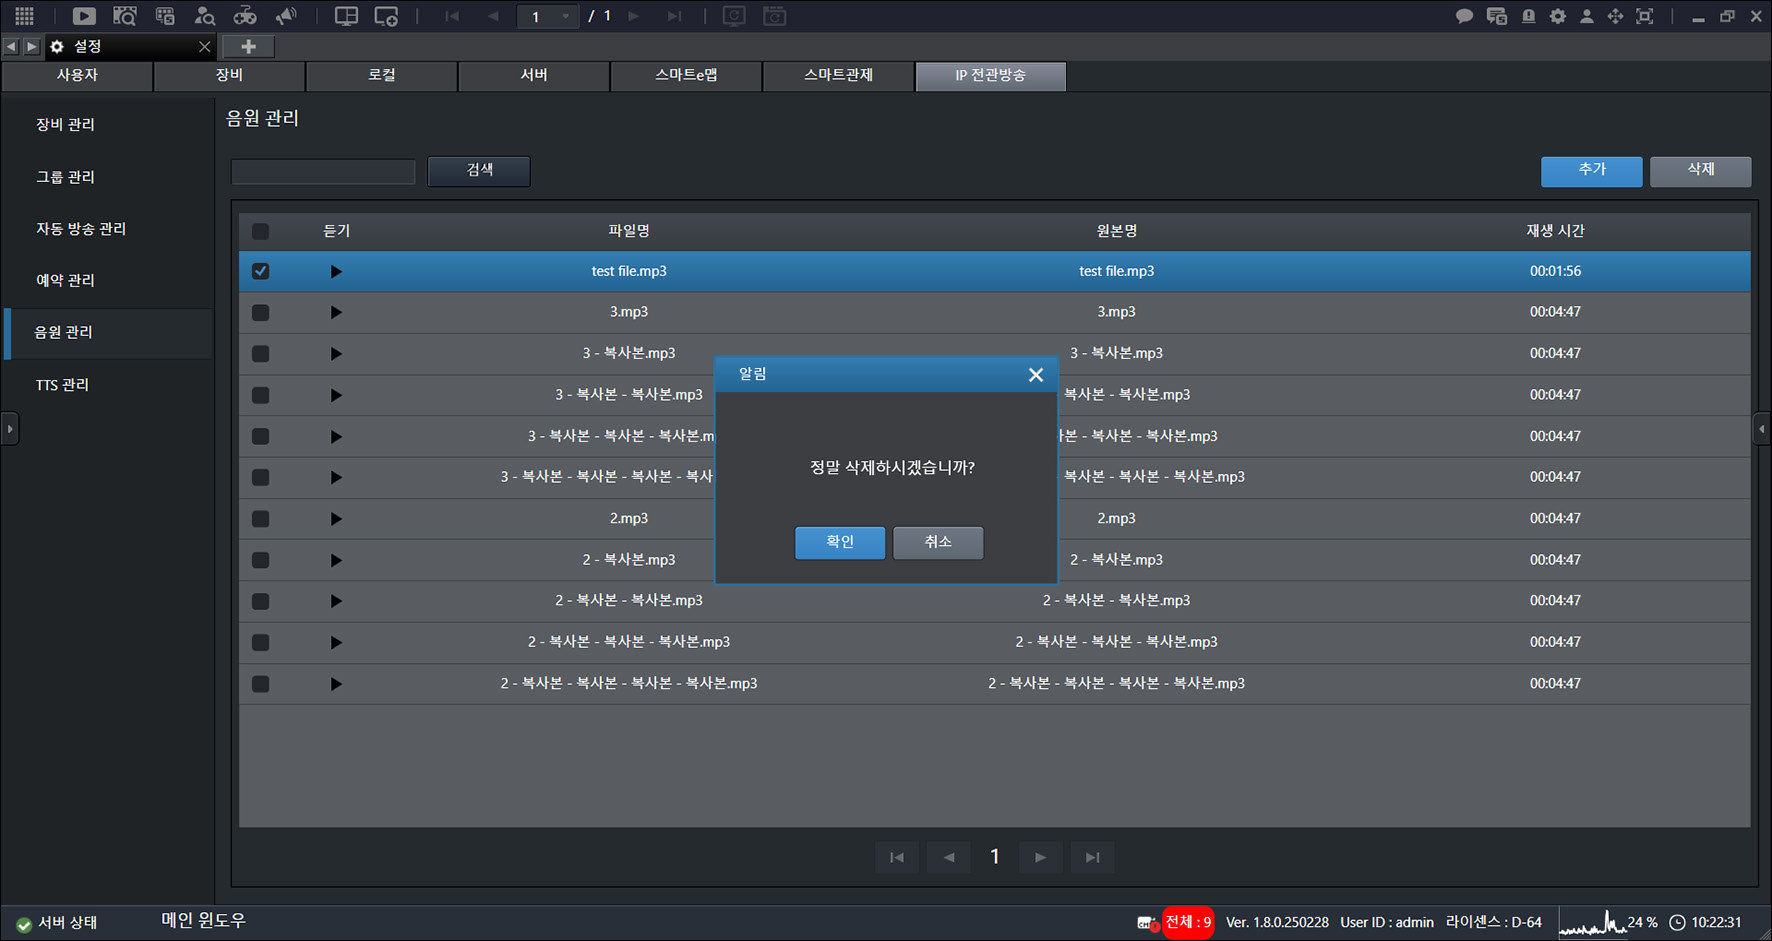
- Click [Delete] > [OK].
IP PA TTS Management
Manage IP PA TTS (Text to Speech).
Adding an IP PA TTS
Adds a TTS.
- On the main screen, select [] > [IP PA] > [TTS Management].
![On the main screen, select [{{icon:cog-frame}}] > [IP PA] > [TTS Management].](/manual/vurix-admin/images/page203_img1.jpg)
- Click [Add].
![Click [Add].](/manual/vurix-admin/images/page203_img2.jpg)
- Enter the title and content.
- Click [Add].
Editing an IP PA TTS
Edits the TTS.
- On the main screen, select [] > [IP PA] > [TTS Management].
![On the main screen, select [{{icon:cog-frame}}] > [IP PA] > [TTS Management].](/manual/vurix-admin/images/page204_img1.jpg)
- Select the item you want.
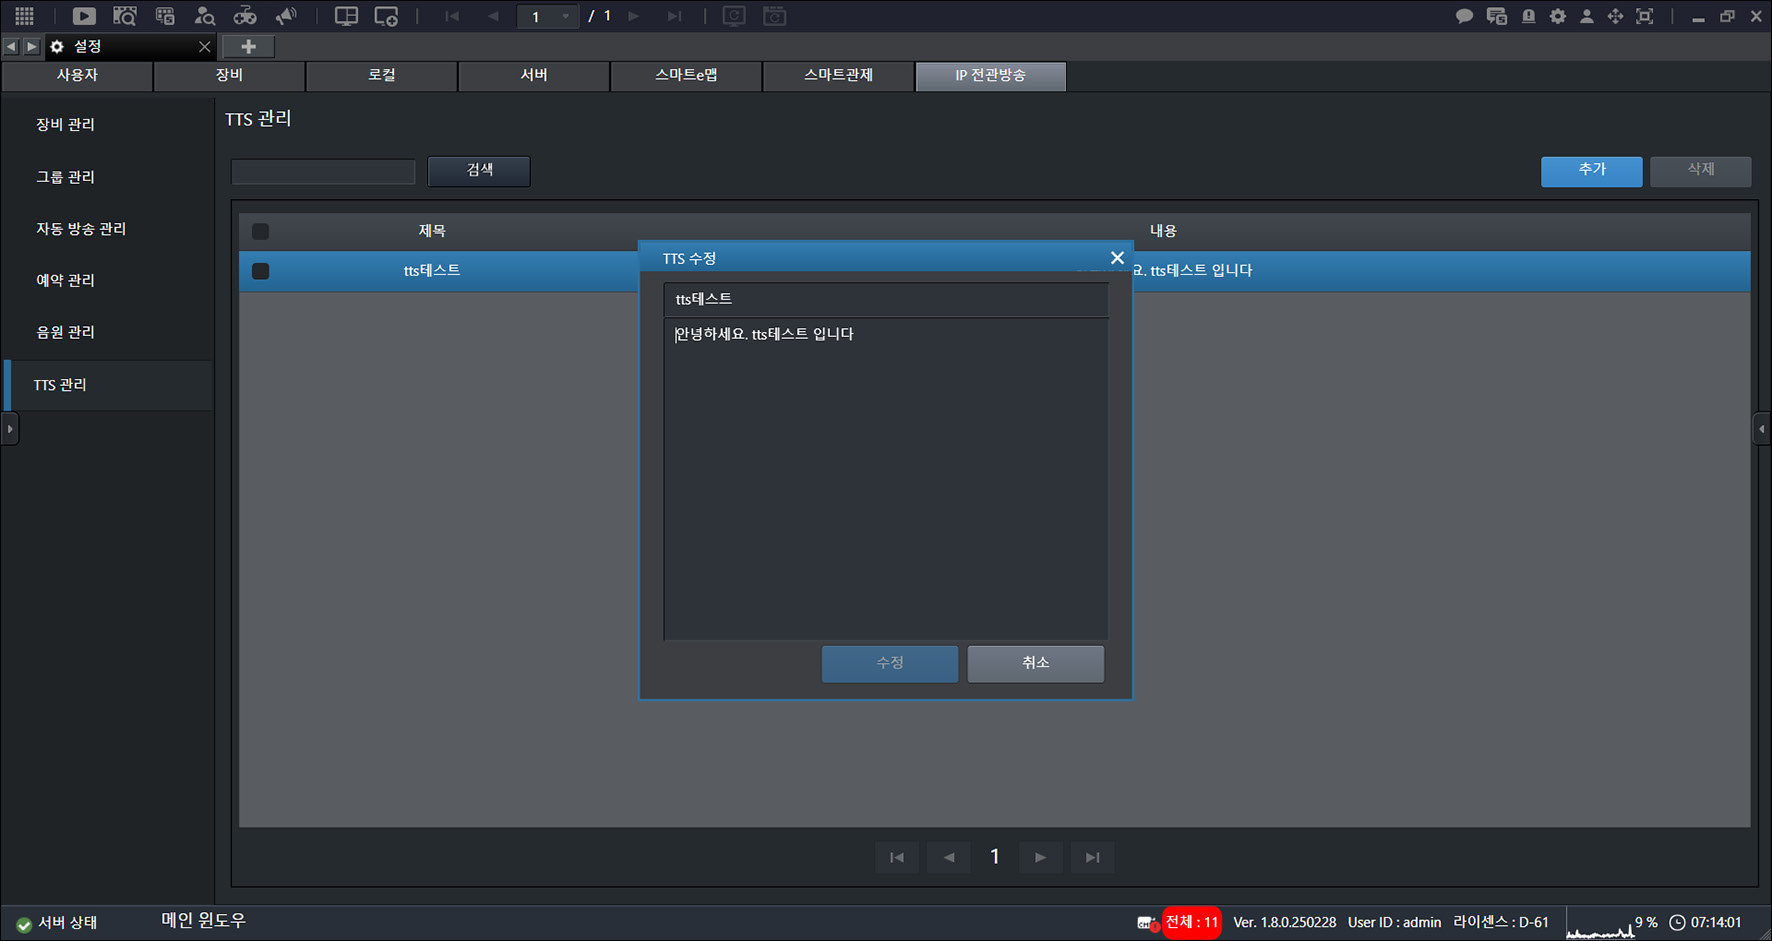
- Click [Edit].
Deleting an IP PA TTS
Deletes the TTS.
- On the main screen, select [] > [IP PA] > [TTS Management].
![On the main screen, select [{{icon:cog-frame}}] > [IP PA] > [TTS Management].](/manual/vurix-admin/images/page205_img1.jpg)
- Select the item you want.
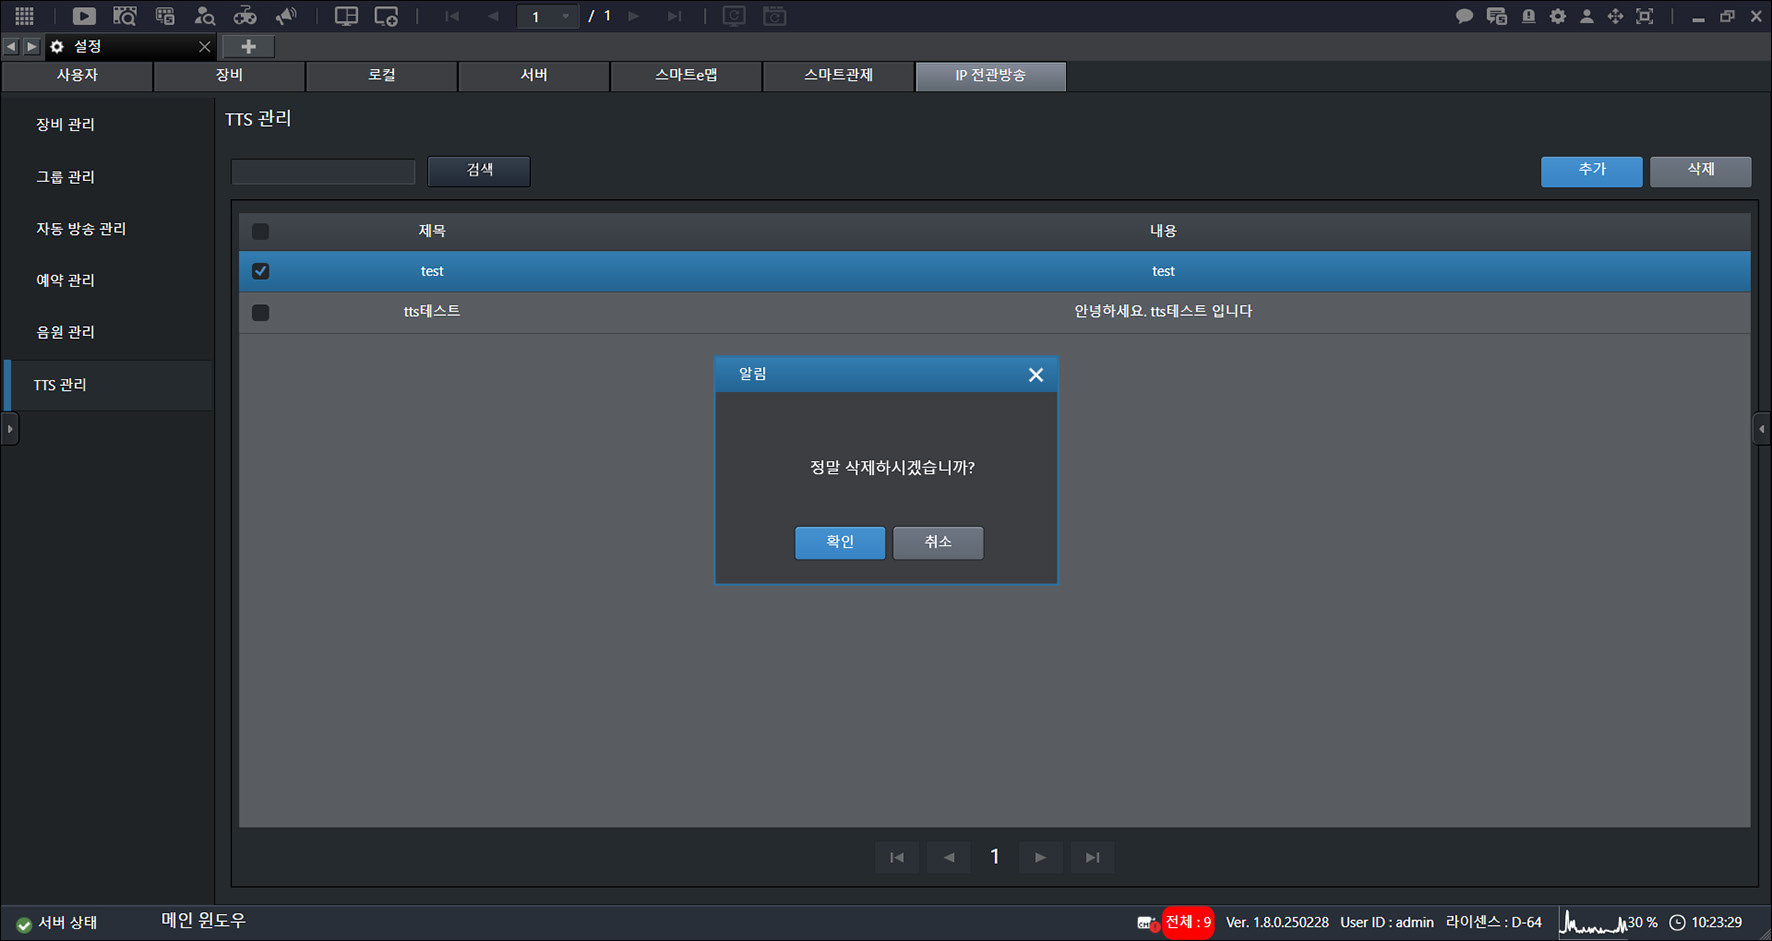
- Click [Delete] > [OK].