06
Settings
This section explains how to manage the settings required to operate Hub.
Exploring the Settings Screen
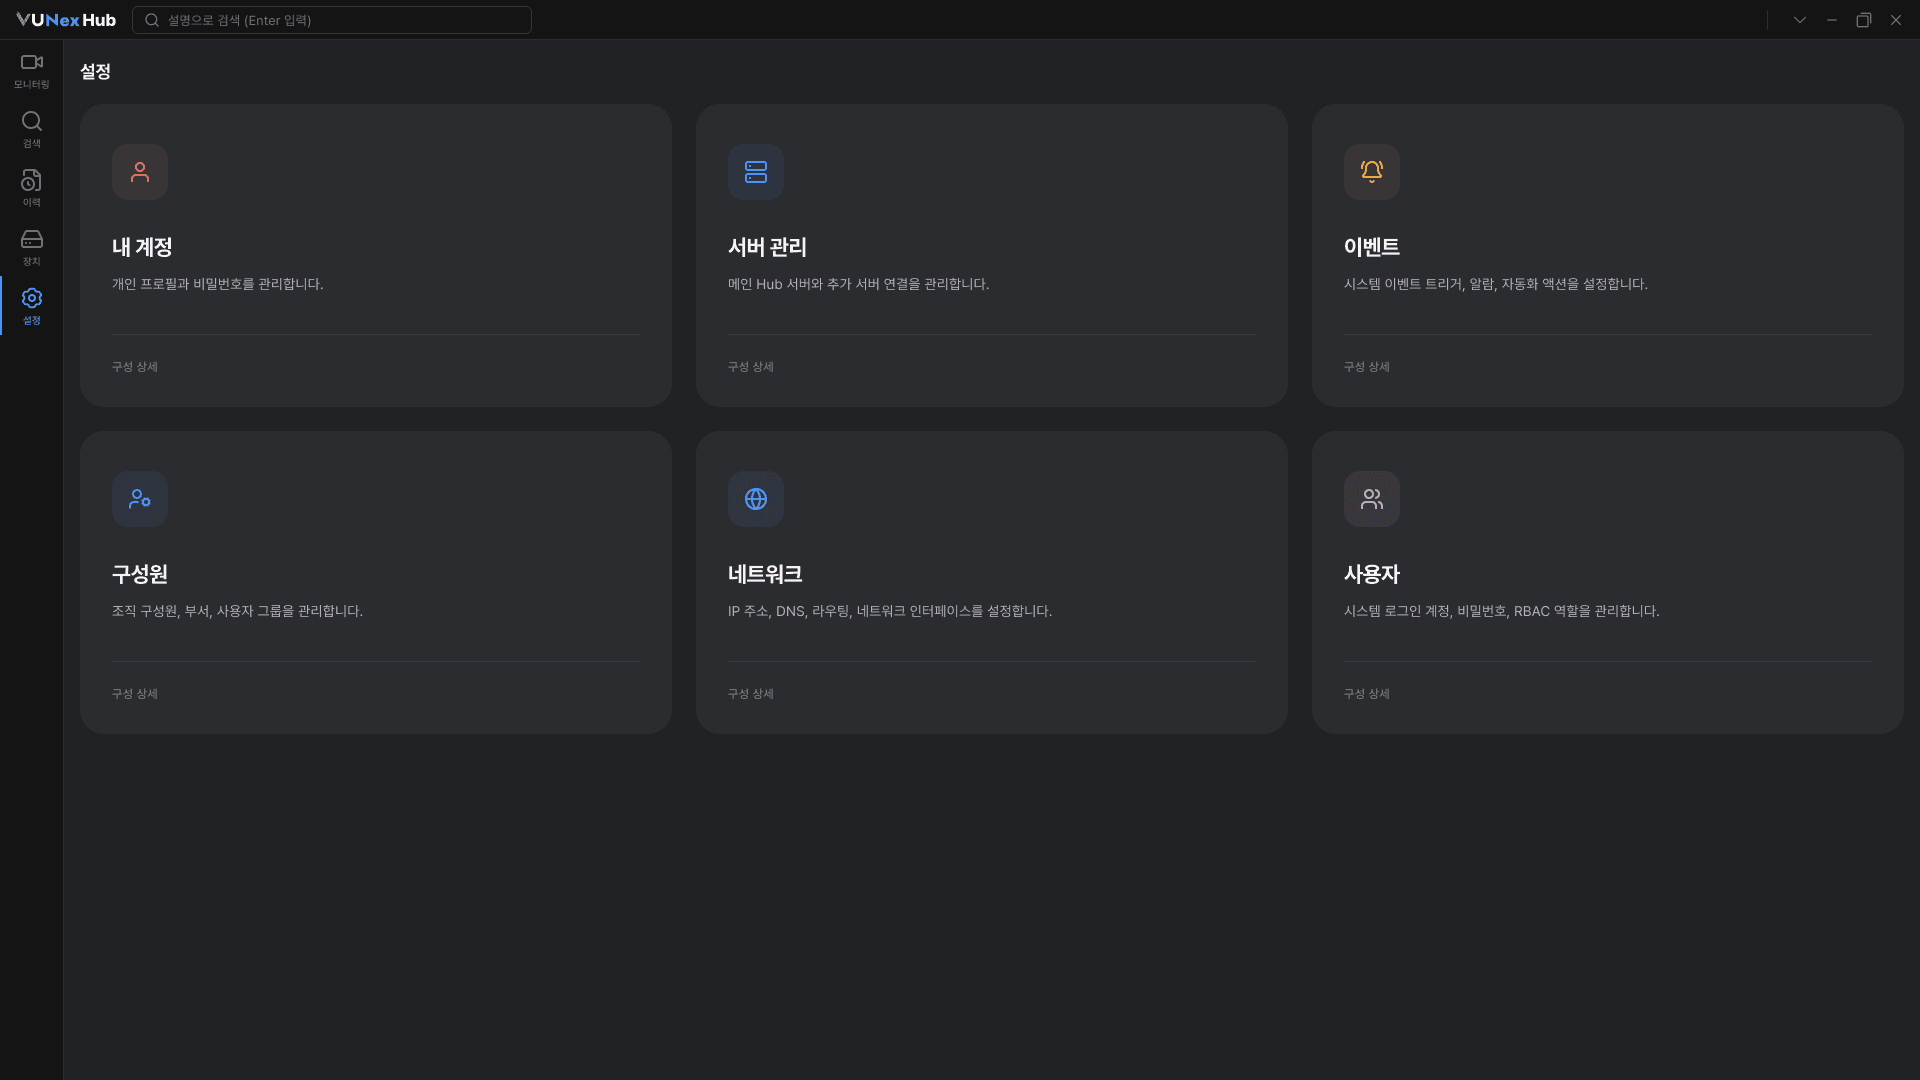
- In the left menu, click [Settings].The available settings items appear as cards.
- Click the card of the settings item you want.You move to the selected settings screen.
- To move to another item, click the settings name at the top of the screen.You can switch to another item without leaving the Settings screen.
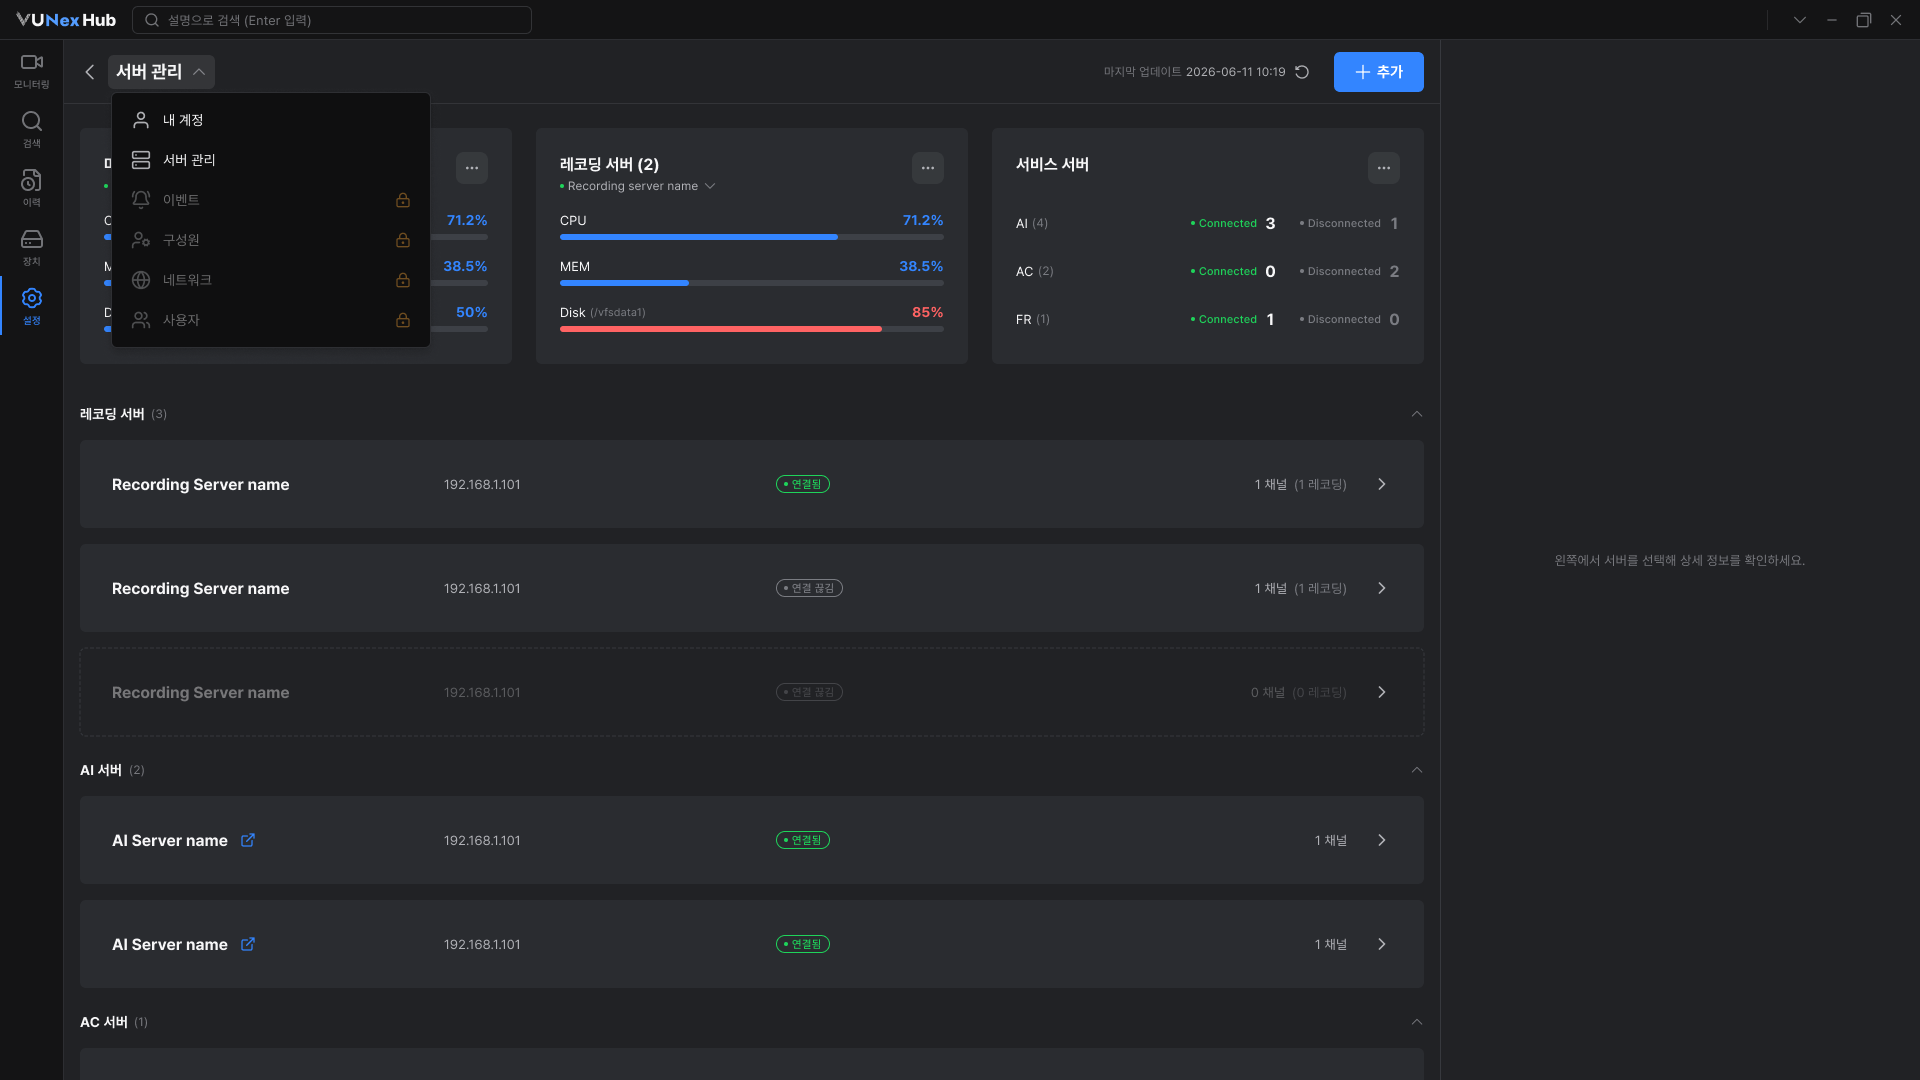
Note
The currently available settings are [Server Management] and [My Account].
Other items are in preparation and will be provided in due course.
Checking the Server List
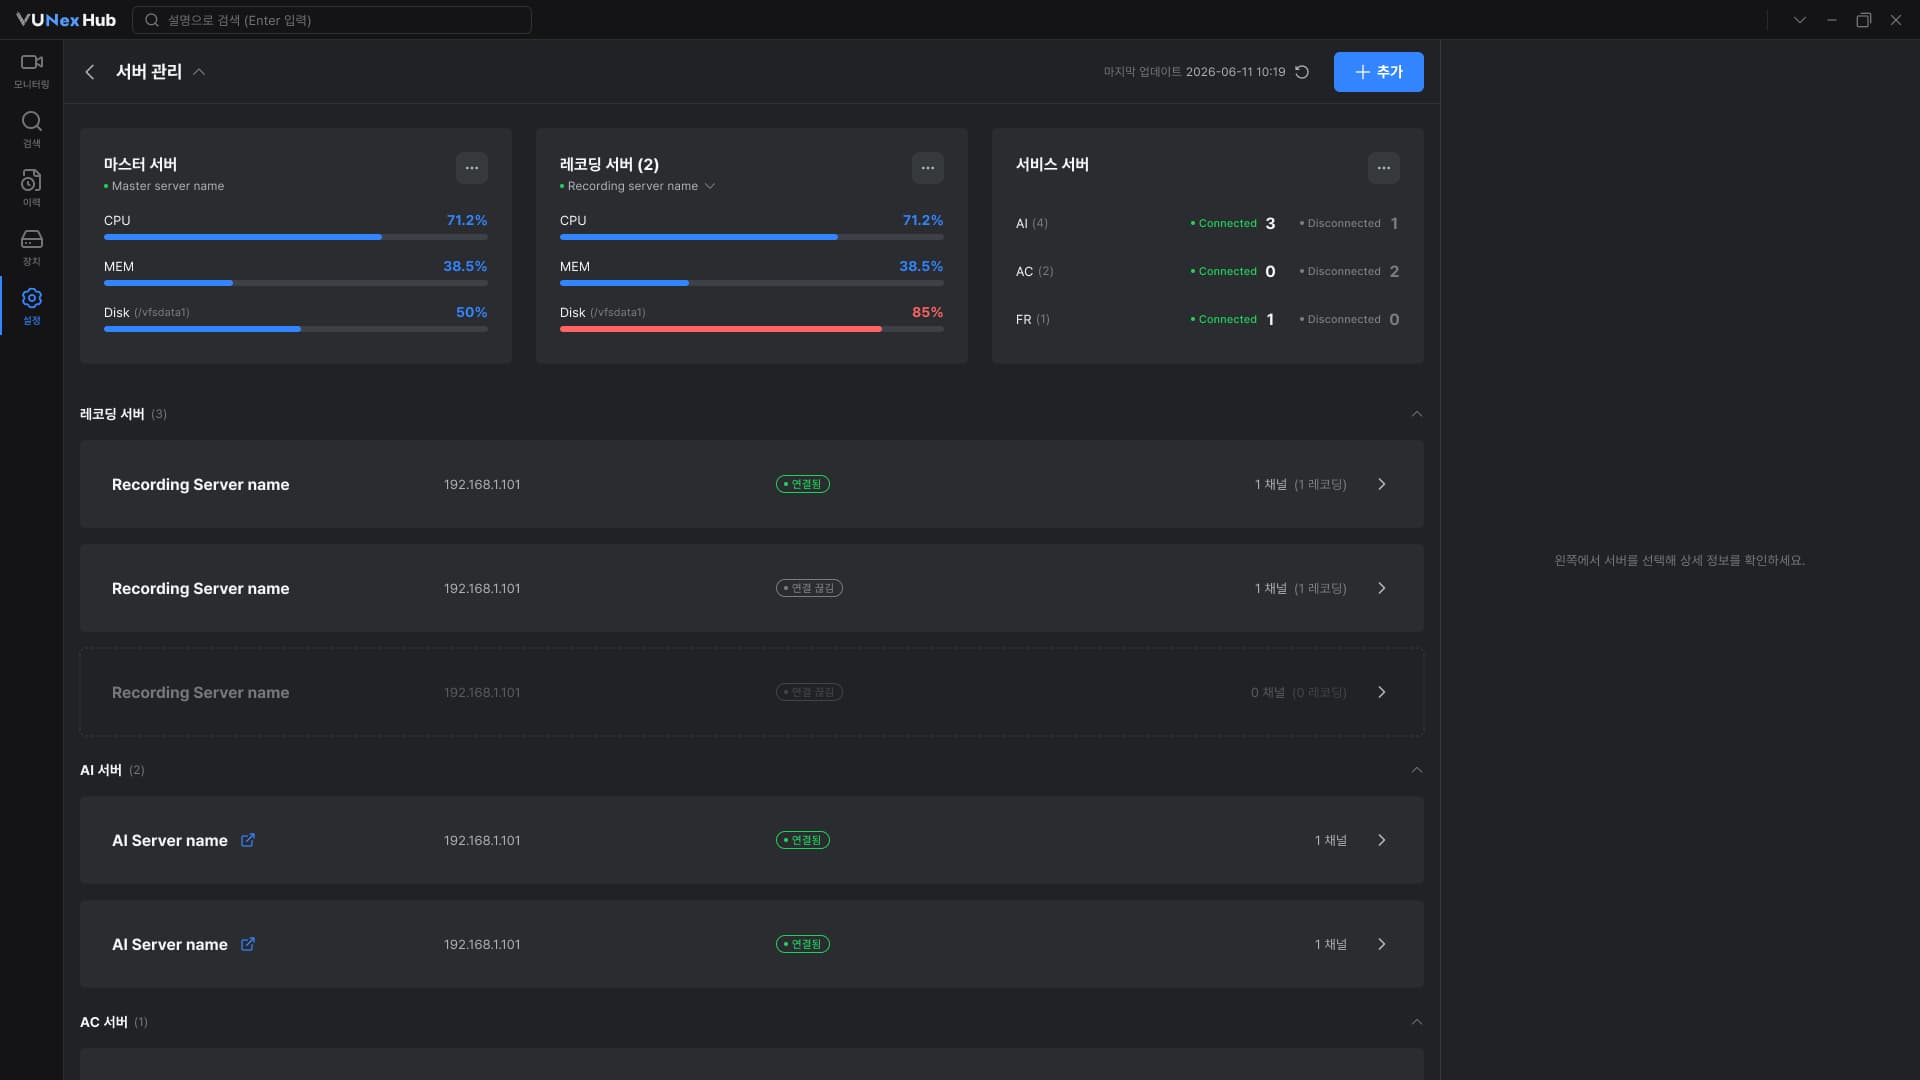
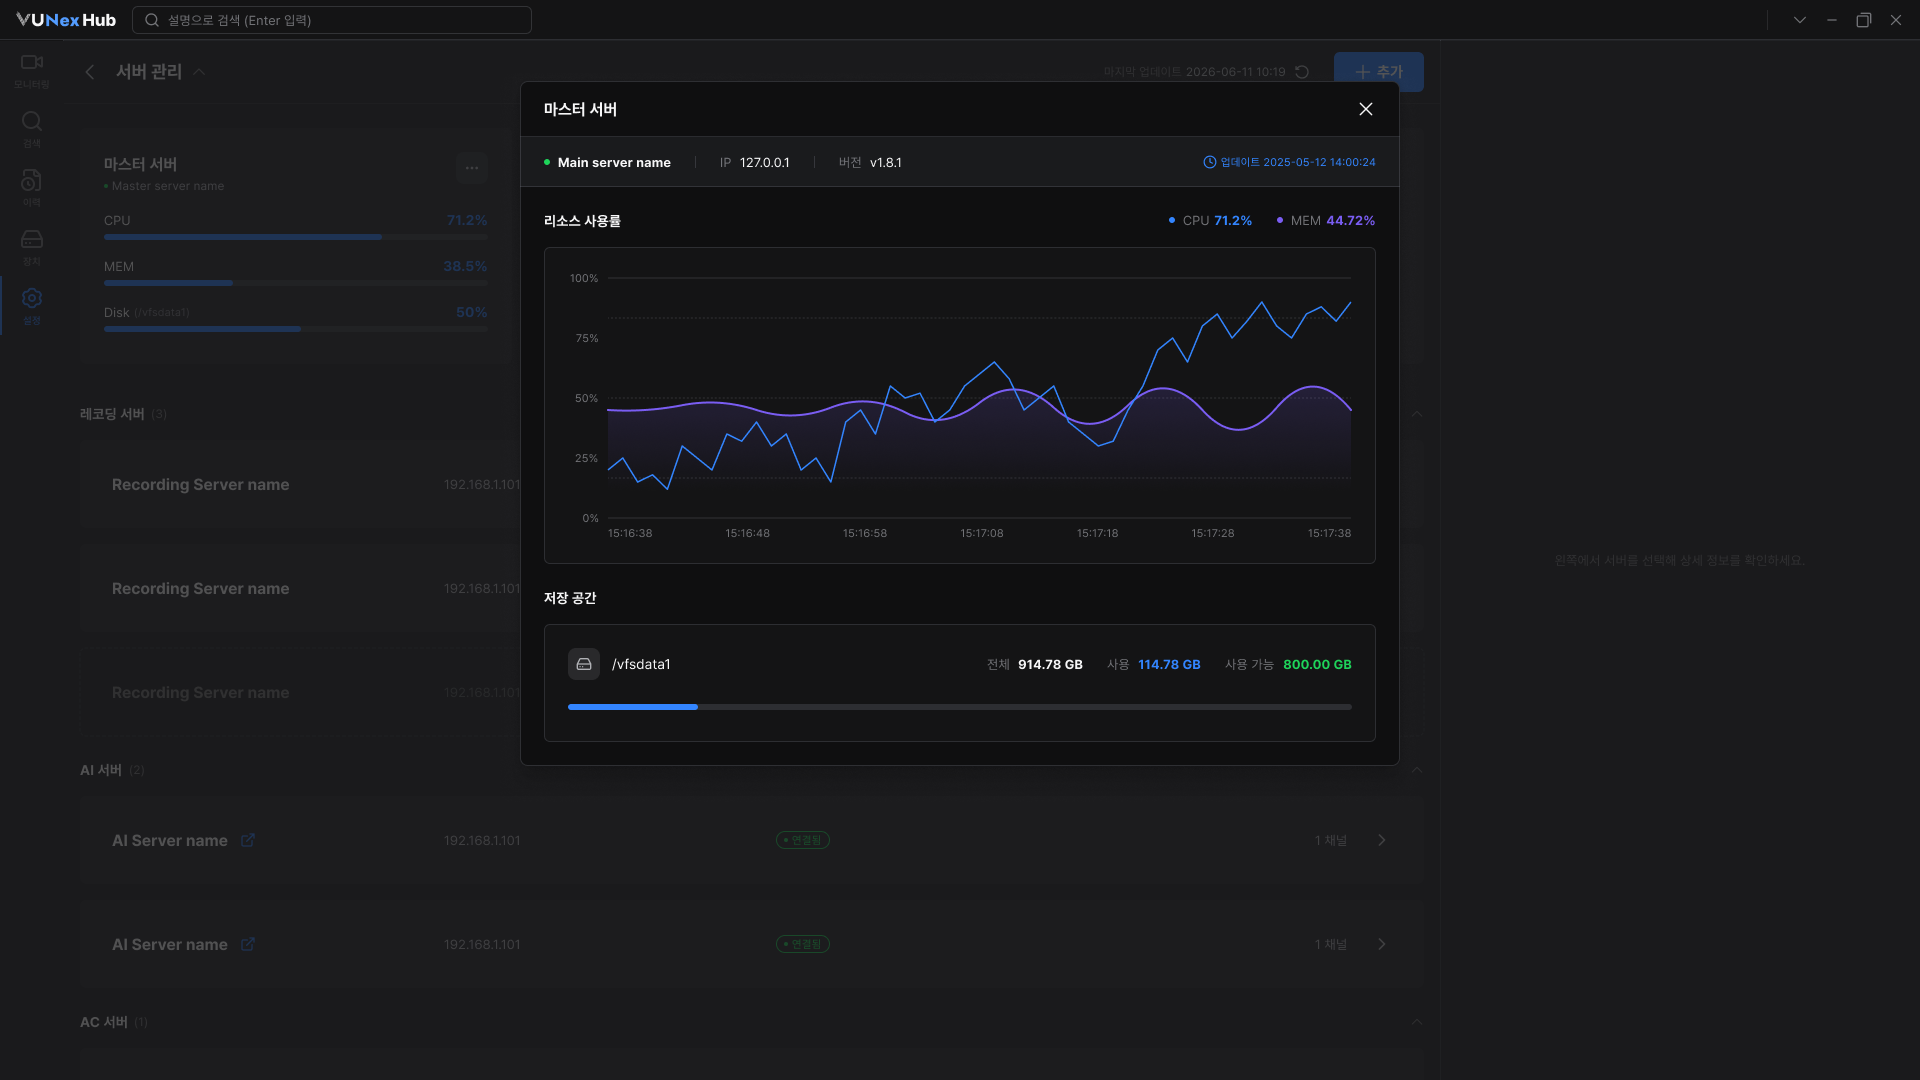
- On the card of the server you want to inspect, click the more button (⋯).The selected server's resource utilization over time, store space, and other details are displayed.
- Click the [Web Page] icon in the AI, AC, or FR server list.You will be redirected to the login page for the selected server’s web page.
Caution
When a server's disk usage exceeds the configured limit, a warning appears at the top of the screen. Please free up storage space.
Adding a Server
![[캡처 필요: 서버 추가 창 — 서버 유형 선택 + 입력 폼]](/_next/image?url=%2Fmanual%2Fvunexhub%2Fimages%2F1781585253687_Server_Management_Add_server_ko.png&w=1920&q=75&dpl=dpl_9dyqtFAdagPhFoBcUQXwGffUzrM7)
- Click [Add].The [Add Server] window opens.
- Select the type of server to add.Under [Server type], choose [AI Server], [FR Server], or [AC Server].
- Enter the server connection details.Enter the [Server name], [IP / Port], and [ID / Password]. For AC and FR servers, also enter the [Token].
- Click [Test connection] to verify the connection. (Optional)It checks whether the server connects with the entered details and shows the result right away. The test is recommended but not required to add the server.
- Click [Apply] to add the server.The added server appears in the server list.
Note
Recording servers cannot be added from this screen; they are configured when the system is installed.
When you add an AC server, its terminals and doors are automatically registered in the [Device] menu.
Managing a Recording Server
![[캡처 필요: 레코딩 서버 상세·수정 패널]](/_next/image?url=%2Fmanual%2Fvunexhub%2Fimages%2F1781585486099_Server_Management_Recording_ko.png&w=1920&q=75&dpl=dpl_9dyqtFAdagPhFoBcUQXwGffUzrM7)
- In the [Recording Server] list, click the server you want to manage.The server's detail area opens. Under [General] and [Detail Information], you can review basic details such as the server name, IP, serial number, and version.
- Use [Enable Recording] to turn recording on or off.When recording is on, you can change the [Recording Operations] settings below.
- In [Auto Delete Threshold], select the auto-delete level.The current retained capacity is shown next to the selected level.
- Click [Assign Device] to assign the channels to record.In the [Assign Devices] window, search for and select devices, then click [Confirm Selection]. The change takes effect only after you click [Apply] in the panel.
![Click **[Assign Device]** to assign the channels to record.](/manual/vunexhub/images/1781585827780_Server_Management_Recording_Assign_Devices_ko.png)
- Click [Apply] to save your changes.Your changes are applied to the server.
Warning
- Turning off [Enable Recording] stops recording for all channels assigned to this server.
- When the auto-delete level is reached, the oldest recordings are deleted automatically and cannot be recovered.
Note
- Recording servers cannot be added or removed from this panel; you can only change their connection and recording settings.
- If you move a device that is assigned to another recording server, a confirmation window appears, and the previous recordings remain intact.
Deleting a Server
![[캡처 필요: 서버 삭제 확인 다이얼로그 (Delete server?)]](/_next/image?url=%2Fmanual%2Fvunexhub%2Fimages%2F1781585979793_Servermanagement_Delete_ko.png&w=1920&q=75&dpl=dpl_9dyqtFAdagPhFoBcUQXwGffUzrM7)
- In the detail panel of the AI, FR, or AC server you want to delete, click [Delete].The [Delete server?] confirmation window opens.
- Click [OK] to delete the server.The server is deleted and removed from the list. To keep the server, click [Cancel] instead.
Warning
- Deleting a server permanently erases all associated data except logs, and cannot be undone.
- Deleting an AC server also removes its terminals and doors from the [Device] menu and unlinks the connected cameras.
- Deleting an AI or FR server automatically disables the AI features on the channels connected to that server.
Managing Your Account
![[캡처 필요: 내 계정 화면 (프로필·보안)]](/_next/image?url=%2Fmanual%2Fvunexhub%2Fimages%2F1781586360305_My_Account_ko.png&w=1920&q=75&dpl=dpl_9dyqtFAdagPhFoBcUQXwGffUzrM7)
- In [Settings], click [My Account].Under [Profile], you can see your [ID] and [Role]. Both are read-only, and your role is assigned by an administrator.
- Edit your [Display Name], then click [Apply].Your new display name is saved.
- To change your password, click [Change] under [Security].The [Change Password] window opens.
Changing Your Password
![[캡처 필요: 비밀번호 변경 창]](/_next/image?url=%2Fmanual%2Fvunexhub%2Fimages%2F1781586417424_My_Account_Change_Password_ko.png&w=1920&q=75&dpl=dpl_9dyqtFAdagPhFoBcUQXwGffUzrM7)
- Enter your [Current Password].Use the show/hide icon in each field to check the password you typed.
- Enter your [New Password] and [Confirm Password].Each [Password Policy] item is checked automatically once you meet it. If the two passwords do not match, a message appears.
- Click [Apply] to change your password.Your password is changed and the window closes. If your current password is incorrect, the change is not applied.
Note
When you change your password, sessions signed in to the same account on other devices end.
Those devices return to the sign-in screen on their next action, while the device you are using stays signed in.