03
Playback
This section explains how to play back recorded video and navigate to a specific moment.
Basic playback controls
![[캡처 필요: 영상 재생 창 - 영상 영역 + 하단 컨트롤 + 우측 하단 메뉴]](/_next/image?url=%2Fmanual%2Fvunexhub%2Fimages%2F1779760951917_Playback_Single_View_Ko.png&w=1920&q=75&dpl=dpl_9dyqtFAdagPhFoBcUQXwGffUzrM7)
- Open the Playback window through one of the following.
- Right-click a monitoring cell and choose [Playback].
- Click [Playback] from event details.
- Click [Playback] from search results.
- Use the play controls at the bottom.
- Forward play / pause : Play the video forward or pause it.
- Reverse play / pause : Play the video in reverse, or pause.
- Step backward / forward (10 seconds) : Click the arrow buttons, or press the ← / → keys.
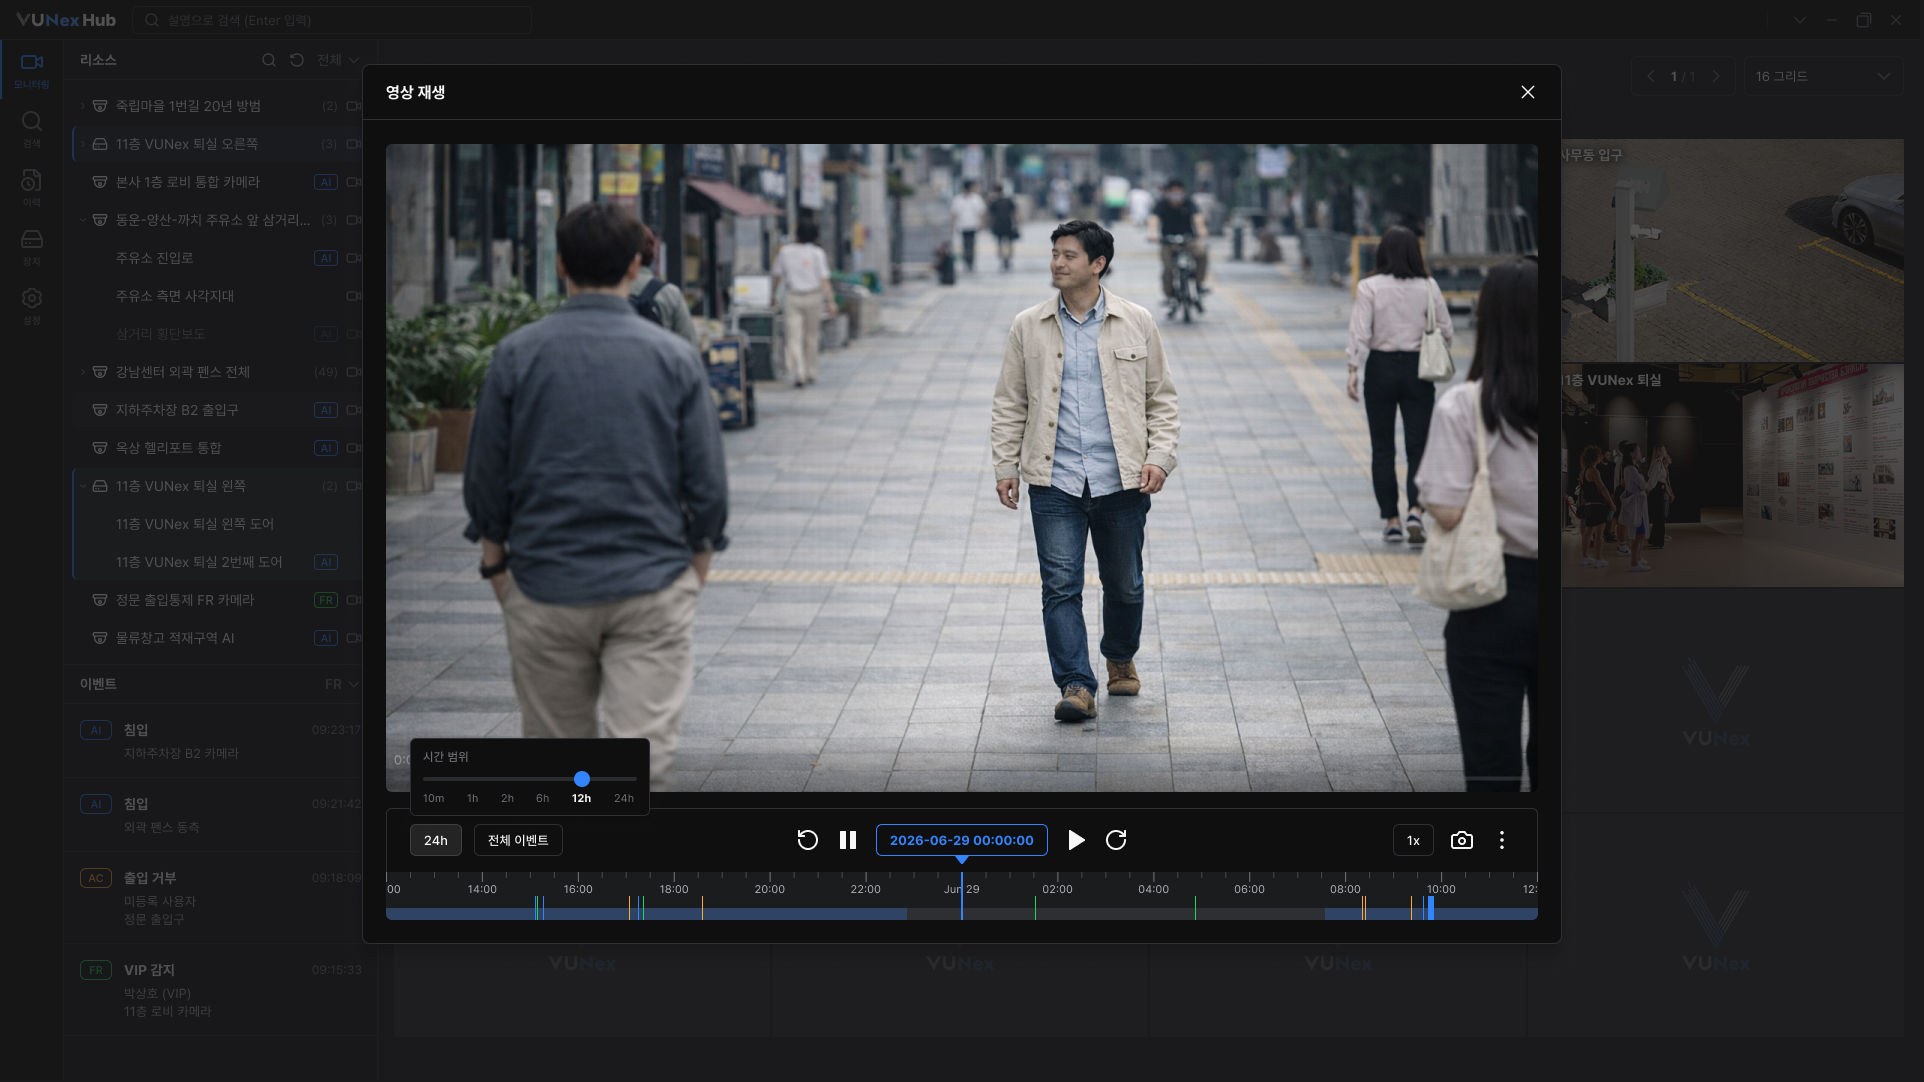
- To change the playback speed, click the speed button and select a value from the [Speed] menu.Choose from 0.5x, 1x, 2x, 4x, 8x, or 16x. The selected speed appears on the button.
![To change the playback speed, click the speed button and select a value from the **[Speed]** menu.](/manual/vunexhub/images/1779760996778_Playback_Single_View_-_Speed_Ko.png)
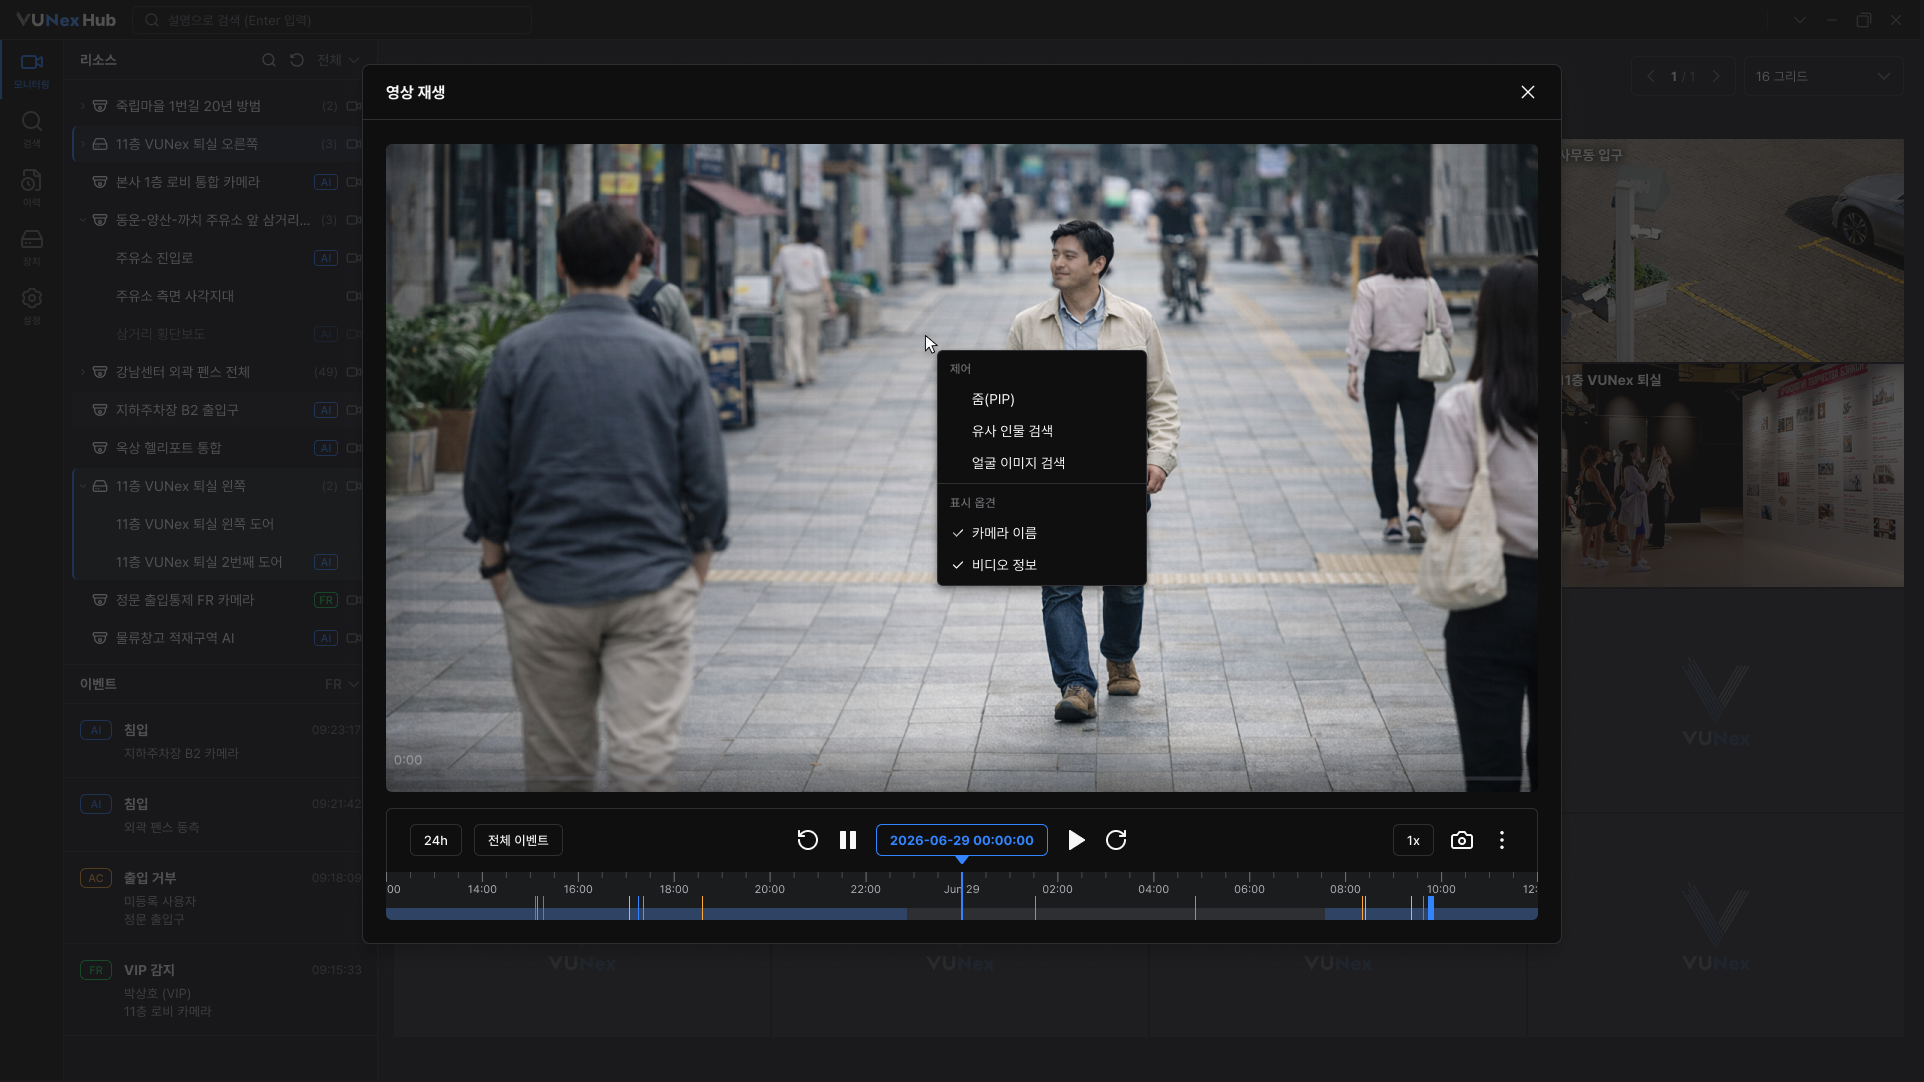
- Right-click on the video to open the menu and turn display options on or off.
- [Zoom(PIP)] : Show a zoomed-in area inside the video (Picture-in-Picture).
- [Camera Name] : Pin the camera name on top of the video.
- [Video Information] : Show resolution, fps, and kbps.
Note
- If there is no recorded data at the entry point, the player automatically moves forward to the nearest recorded segment.
- The [Face image search] menu will be supported in a future update.
Navigating with the timeline
![[캡처 필요: 타임라인 영역 - 눈금/녹화 구간/이벤트 마커]](/_next/image?url=%2Fmanual%2Fvunexhub%2Fimages%2F1779760985978_Playback_Single_View_-_Timeline_Ko.png&w=1920&q=75&dpl=dpl_9dyqtFAdagPhFoBcUQXwGffUzrM7)
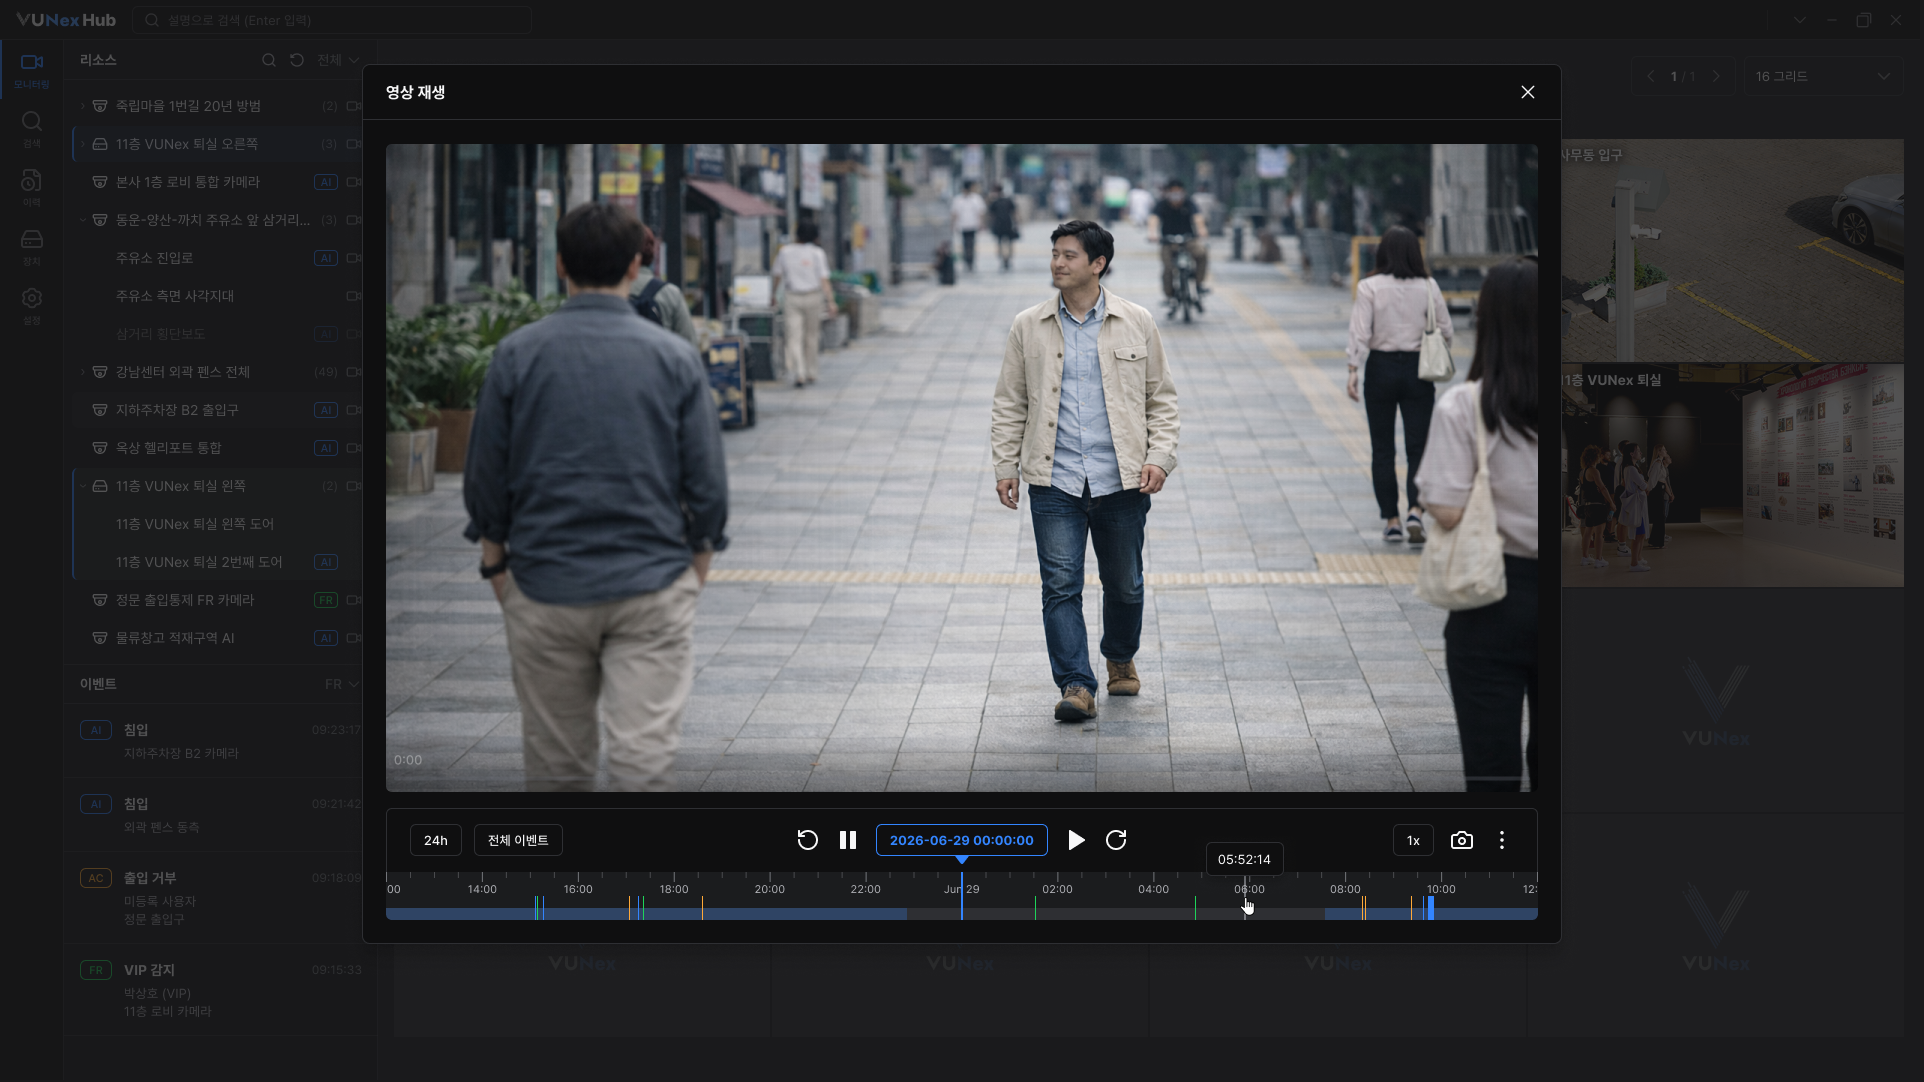
- Move to a specific point on the timeline.Click any point on the timeline to jump to that time. Drag left or right to scrub through the video.
- Zoom the timeline in or out.Hover over the timeline and use the mouse wheel to change the time unit.
- Scroll up : Zoom in (narrower time unit, more detail).
- Scroll down : Zoom out (wider time unit, broader view).
Note
- Recorded segments are shown as blue bars on the timeline.
- When you jump to a moment with no recording, the player skips forward to the next recorded segment.
- The playhead cannot be moved beyond the current time; sections in the future are not selectable.
Filtering event markers
![[캡처 필요: 이벤트 마커 필터 - [전체 이벤트] 목록 펼침 상태]](/_next/image?url=%2Fmanual%2Fvunexhub%2Fimages%2F1779761038583_Playback_Single_View_-_Event_marker_ko.png&w=1920&q=75&dpl=dpl_9dyqtFAdagPhFoBcUQXwGffUzrM7)
- To filter event markers on the timeline, click the [All Events] list at the left of the timeline.A list of event types grouped by source opens.
- [All Events] : Show every event marker.
- AI Type : Choose specific AI event types.
- AC Type : Choose access control events.
- FR Type : Choose face recognition events.
Jumping to a specific date and time
![[캡처 필요: 단일 날짜·시간 선택기 - 캘린더 + 시·분·초 스크롤]](/_next/image?url=%2Fmanual%2Fvunexhub%2Fimages%2F1779761047474_Playback_Single_View_-_Datetime_picker_ko.png&w=1920&q=75&dpl=dpl_9dyqtFAdagPhFoBcUQXwGffUzrM7)
- Click the current time display in the play controls.The date and time picker appears.
- Select a date in the calendar.Days with recorded data are marked with a dot. Days outside the recording retention period are disabled.
- Scroll the time columns to select hour, minute, and second.
- Hour : 0–23
- Minute : 0–59
- Second : 0–59
- Click outside the picker area to apply.The playback position moves to the selected date and time.
Saving a screenshot
![[캡처 필요: 재생 컨트롤 우측의 스크린샷 버튼 + 저장 완료 안내]](/_next/image?url=%2Fmanual%2Fvunexhub%2Fimages%2F1779761088951_Playback_Single_View_-_Snapshot_ko.png&w=1920&q=75&dpl=dpl_9dyqtFAdagPhFoBcUQXwGffUzrM7)
- Click the camera icon (screenshot) at the right side of the play controls.The current frame is saved immediately, and a confirmation message appears.
- Click the Open Folder button in the snackbar to check the snapshot image file from that point in time.
Note
Screenshots are saved to the following folder, depending on the operating system.
- Windows : C:\Users\{username}\Pictures\VUNexHub\
- macOS : /Users/{username}/Pictures/VUNexHub/
- Linux : /home/{username}/Pictures/VUNexHub/