01
Getting Started
This section explains the basic usage of the VUNex AI system.
Login and Logout
Log in or out of the system.
- Enter your information[ID]: Enter your ID. [Password]: Enter your password.
- Enter the default URL in your web browser
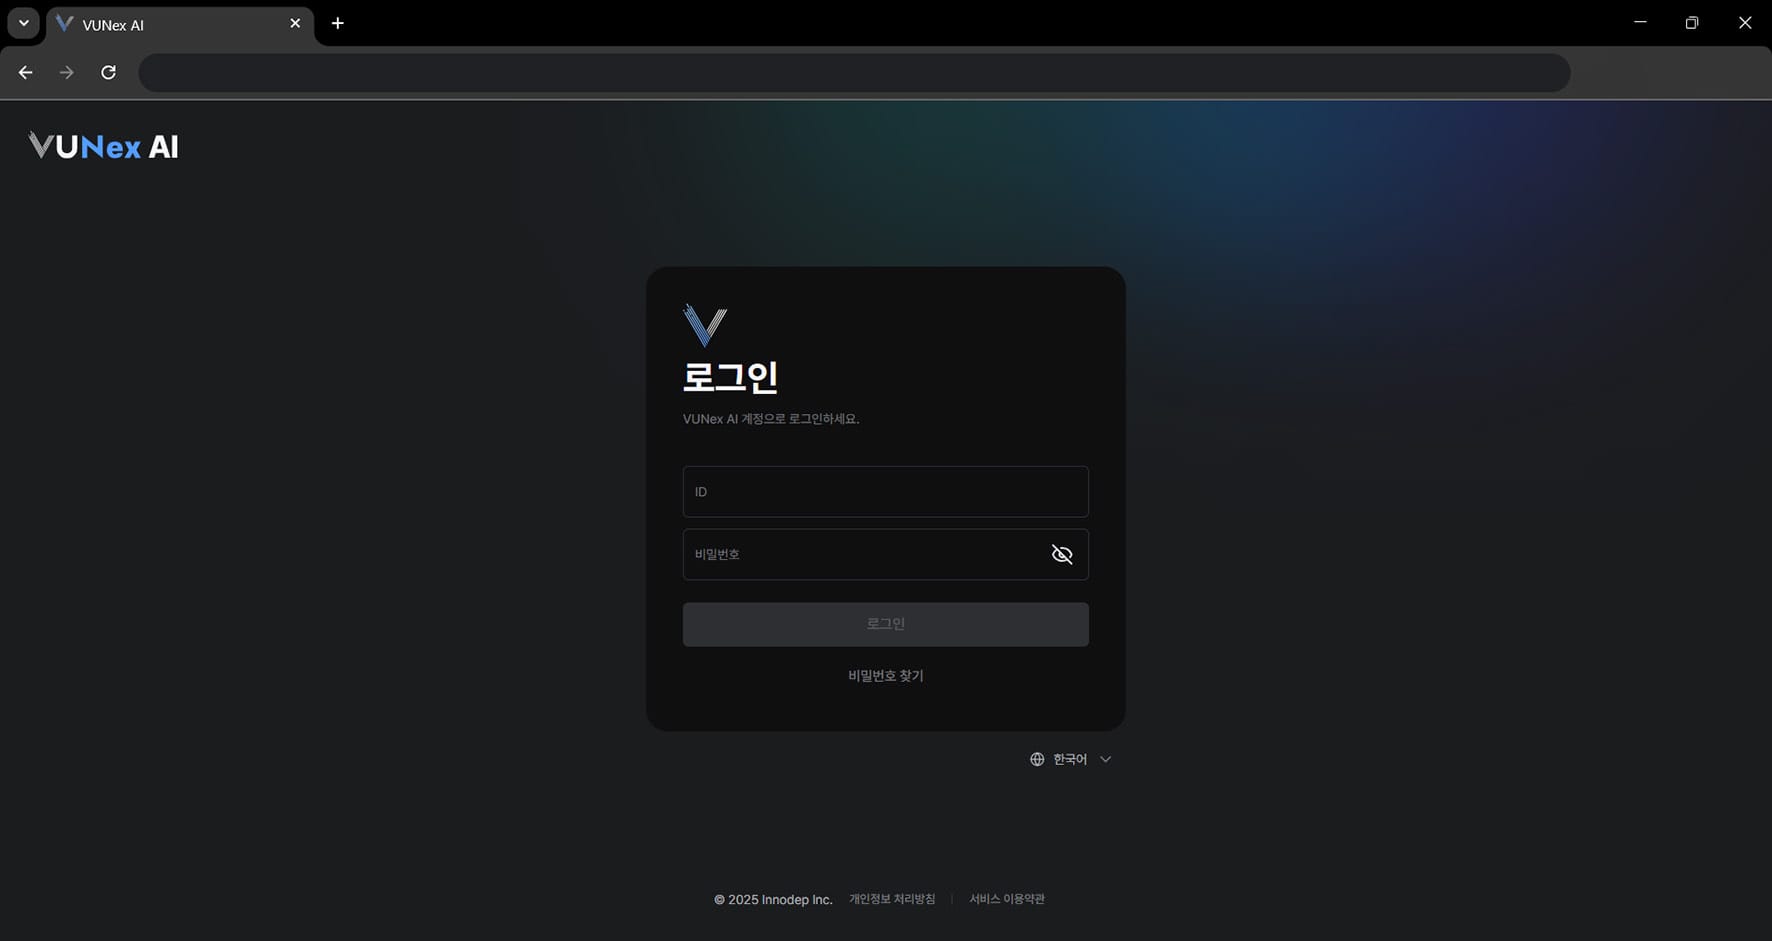 Figure 1-1. VUNex AI Login Screen
 - Click [Login]Access the system.
Note
Click [Forgot Password] to set a new password.
Click [Korean] to set the system language.
Initial Login
Access the system for the first time after installation.

Figure 1-1a. Initial Login Screen
- Enter the system URL in your web browserAccess using the IP address or domain configured during installation.
- Log in with the default account[ID]: admin [Password]: admin
- Click the [Sign In] button
Warning
The [Forgot password] feature is not available during initial login.
For security, be sure to change your password after your first login.
Change Default Password
Change the default password for security.
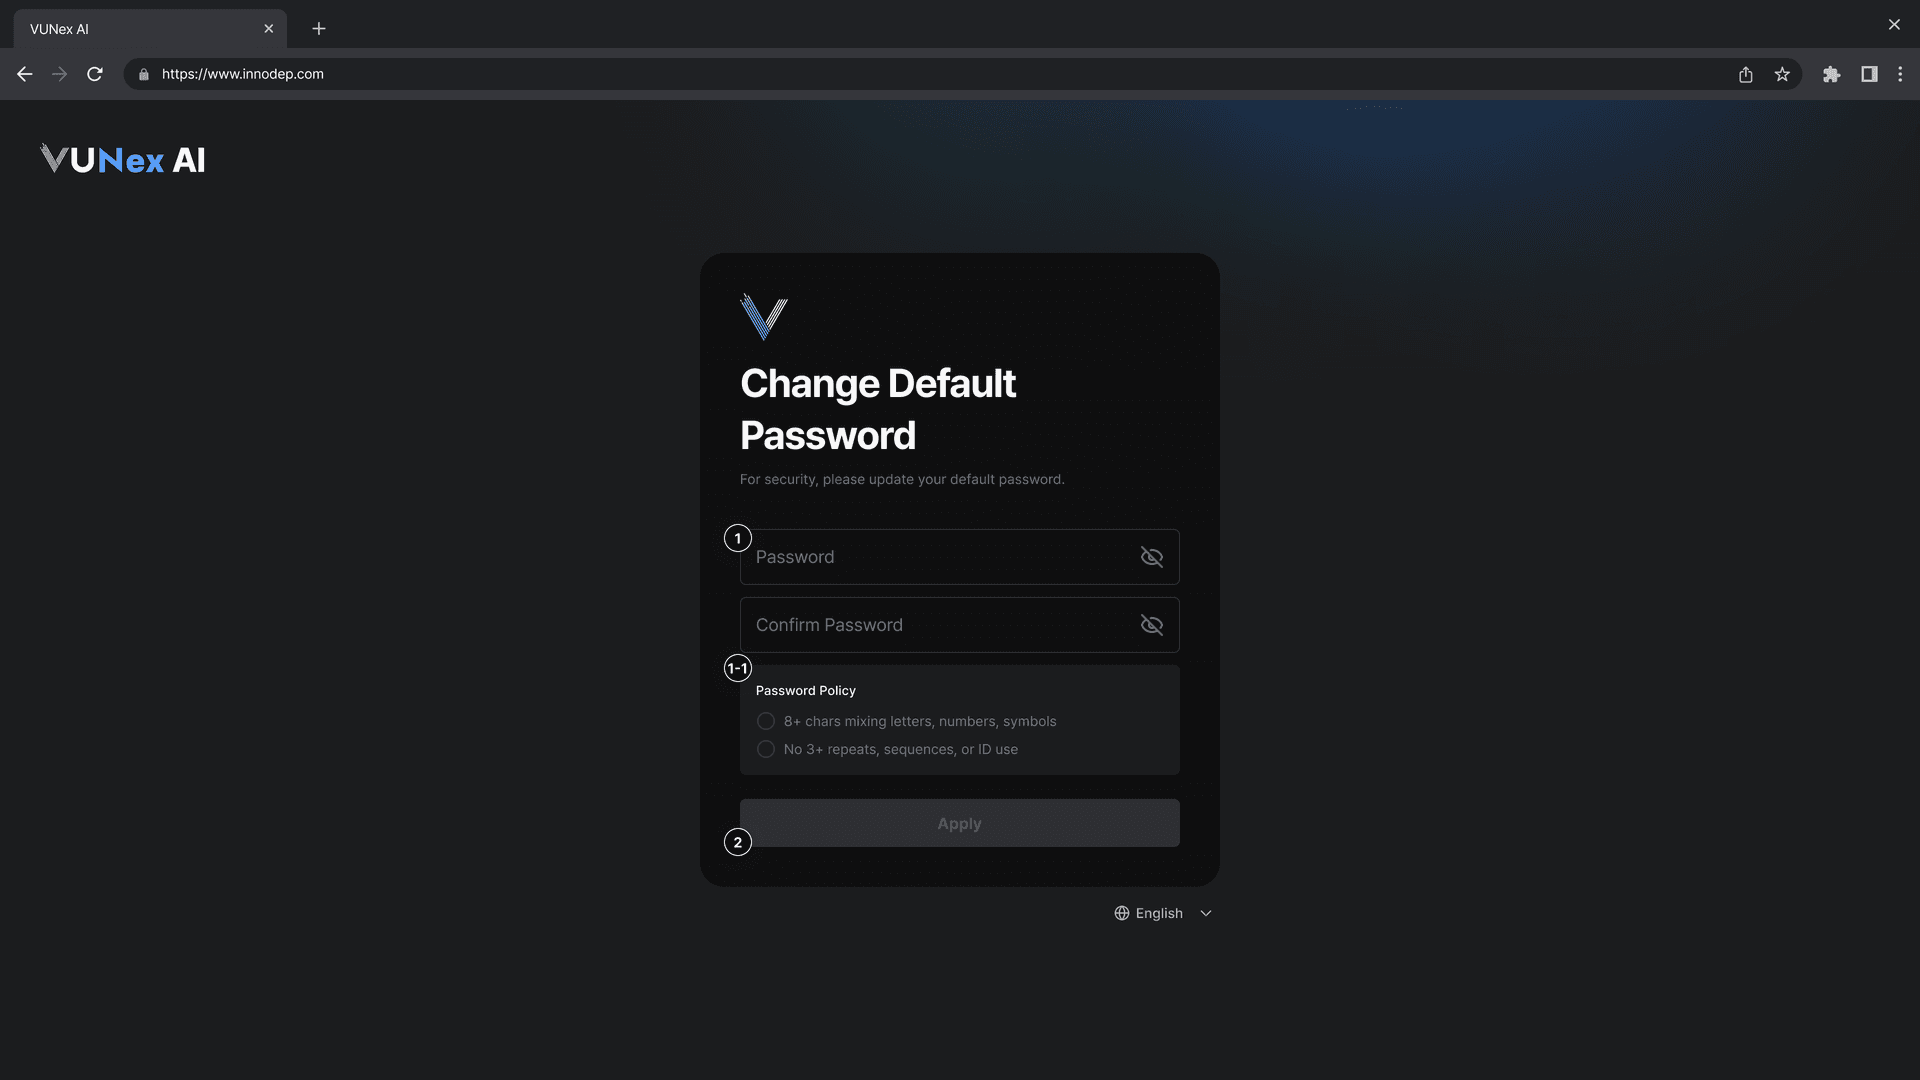
Figure 1-1b. Change Default Password Screen
- Enter your new password[Password]: Enter your new password. [Confirm Password]: Re-enter the same password.
- Click the [Apply] button
Password Policy
- Minimum 8 characters mixing letters, numbers, and symbols
- No 3+ repeats, sequences, or ID use
Security Questions Setup
Set up security questions for password recovery.
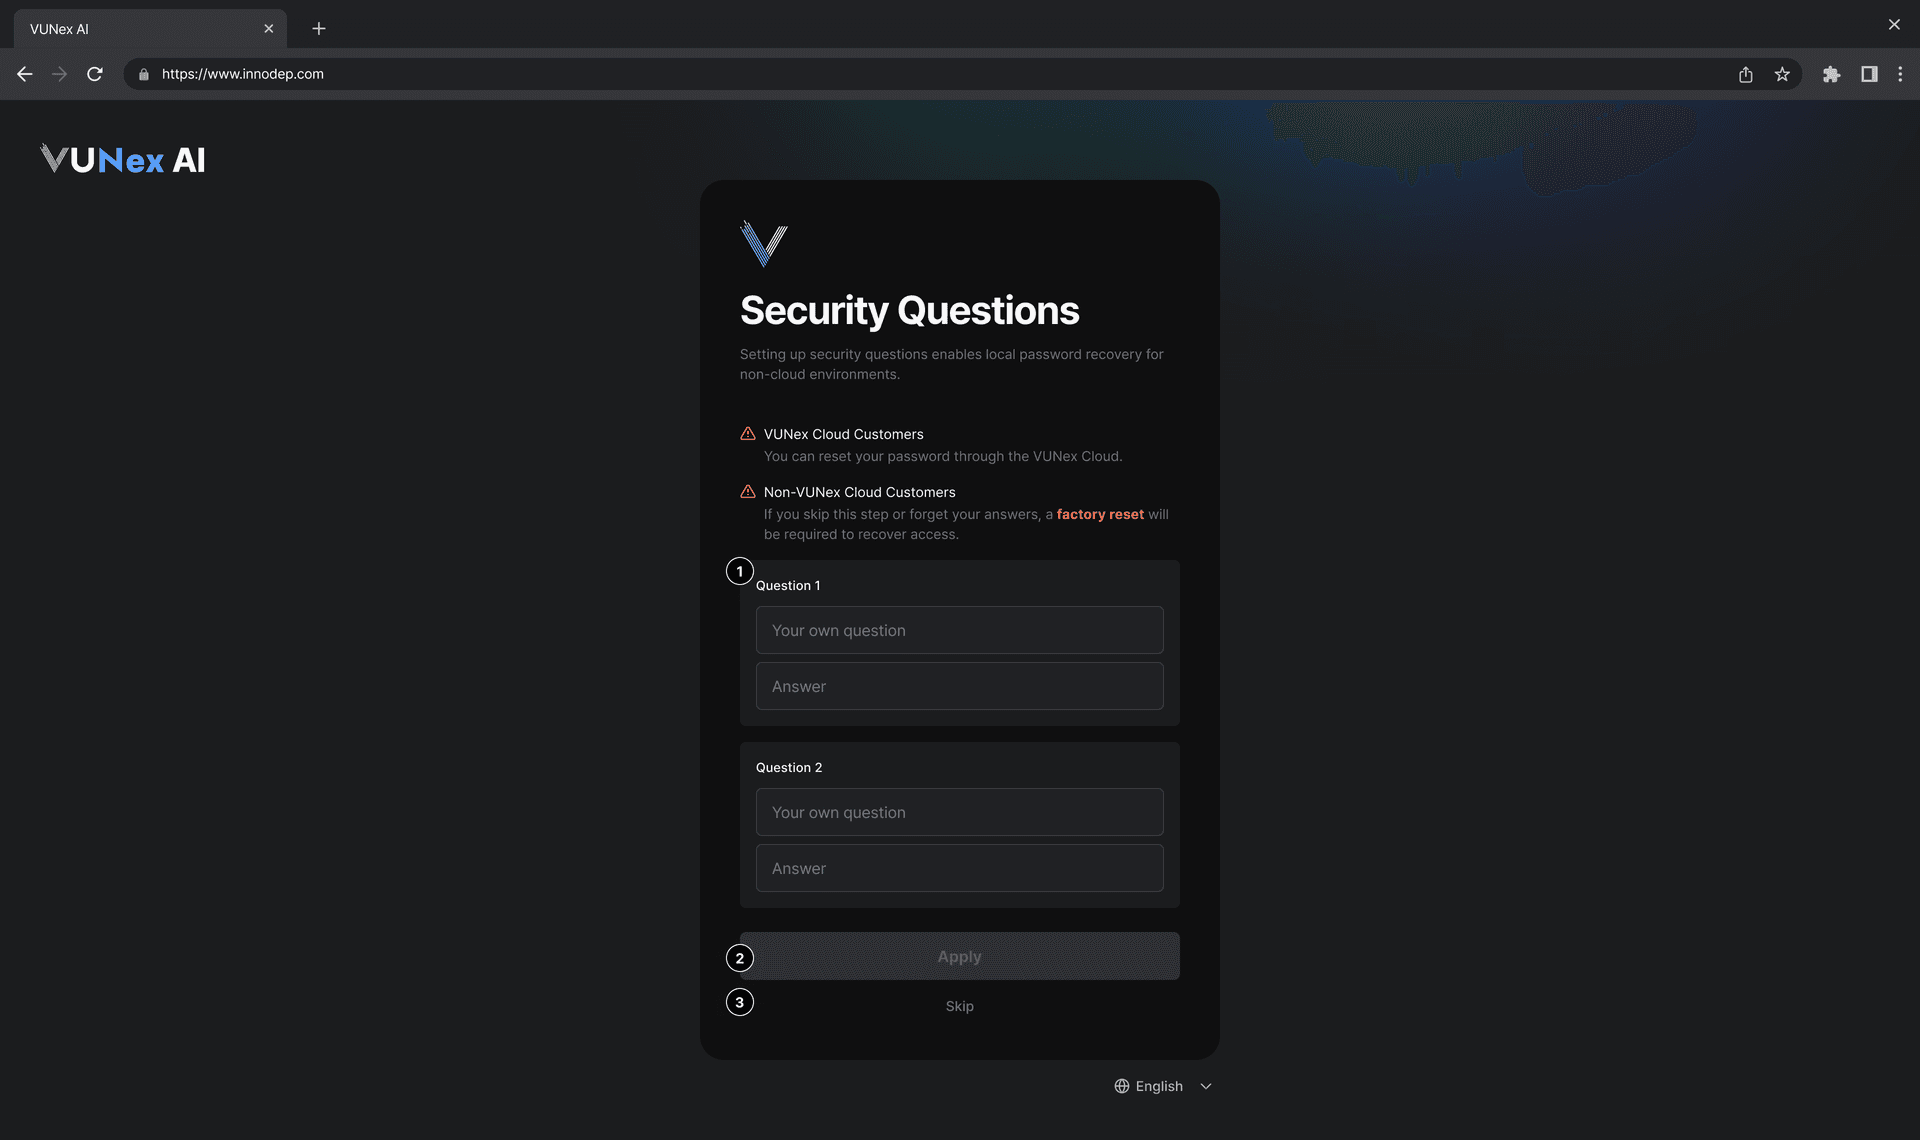
Figure 1-1c. Security Questions Setup Screen
- Set up Security Question 1[Question 1]: Enter your question. [Answer]: Enter your answer.
- Set up Security Question 2[Question 2]: Enter your second question. [Answer]: Enter your answer.
- Click [Apply] or [Skip] button
VUNex Cloud Customers
If you are using VUNex Cloud, you can reset your password through VUNex Cloud.
Non-VUNex Cloud Customers
If you skip this step or forget your answers, a factory reset will be required to recover access.
Forgot Password
Instructions for recovering your password if you forgot it.
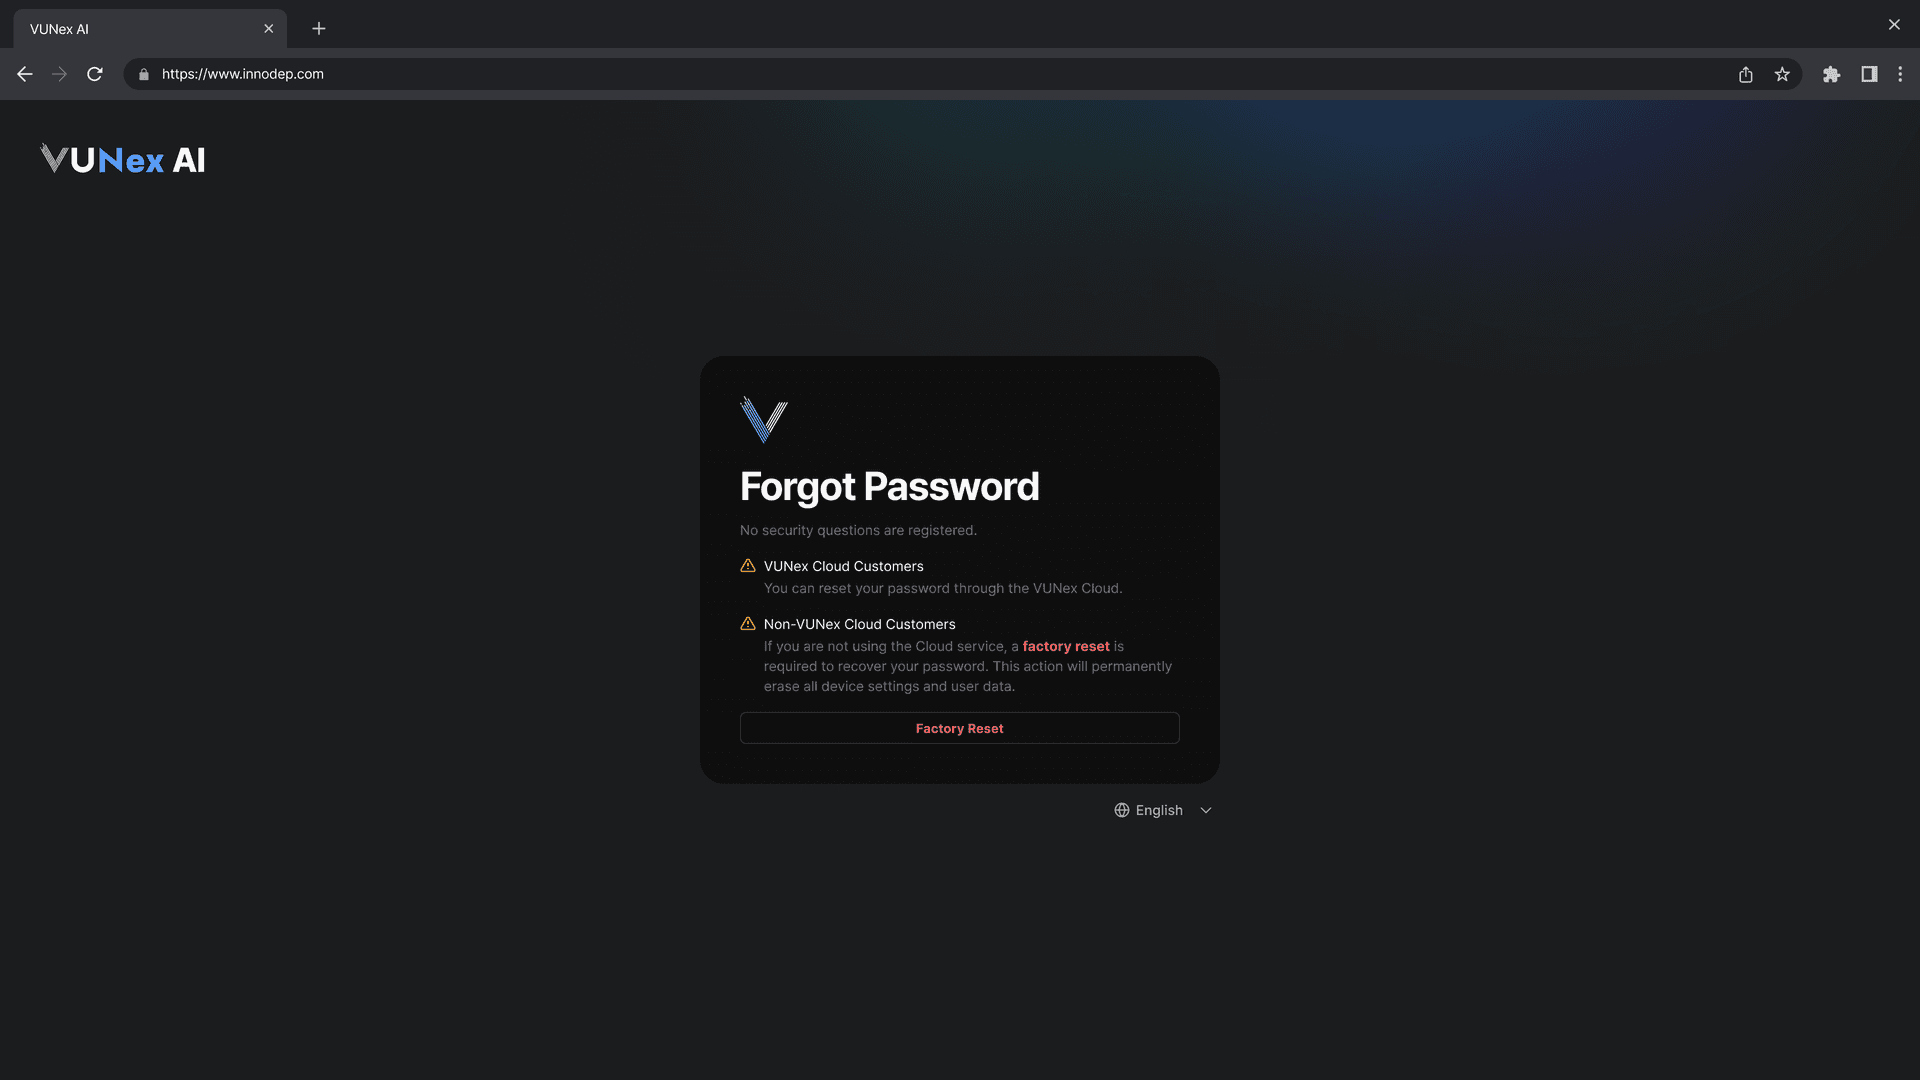
Figure 1-1d. Forgot Password Screen
VUNex Cloud Customers
You can reset your password through the VUNex Cloud.
Non-VUNex Cloud Customers
If you are not using the Cloud service, a factory reset is required to recover your password.
This action will permanently erase all device settings and user data.
- Click [Forgot password] on the login screen
- Click the [Factory Reset] buttonWarning: This will delete all settings and data.
New Password (Recovery)
Set a new password after security question verification.
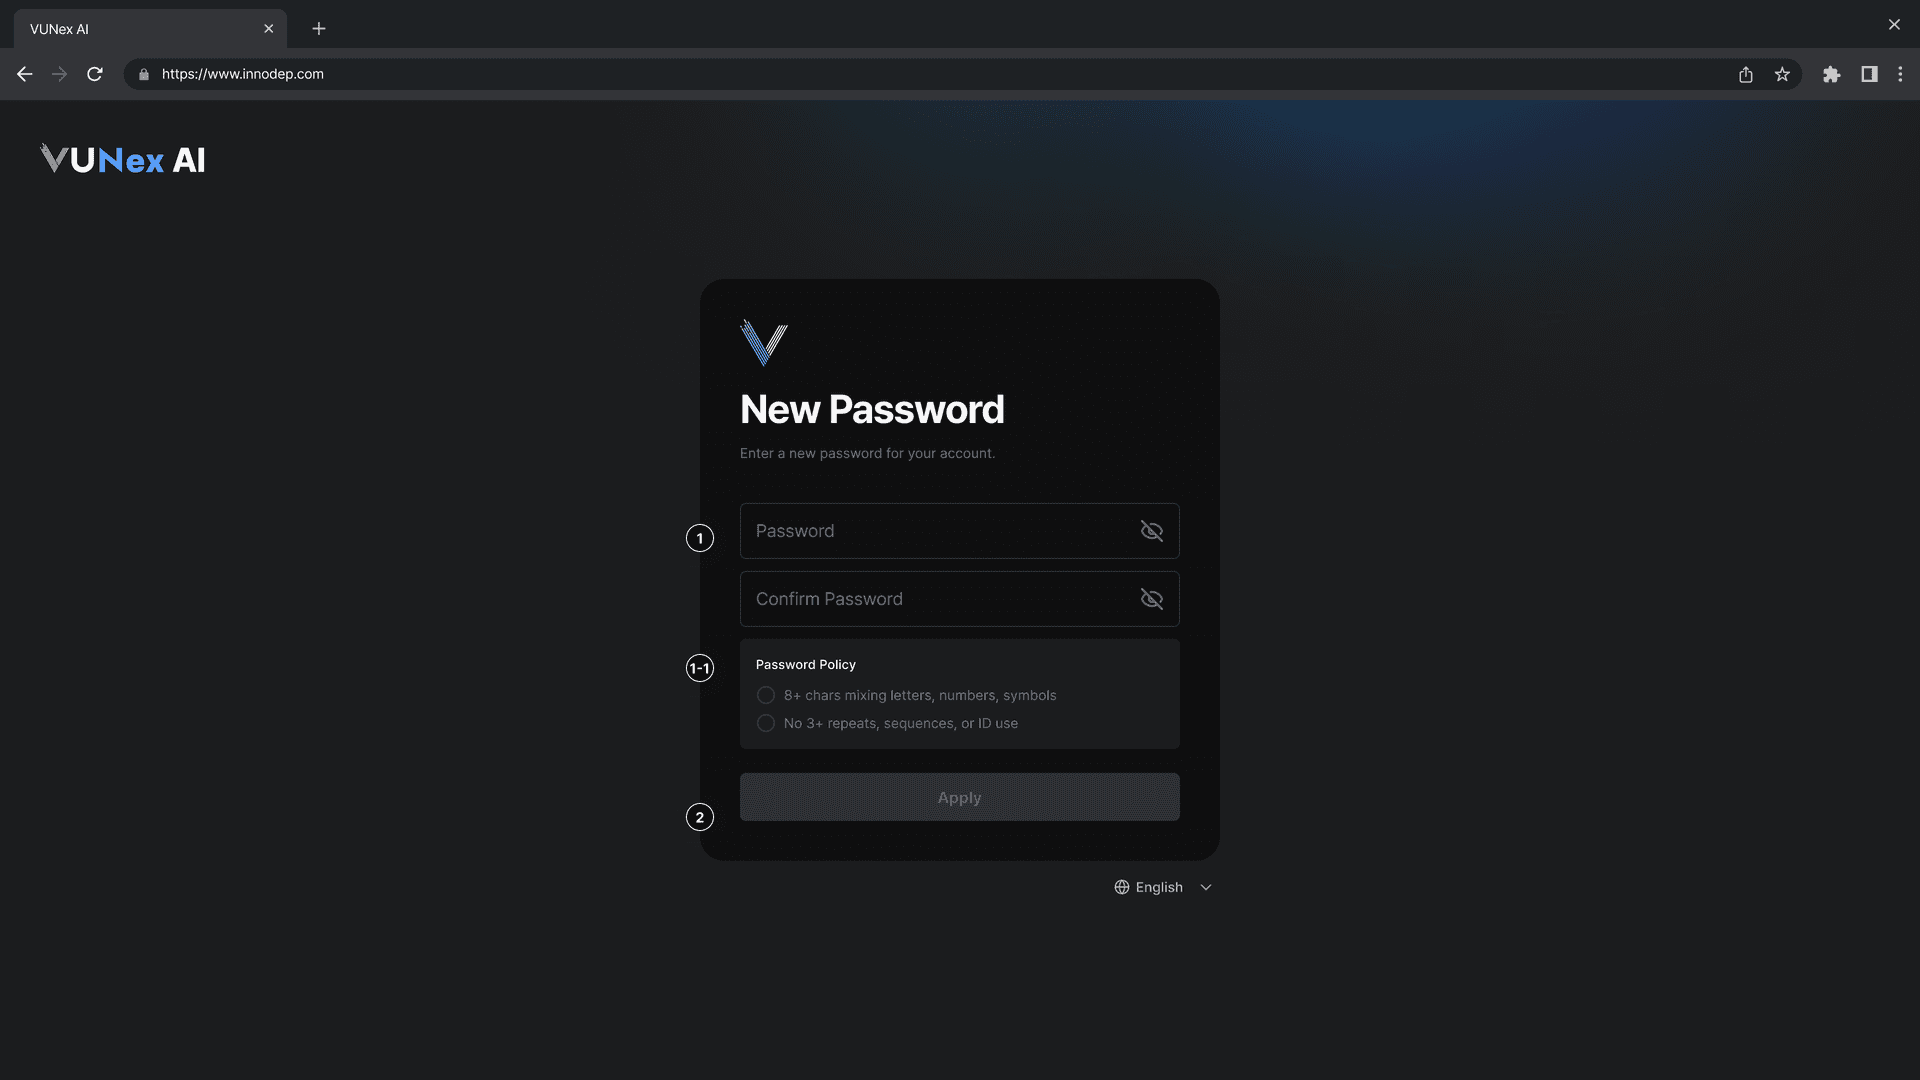
Figure 1-1e. New Password Screen
- Enter your new password[Password]: Enter your new password. [Confirm Password]: Re-enter the same password.
- Click the [Apply] buttonYour new password will be applied and you will be redirected to the login screen.
Password Policy
- Minimum 8 characters mixing letters, numbers, and symbols
- No 3+ repeats, sequences, or ID use
Logout
Log out of the system.
- Click the [Logout] button at the top right of the screen
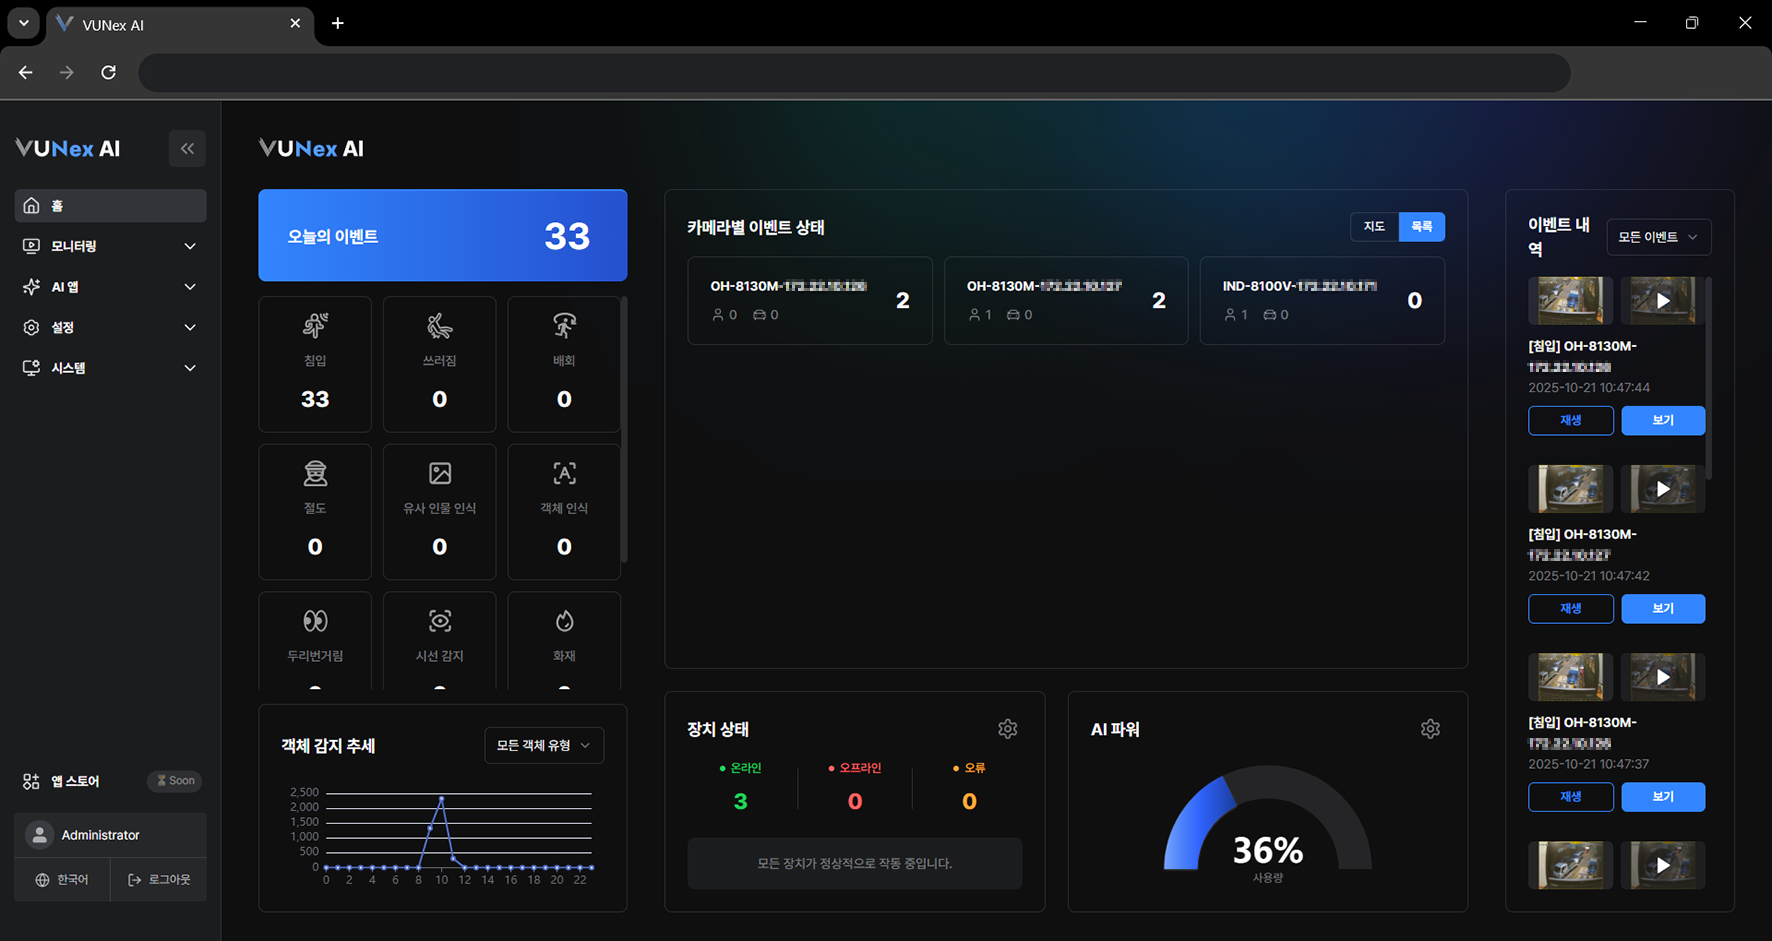 Figure 1-2. Logout Button
 - Click [OK] in the confirmation dialogYou will be logged out and returned to the login screen.
Main Screen
View the screen and menus.
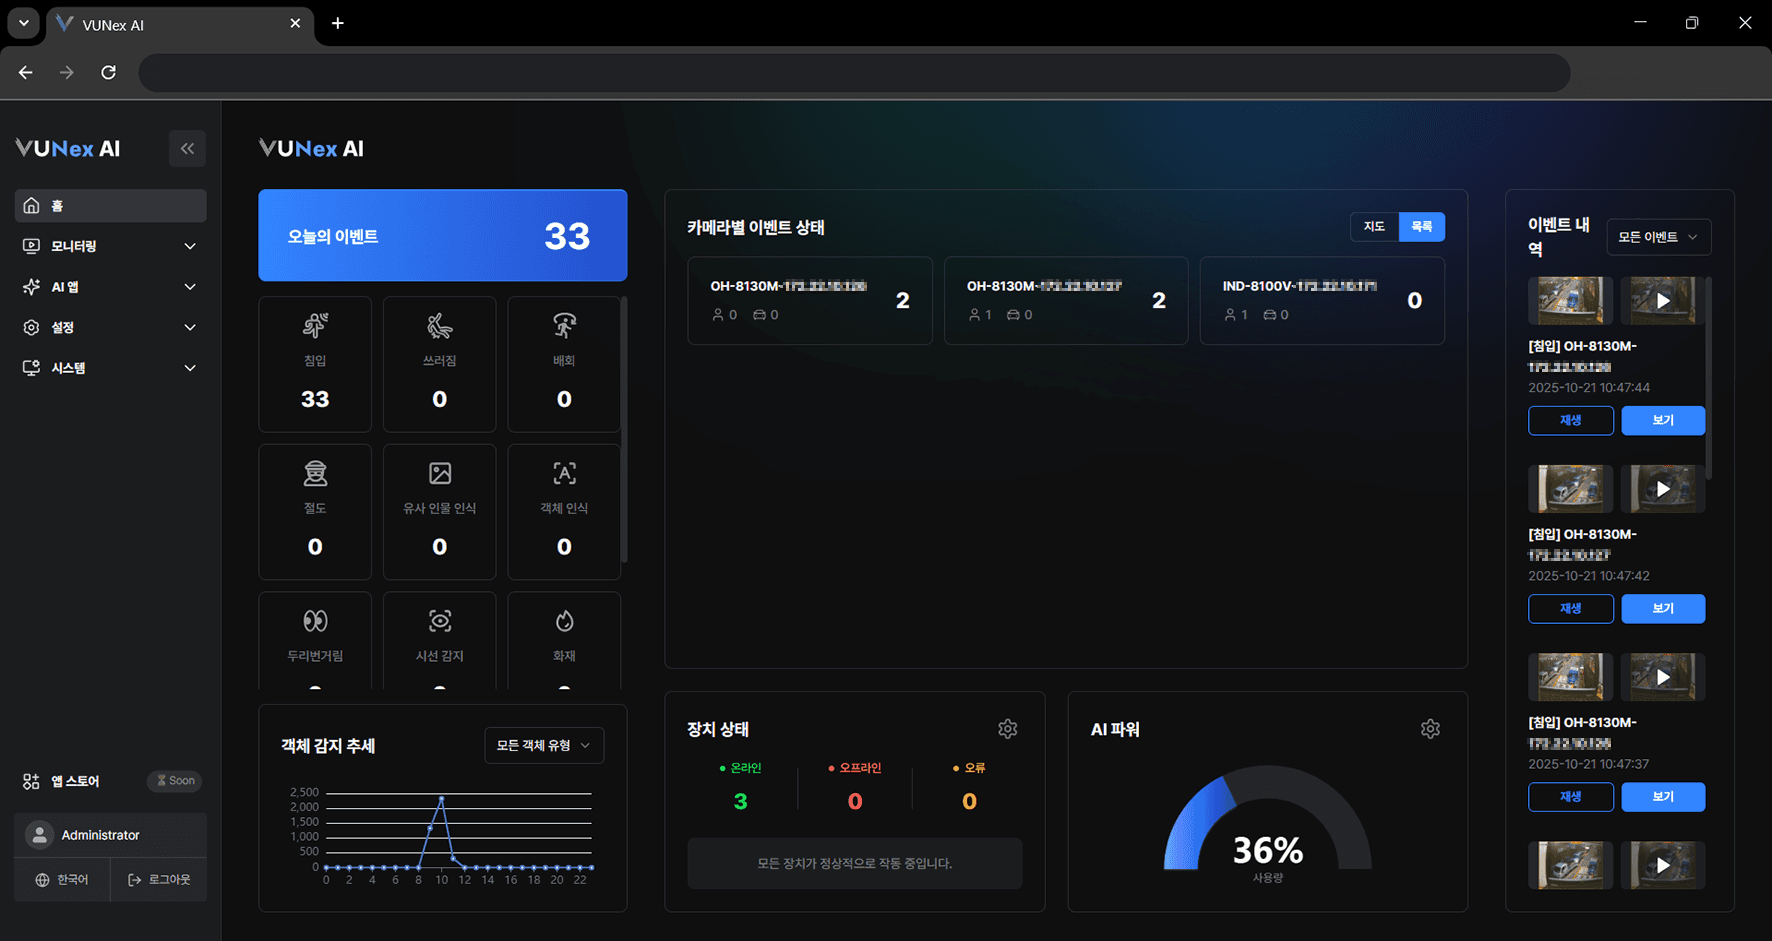
Figure 1-4. Main Menu Structure
| 번호 | 메뉴 | 설명 |
|---|---|---|
| ❶ | 홈 | 홈 화면으로 이동합니다. |
| ❷ | 모니터링 | 실시간 영상 및 녹화 영상을 확인합니다. |
| ❸ | AI 앱 | AI 이벤트 및 서비스를 설정합니다. |
| ❹ | 설정 | 시스템을 설정합니다. |
| ❺ | 시스템 | 업데이트, 초기화 등 시스템을 관리합니다. |
Language Settings
Change the system language.
- Click the language selection button on the login screen
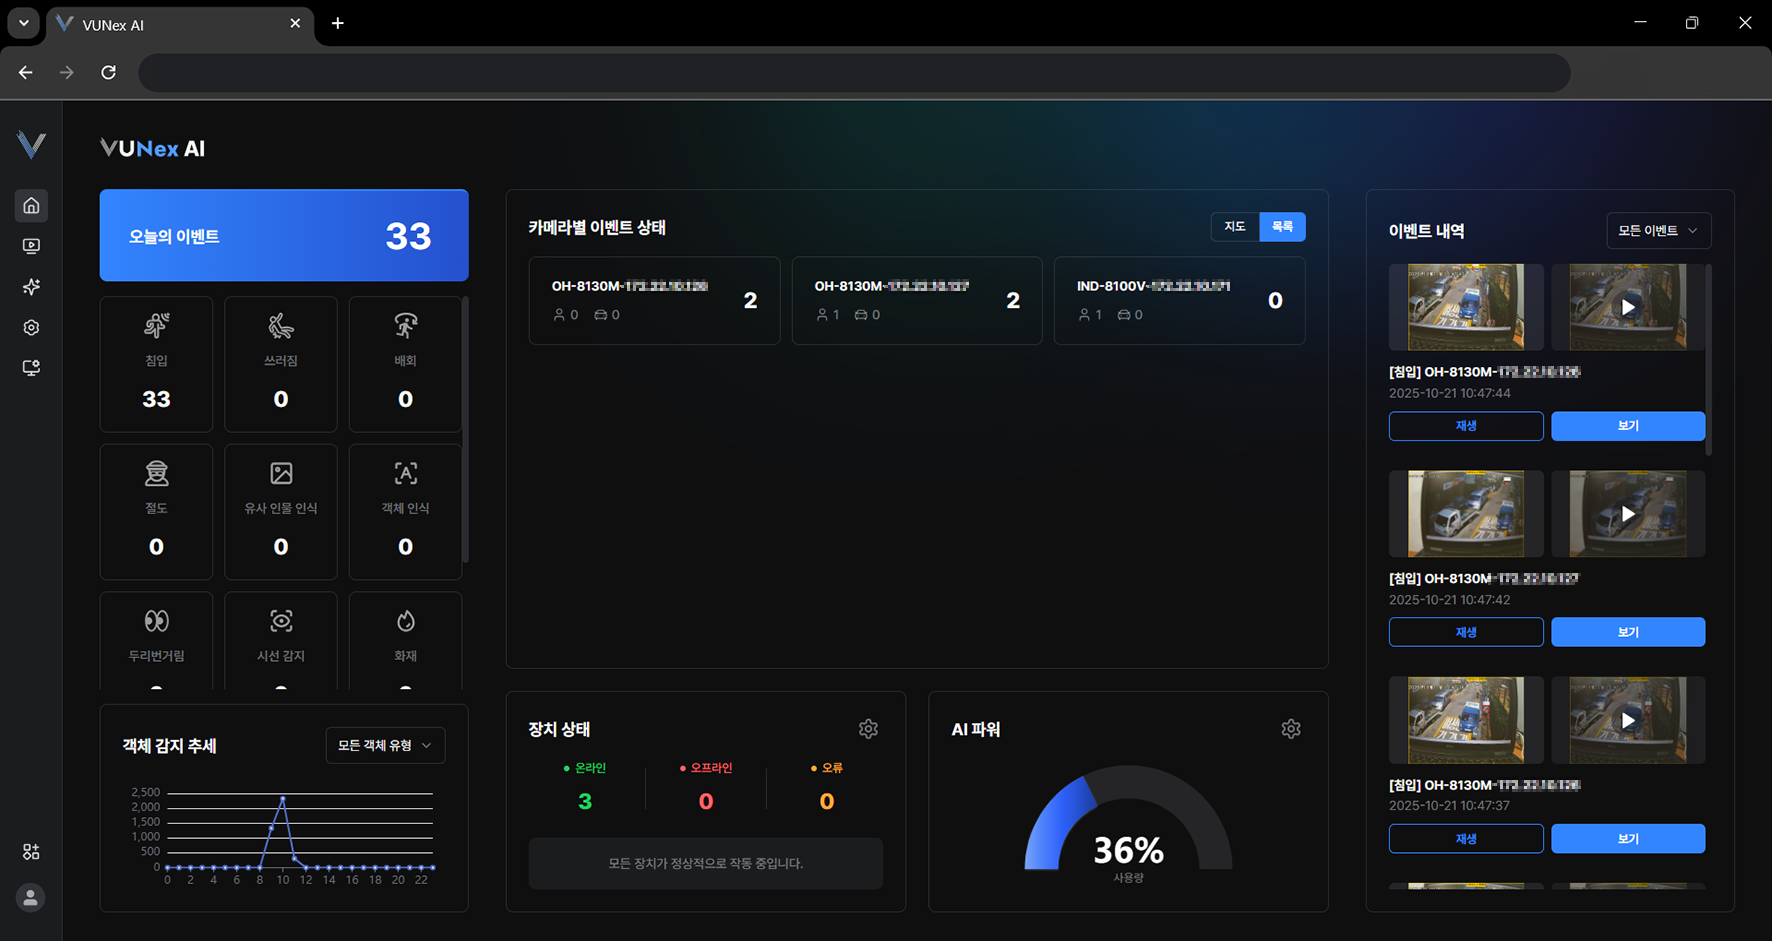 Figure 1-3. Language Settings
 - Select your preferred languageYou can choose from Korean, English, Japanese, or Spanish.
Note
Language settings can also be changed in the Settings menu after login.
Home Screen
View the home screen.
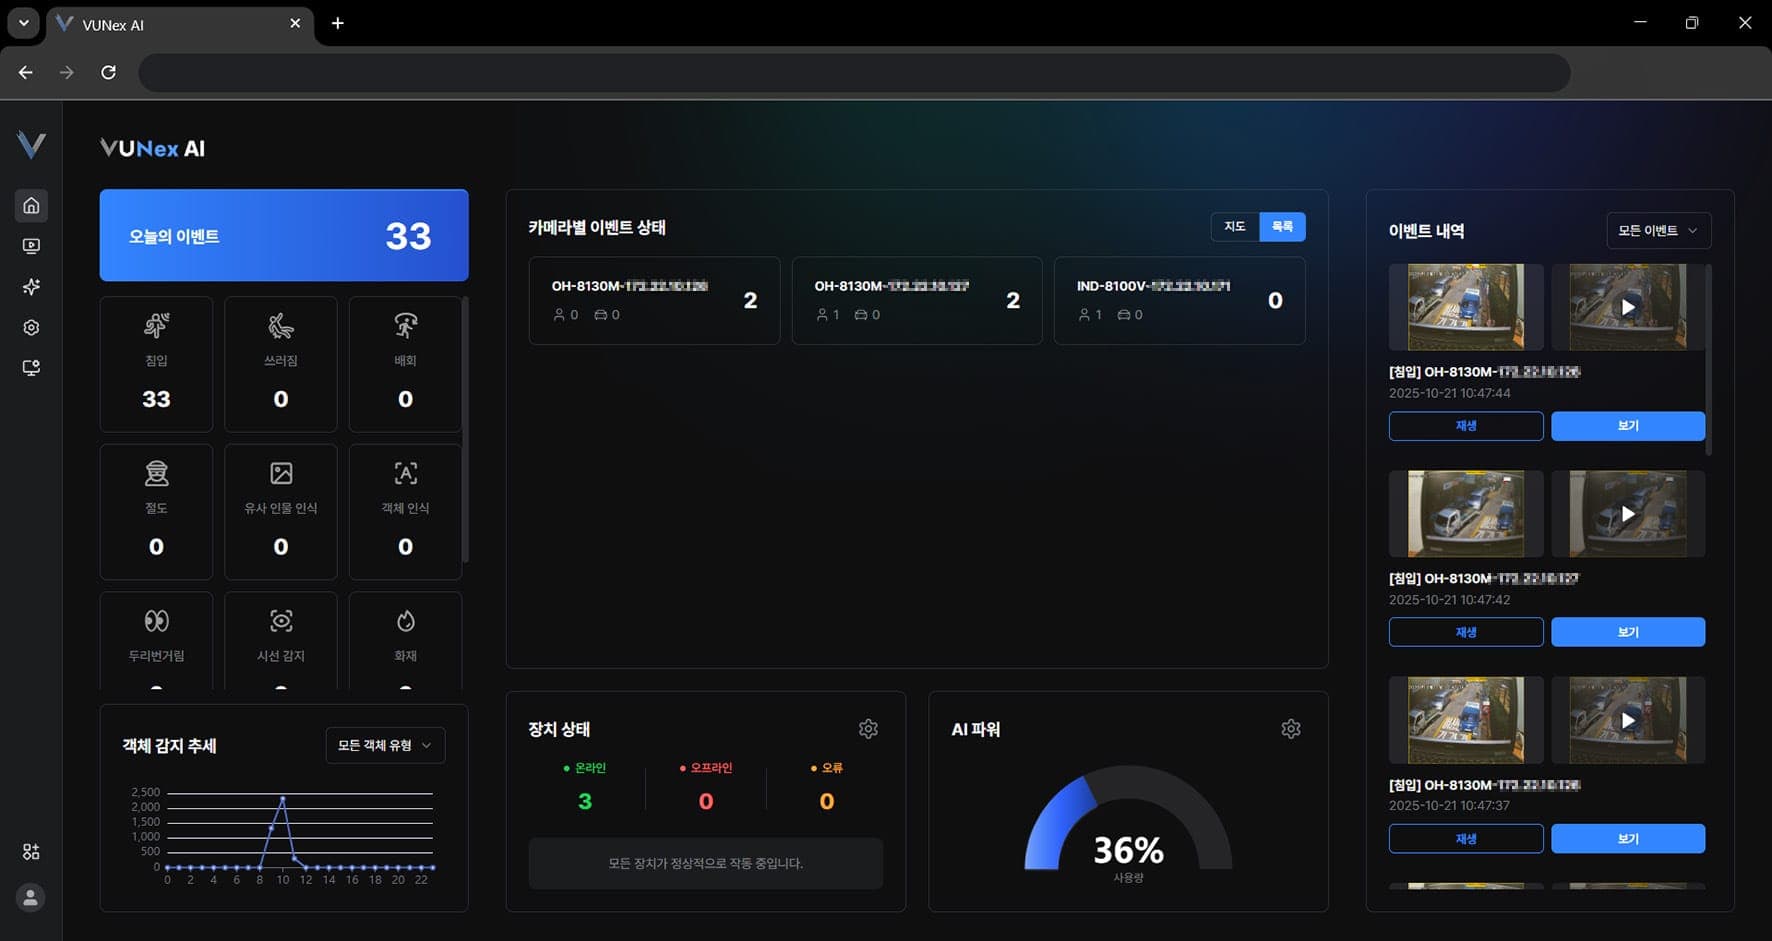
Figure 1-6. Home Screen
| 번호 | 항목 | 설명 |
|---|---|---|
| ❶ | 장치 현황 | 등록된 장치의 연결 상태를 확인합니다. |
| ❷ | 이벤트 현황 | 최근 발생한 이벤트를 확인합니다. |
| ❸ | 시스템 상태 | CPU, 메모리, 저장공간 현황을 확인합니다. |
| ❹ | 즐겨찾기 | 자주 사용하는 카메라를 빠르게 접근합니다. |
Note
If this is your first time accessing, you need to add a device.
See page 83 "Adding a Device" for more details.